Holidays
Through Holidays you can configure holiday days, both national and regional/local, so that they appear in your employees' work calendar and thus be able to manage shifts and vacation requests for each of them.
Holidays are configured through groups of holidays, where the minimum for each group must be one day; for example, the first group will be called March Holidays and the only holiday in that month is March 19th. Additionally, holiday groups can only be assigned to company centers, that is, they cannot be configured either by companies or by zones that are below centers.
To access holiday configuration:
- Open the application menu and in the Settings section click on Calendar.
- When clicking, the Holidays settings will open directly.
- In the side menu you can navigate between Holidays or Vacation settings.
Add pre-established holidays
Pre-established holidays are groups of holidays that we offer through the platform to speed up and facilitate the assignment of holidays in company centers.
-
Open the application menu and in the Settings section click on Calendar.
-
Check in the side menu that you are within the Holidays section.
-
To add a new holiday group, click on the Add Group button located in the corner of the Holiday Groups table.

-
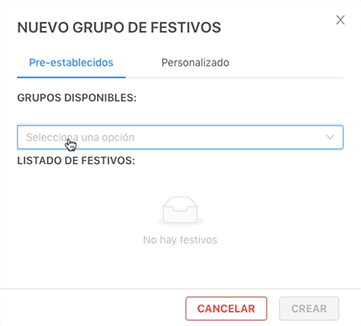
A new window will open where you can choose the already pre-established holiday groups.
-
Select in the dropdown menu the group you want to add to the calendar.
-
In Holiday List you can see all the days that make up the selected group.
-
Finally, click Create.
Once created, it will appear in the Holiday Group table and will be ready to assign it to centers.
The pre-established holidays group option is not available at this time.
Add custom holidays
Custom holidays are groups of holidays that you can create based on your companies' or centers' needs. You can choose all the days you want, from the months necessary and even from different years.
- Open the application menu and in the Settings section click on Calendar.
- Check in the side menu that you are within the Holidays section.
- To add a new holiday group, click on the Add Group button located in the corner of the Holiday Groups table.
- A new window will open to configure the holiday group. Click on Custom to create it in a personalized way.
- In Group Title write the name that the holiday group will have.
- Select the holiday date by clicking on Select date. You can change the calendar month by clicking on the arrows located to the right and left of the month. To change year, click on the double arrows that appear on the sides of the month.
- Choose the month and year in which you want to create the holiday and click on the specific day.
- In Holiday name write the name with which you want that day to appear in the calendar.
- To assign that holiday, click on Add Holiday.
- Add all necessary holidays by repeating the previous steps.
- In Holiday List you can see a summary of all the days you have added to the group. You can also delete the days you need by clicking on the trash icon.
- Finally, click Create.
Once created, it will appear in the Holiday Group table and will be ready to assign it to centers.
Assign holidays
Once the holiday groups are created, they must be assigned to the corresponding centers so that they appear in the employees' work calendar. To assign holiday groups:
- Open the application menu and in the Settings section click on Calendar.
- Check in the side menu that you are within the Holidays section.
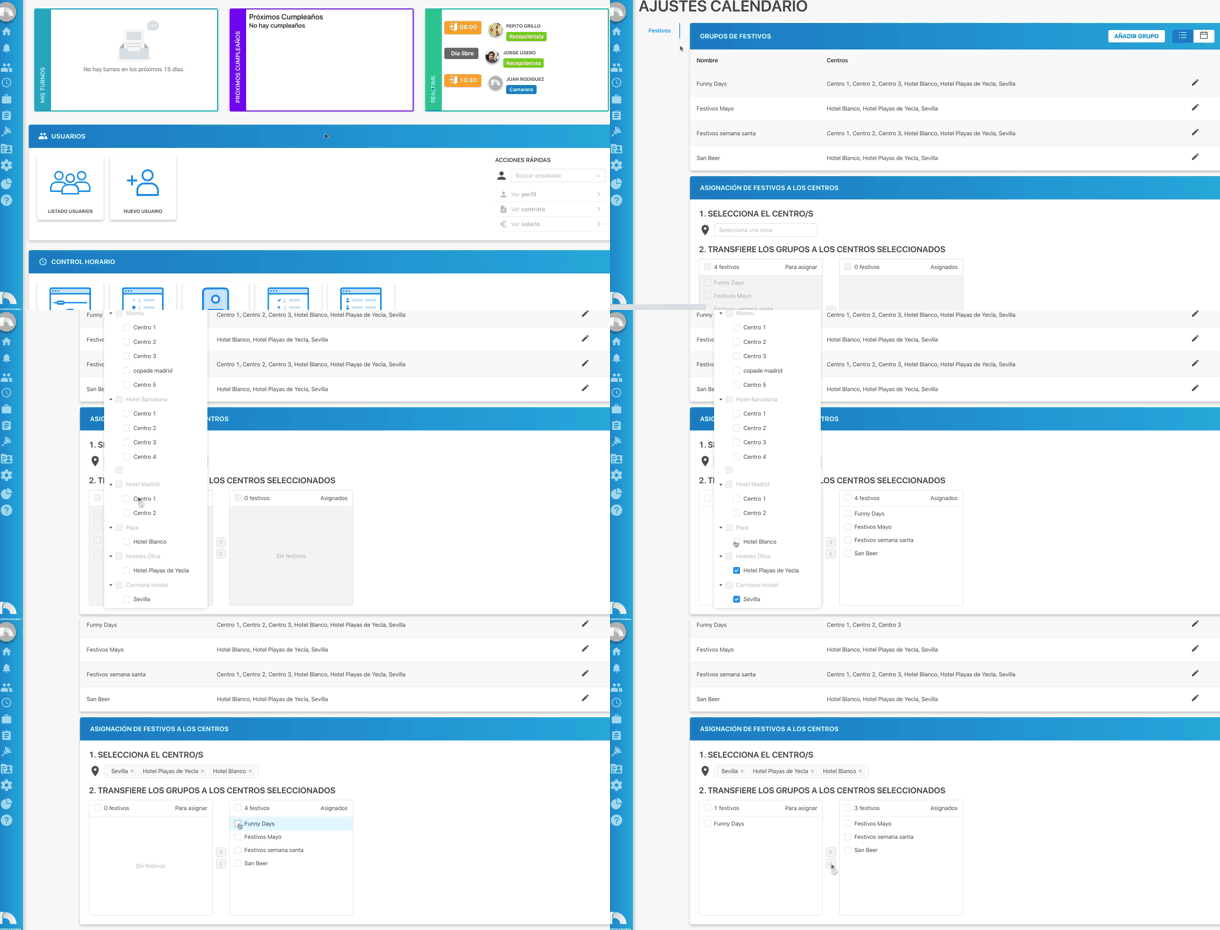
- Position yourself in the Holiday assignment to centers table.
- Click on Select a zone to choose the center or centers to which you want to assign the holidays. You can also write the center name to search for it more quickly.
- Check the box of all those centers to which you are going to assign the holidays.
- In the Transfer groups to selected centers section, check the boxes of the holiday groups that you are going to assign to the centers chosen earlier.
- Once marked, click on the arrow pointing to the right.
- In the Holiday Groups table you can see that the holidays already have their corresponding centers assigned.
If you want to remove a center from a holiday group, you must select the center and, in the assigned groups, check the one you want to remove from the center. Once the box is checked, click on the arrow pointing to the left. The Holiday Groups table will update with the new changes.
Edit holidays
Holiday groups can be modified at any time. To edit them:
- Open the application menu and in the Settings section click on Calendar.
- Check in the side menu that you are within the Holidays section.
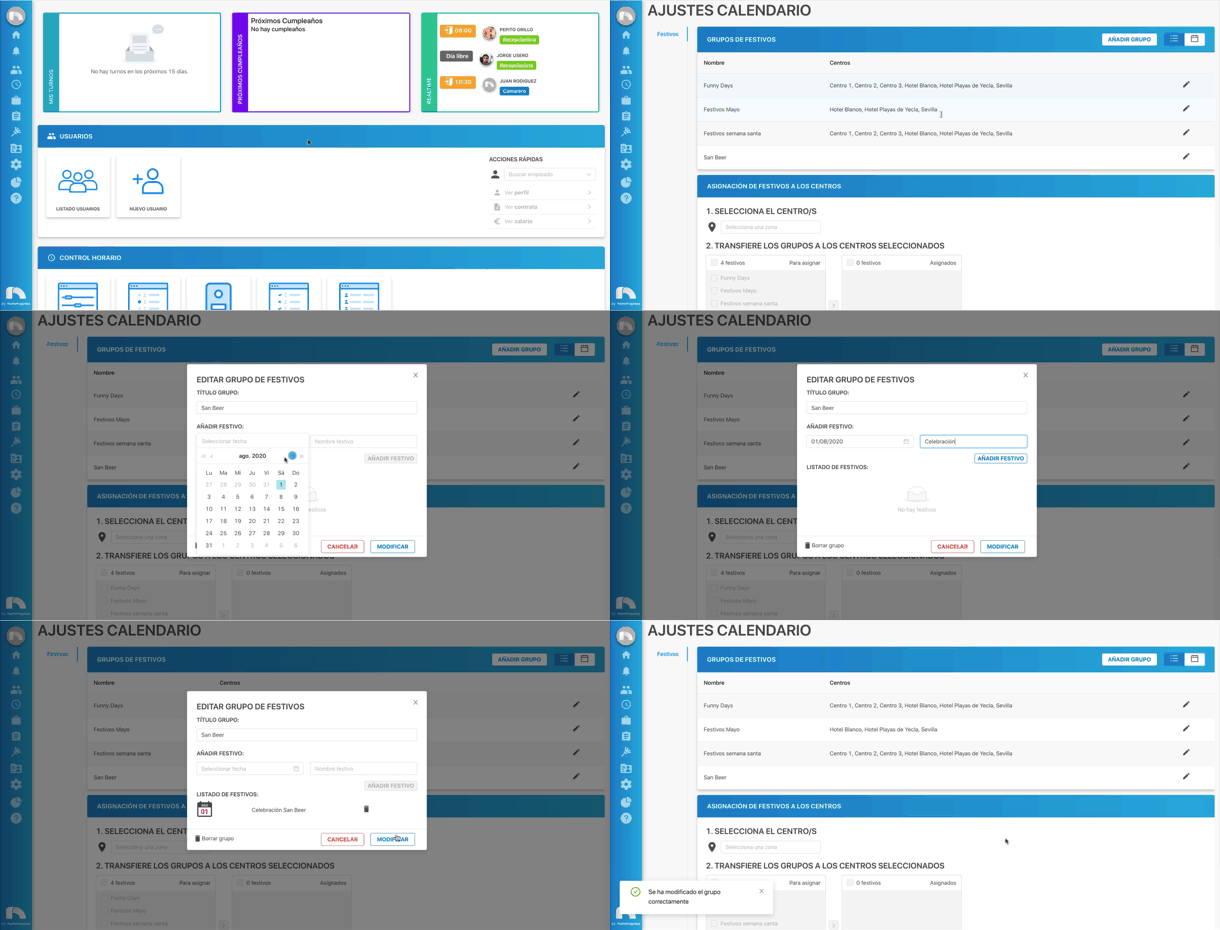
- In the Holiday Groups table you can see all the holiday groups already created.
- Click on the pencil icon located in the holiday group you want to modify.
- In the new window you can change the group name or add and remove holidays from that group.
- Once the changes are made, click Modify.
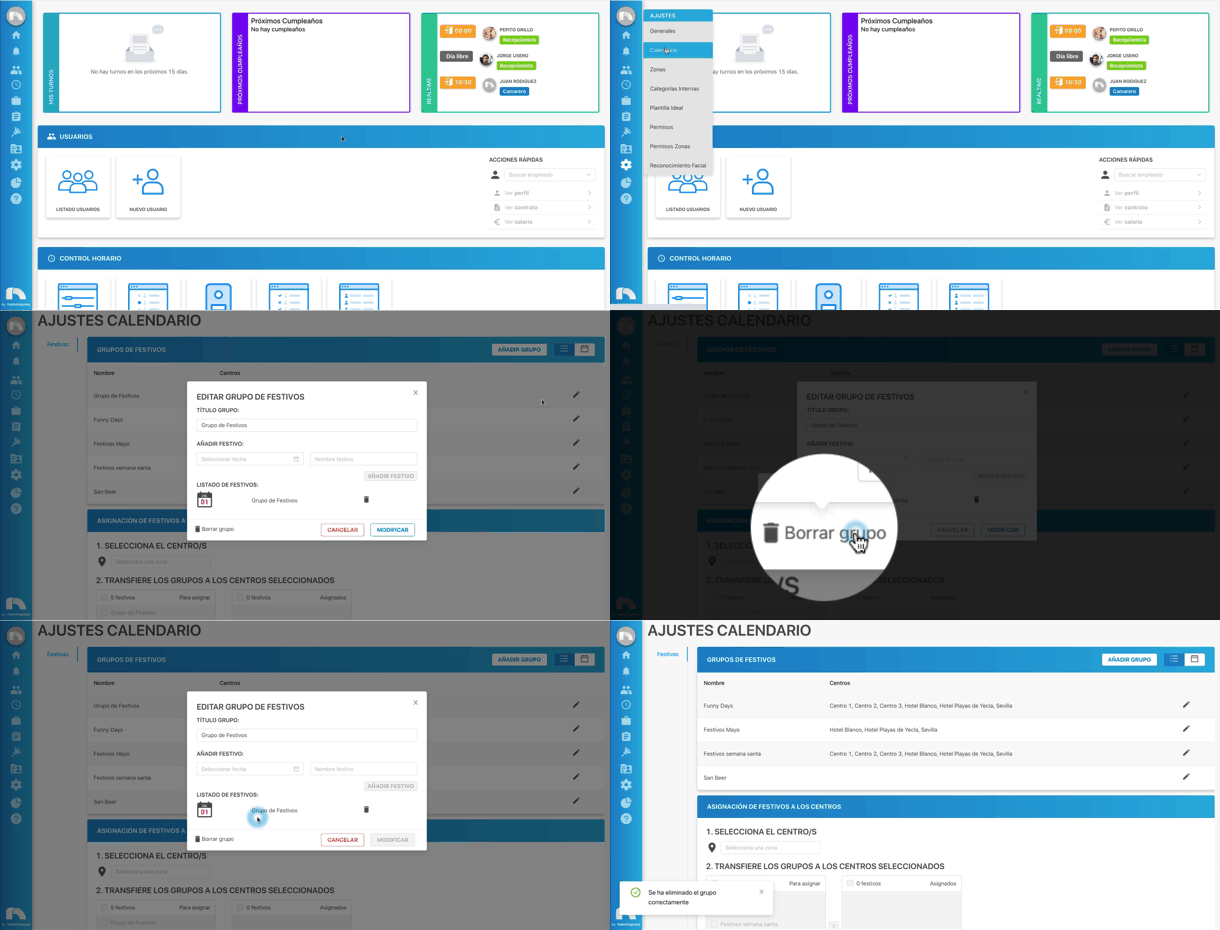
- If what you want is to delete the entire group, click on Delete group.