Bulletin Board
You can enable a custom announcements module so employees see any communications on the home page.
Create announcements on the Bulletin Board
To create an announcement:
- In the Bulletin Board widget, click +.
- Enter the announcement title (this is the header shown in the widget).
- Enter a summary (shown next to the title in the widget).
- Click Upload Image to add a Featured image.
- Select the zone(s) where you want to publish the message.
- Write the message. The editor lets you format and insert images/videos.
- Click Publish.

Delete announcements
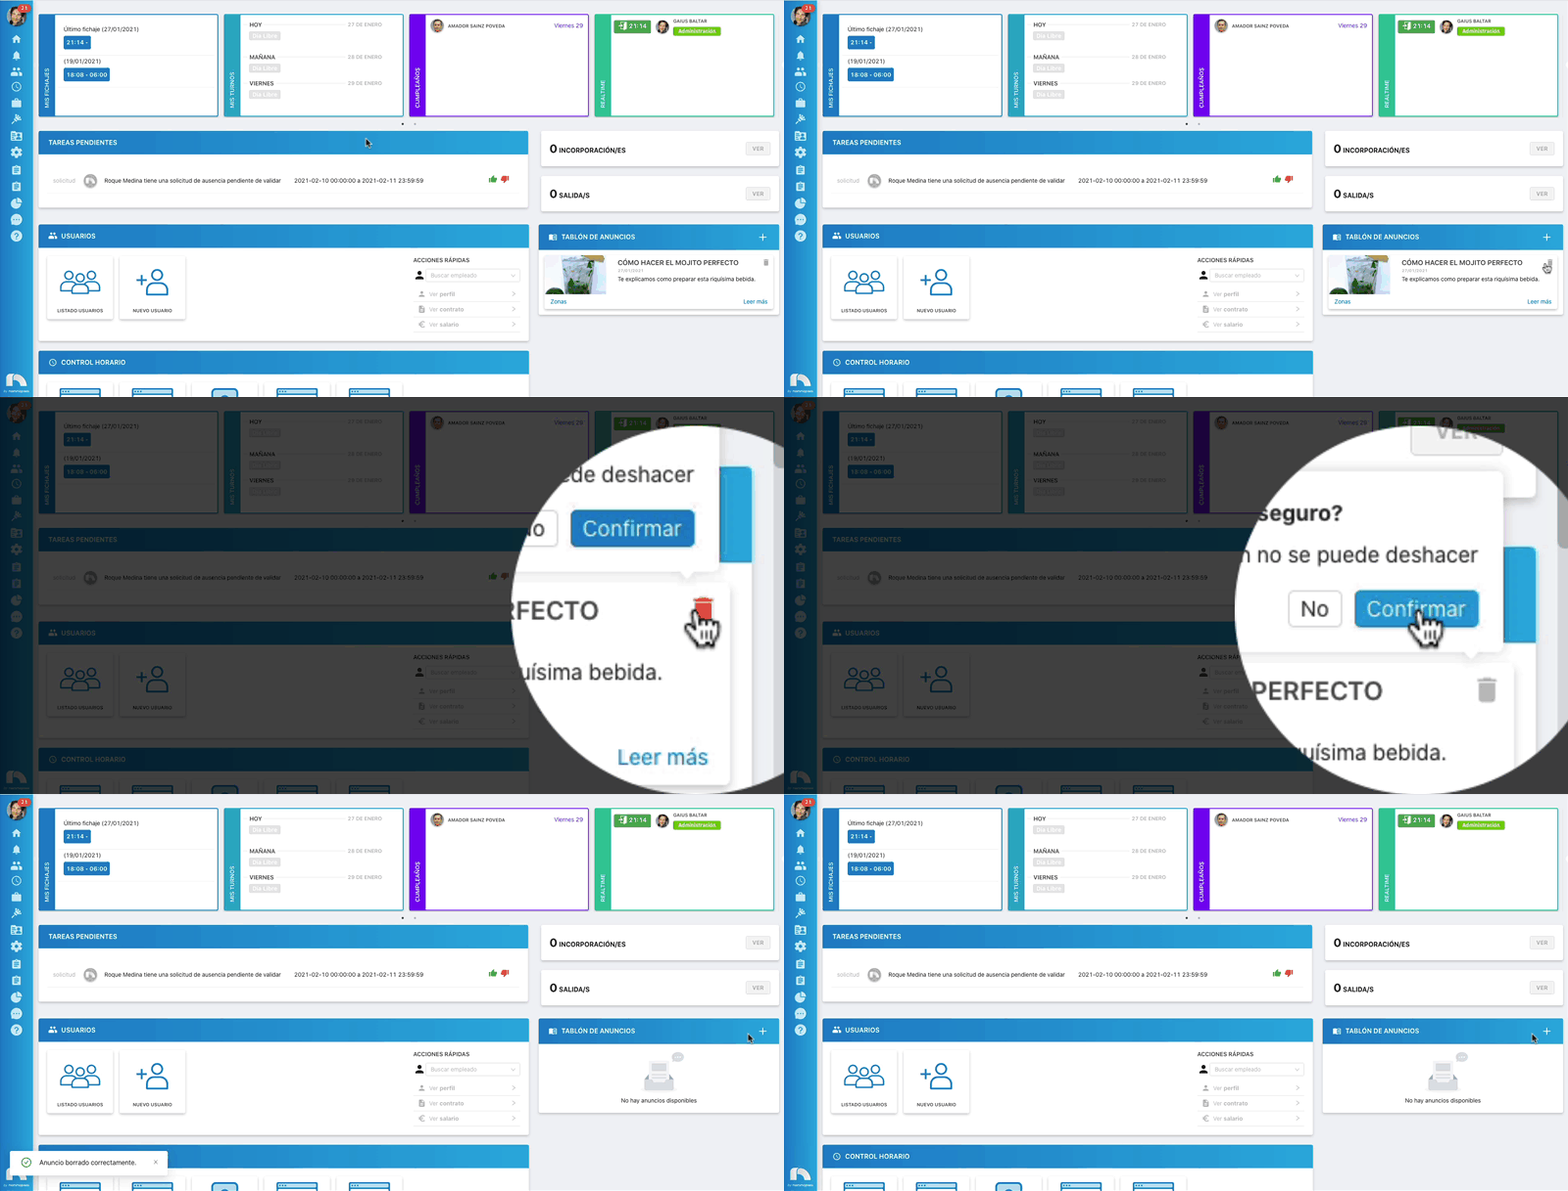
- In the Announcements widget, click the Trash icon on the announcement you want to remove.
- Click Confirm to delete it.
Insert images in an announcement
- In the announcements widget click +.
- Add title, summary, zones, featured image, etc. as above.
- Write the message.
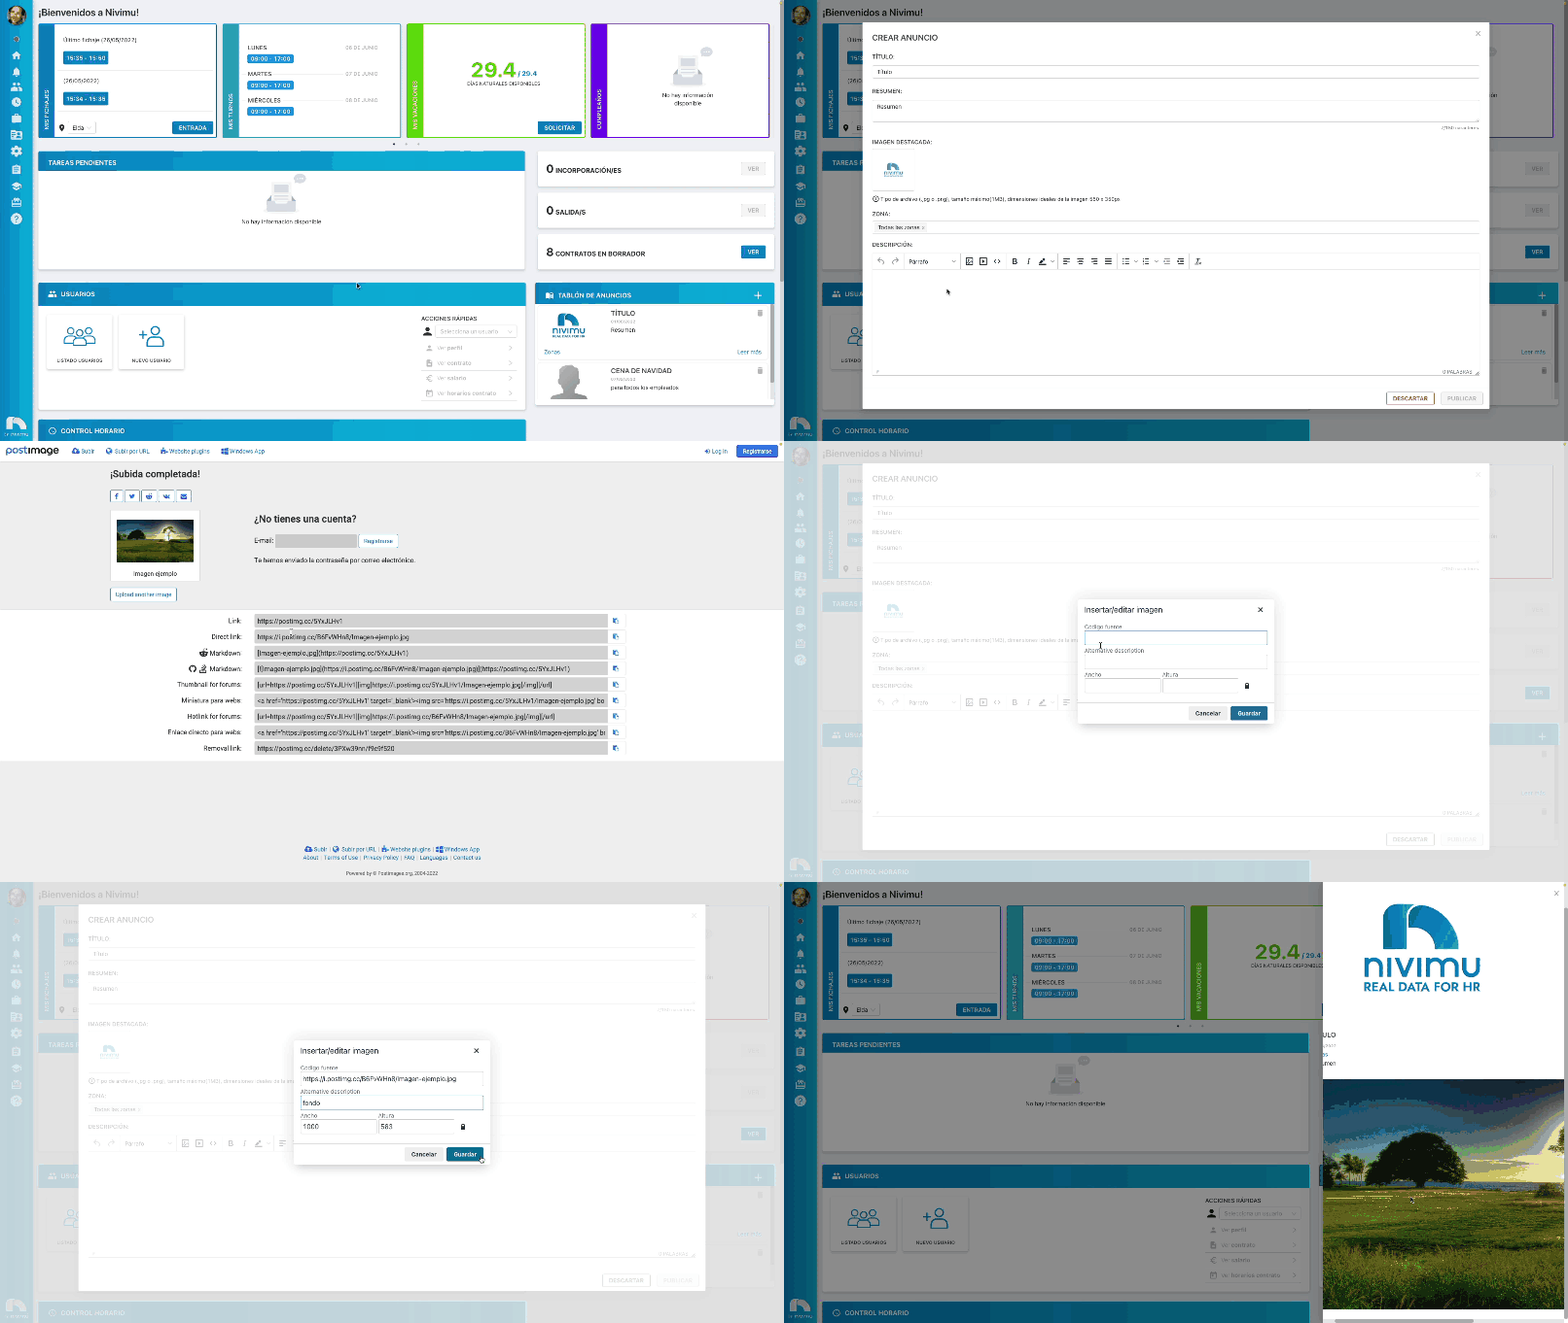
- To attach an image, click Insert/edit image in the editor.
- Paste the image URL. To get it, right-click the image on the internet, choose Copy image address, and paste into Source.
- Add a description.
- Set width/height (lock proportions with the padlock if needed).
- Click Publish.

Insert your own images in an announcement
If you have local images to share:
- Use an image hosting site that gives you a direct link (e.g., Postimg or Imgur).
- Upload your image.
- Copy the direct image link.
- In the announcements widget click +.
- Add title, summary, zones, featured image, etc.
- Write the message.
- Click Insert/edit image.
- Paste the direct image link (right-click the hosted image → Copy image address → paste in Source).
- Add a description.
- Set width/height (lock proportions if needed).
- Click Publish.
Important
The image link and the page URL where it's hosted may differ. Use the direct image link (often ends in .jpg). In Postimg, choose “Direct link”. In Imgur, right-click the image → “Copy image address”.