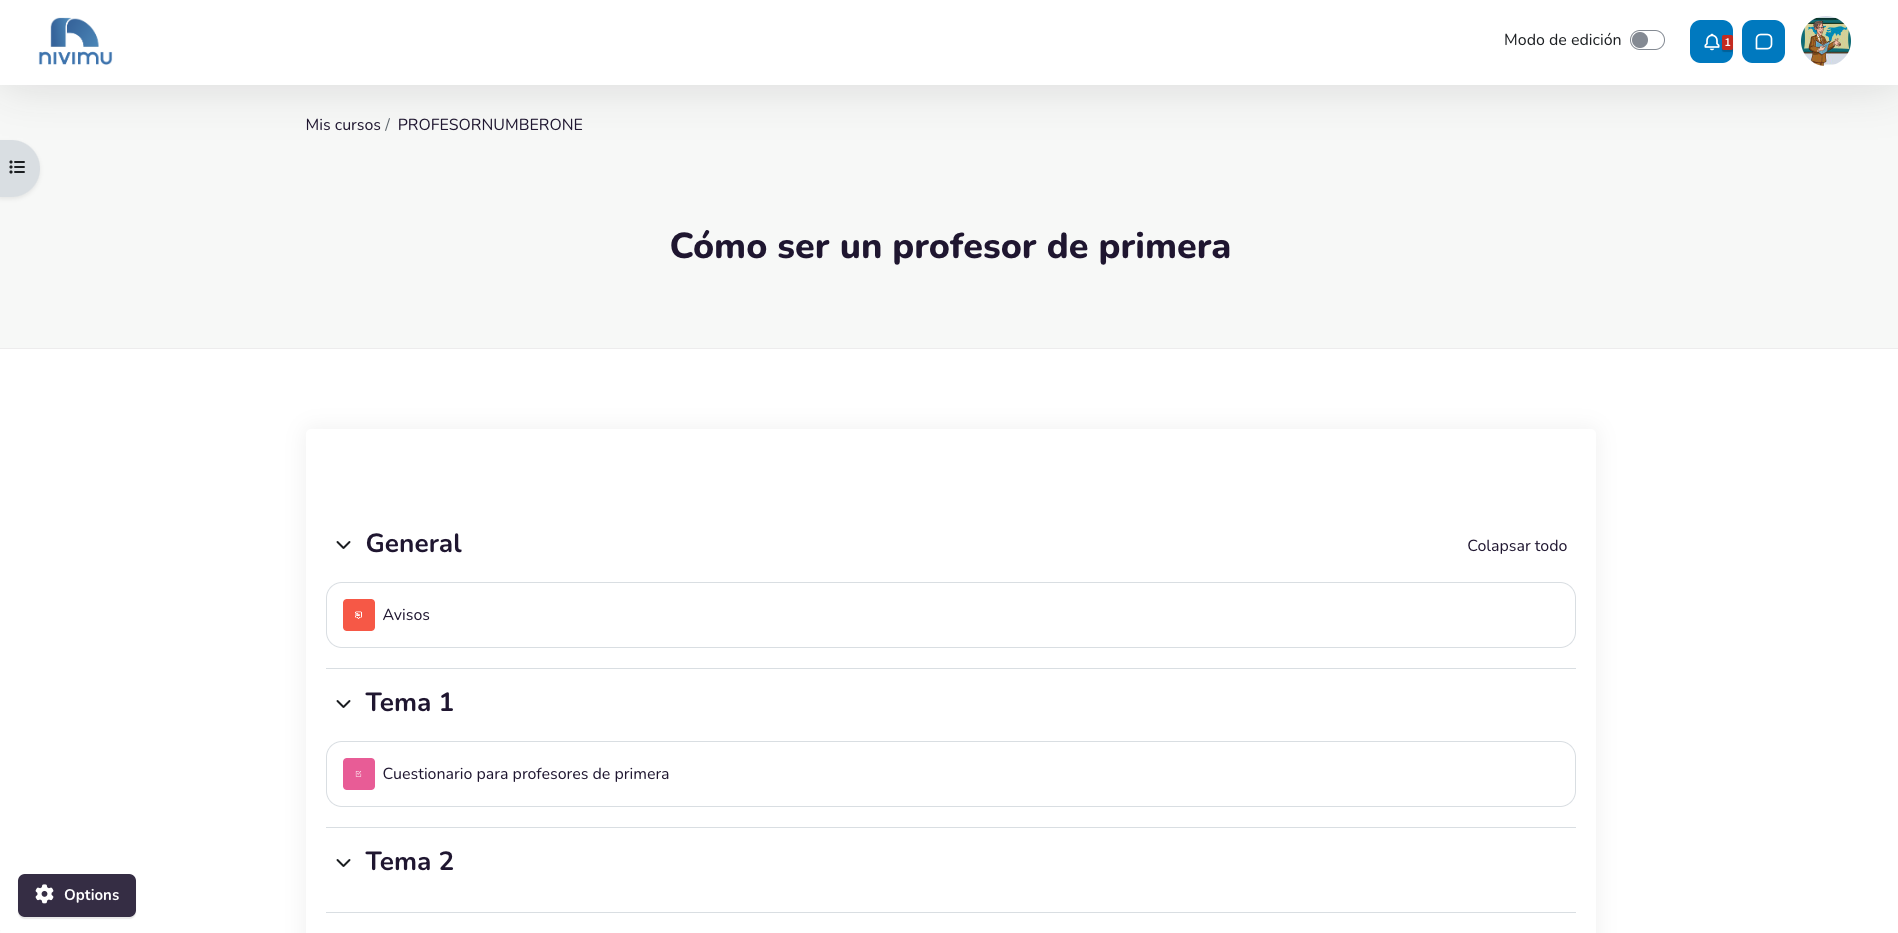
Create a New Course
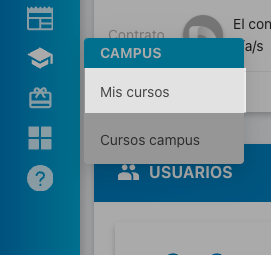
- In the Nivimu sidebar, under "Campus", click on "My Courses"
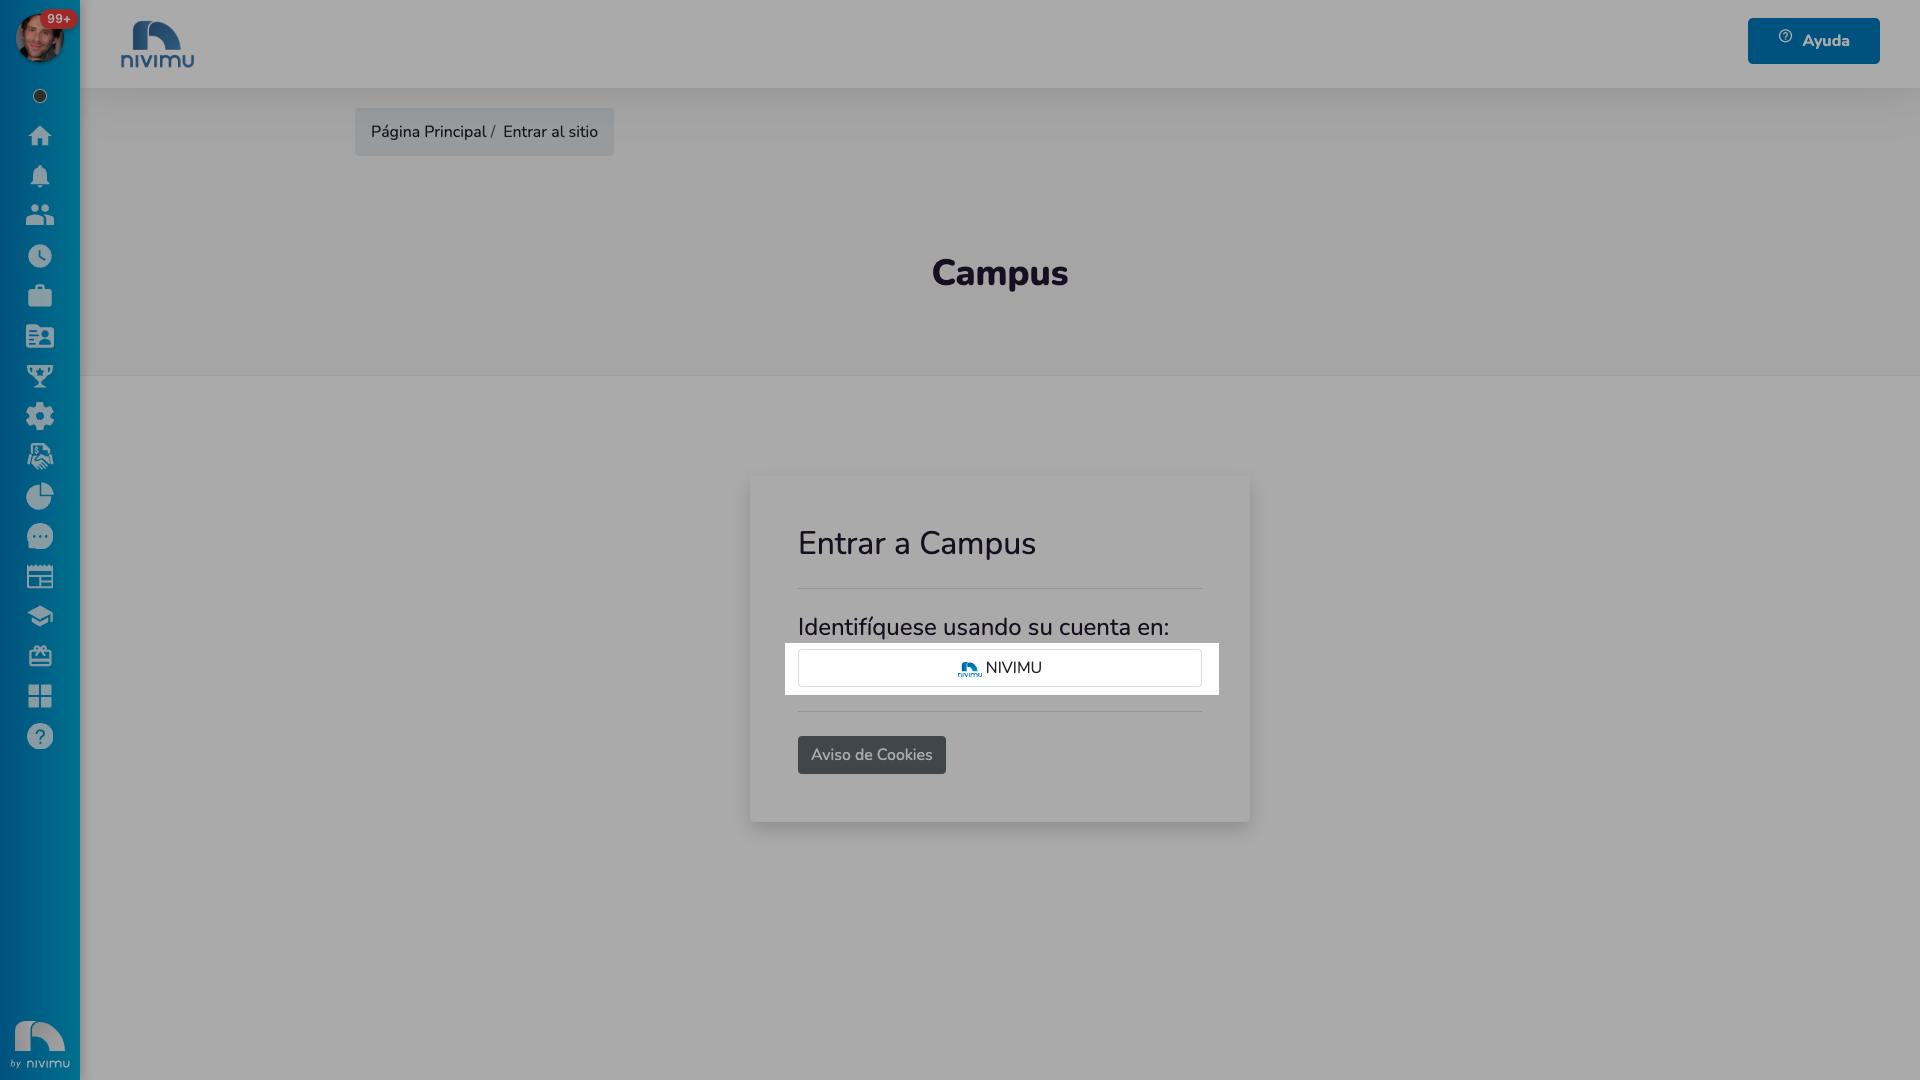
- Click on "Identify yourself using your account in:
Nivimu"
- Click on Campus → Campus Courses. Click on the + sign and then on Create New Course.
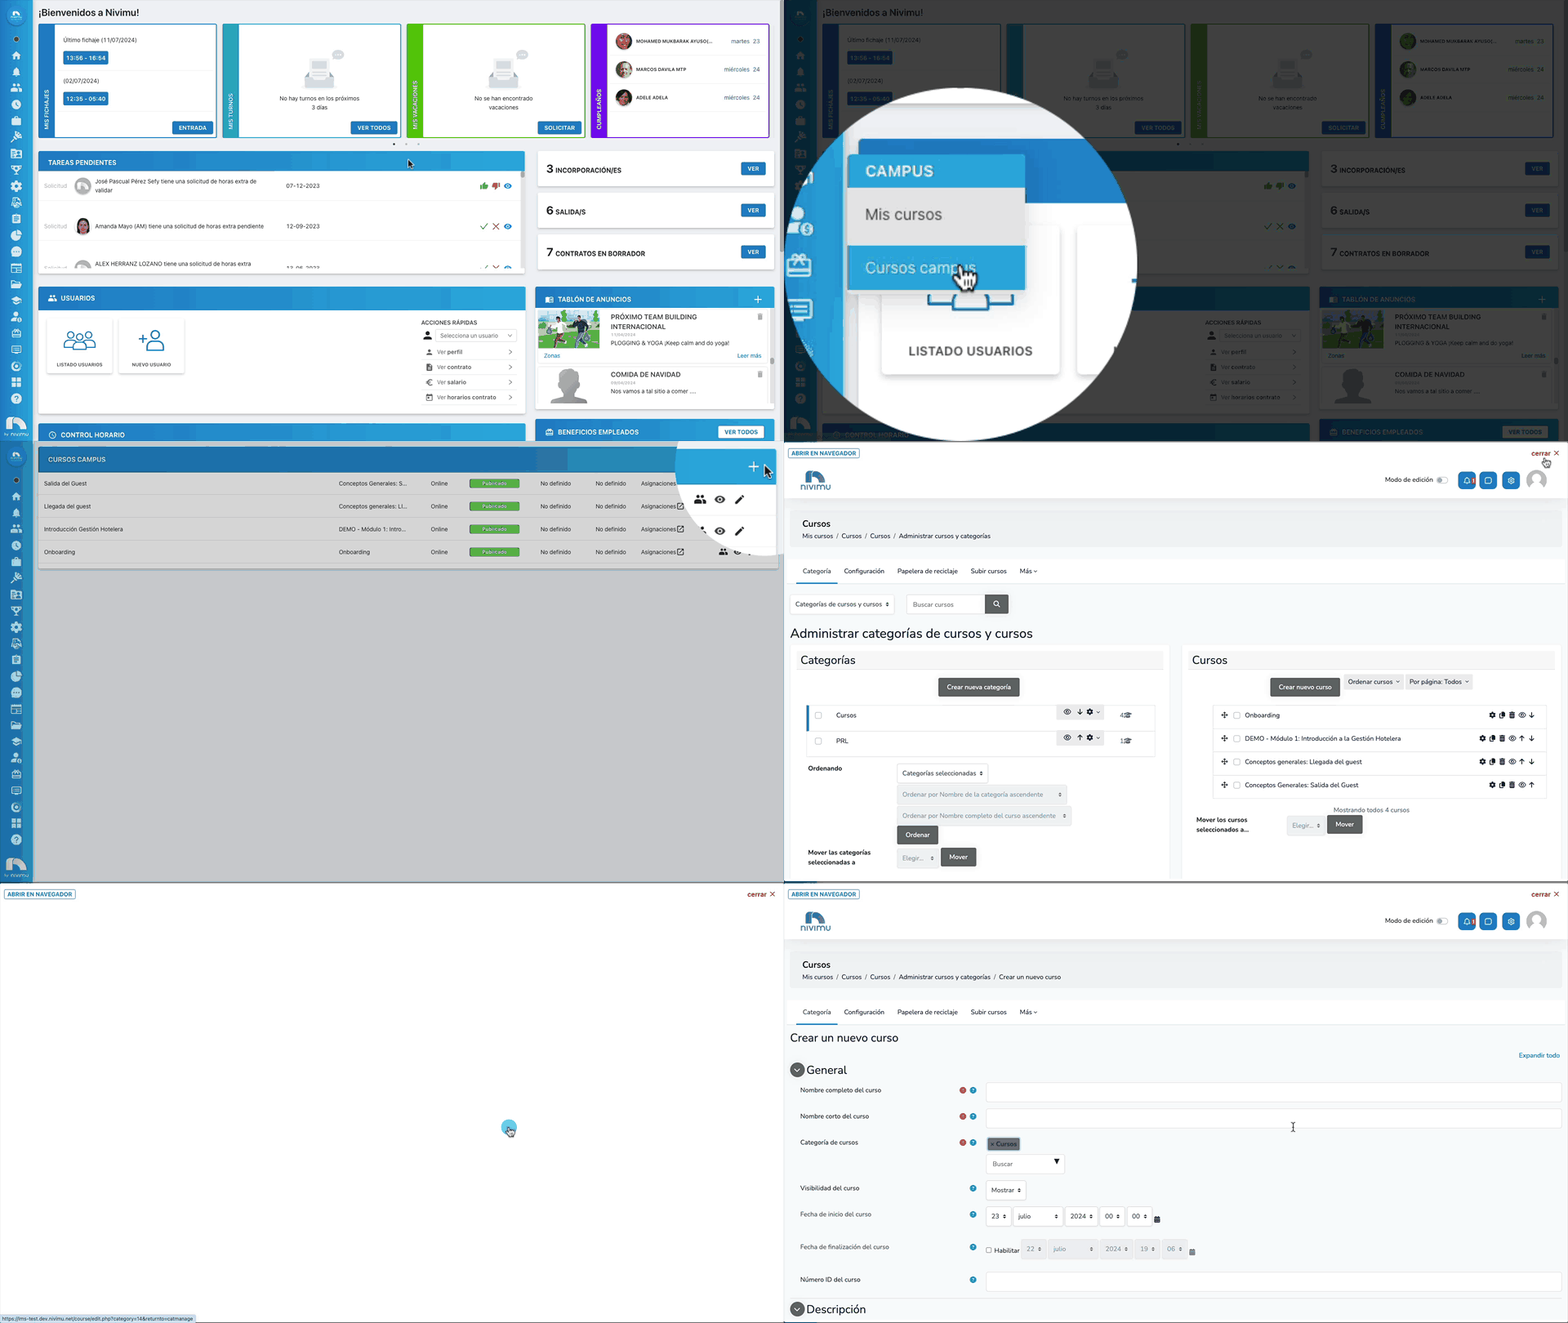
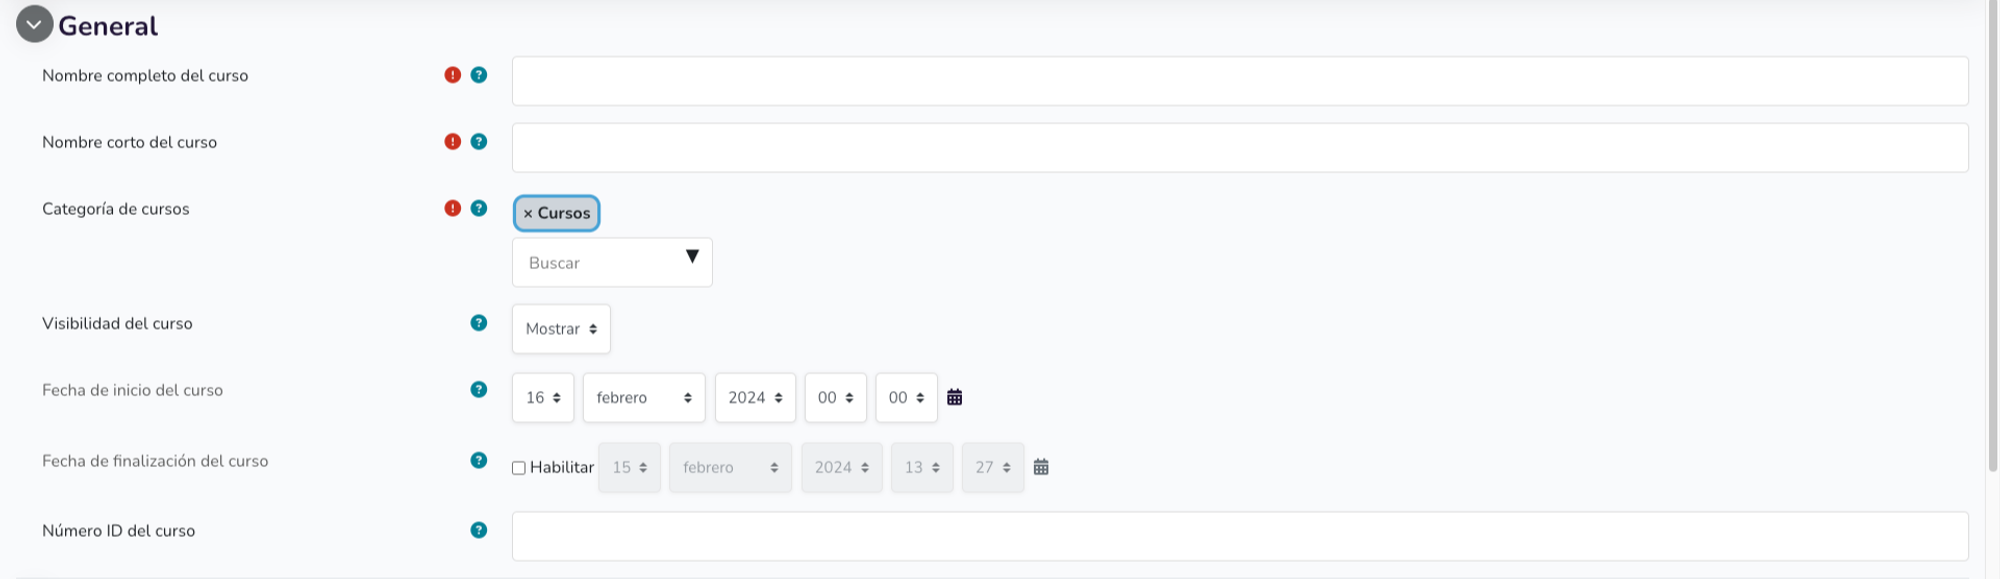
General
- Full Course Name: This is the official name of the course that students will see in the course list.
- Example: "World History - Advanced Level"
- Short Course Name: An abbreviated name used in the system to identify the course internally.
- Example: "HIST101"
- Course Category: Select the category under which the course will be classified within the Campus. This helps organize and locate courses easily.
- Example: "Humanities > History"
- Course Visibility: Defines whether the course will be visible to students or remain hidden until it is ready.
- Example: "Show"
- Course Start Date: Sets the date when the course will officially begin. This may influence when students can access the course content.
- Example: "July 25, 2024"
- Detailed Configuration: Allows adjusting the day, month, year, hour, and minute.
- Example: "Day: 25, Month: July, Year: 2024, Hour: 00, Minute: 00"
- Course End Date: (Optional) Determines the date when the course will end. This can be useful for courses with a specific duration or for planning the withdrawal of access to content.
- Example: "Enable", "Day: 24, Month: July, Year: 2025, Hour: 23, Minute: 59"
- Course ID Number: A unique identifier for the course, used for internal administration and reference in external systems or reports.
- Example: "HIST1012024"
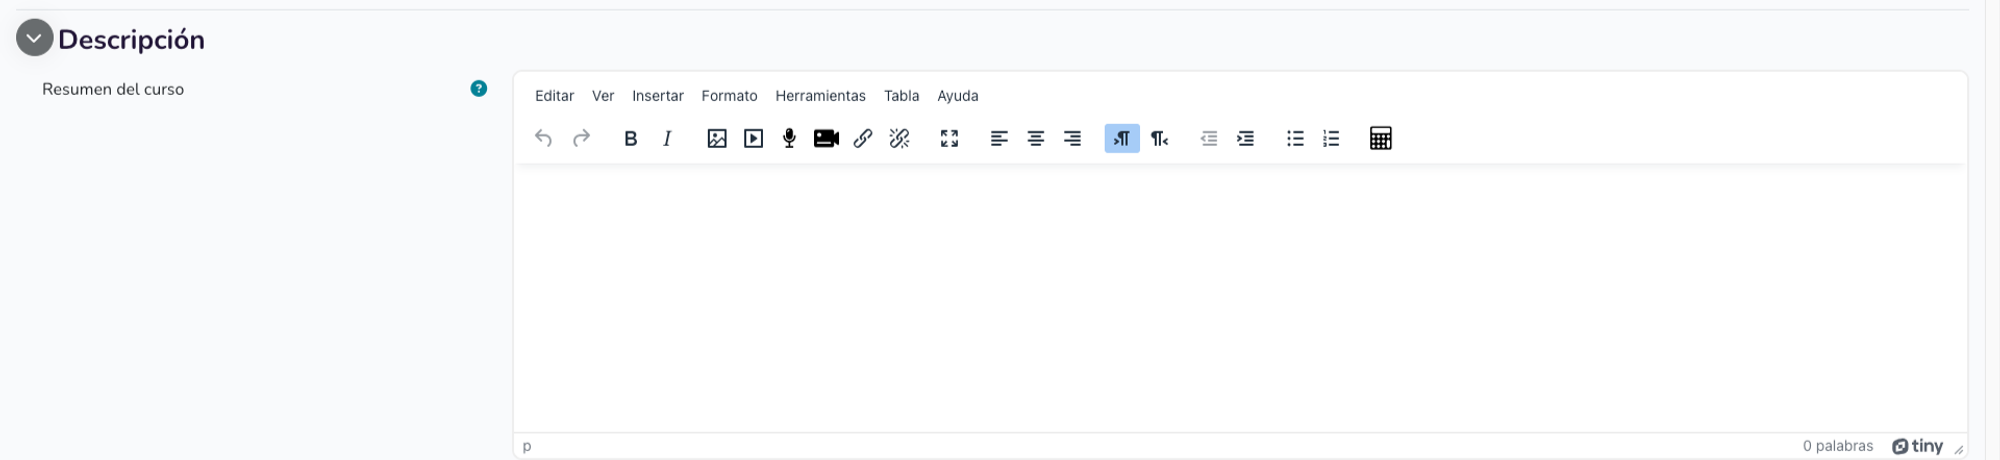
Description
-
Course Summary: Provides a brief description of the course, highlighting the main objectives, topics to be covered, and any prerequisites.
-
Example: "This course covers historical events from the Renaissance to the Industrial Revolution. It is ideal for students with prior knowledge of history."
-
-
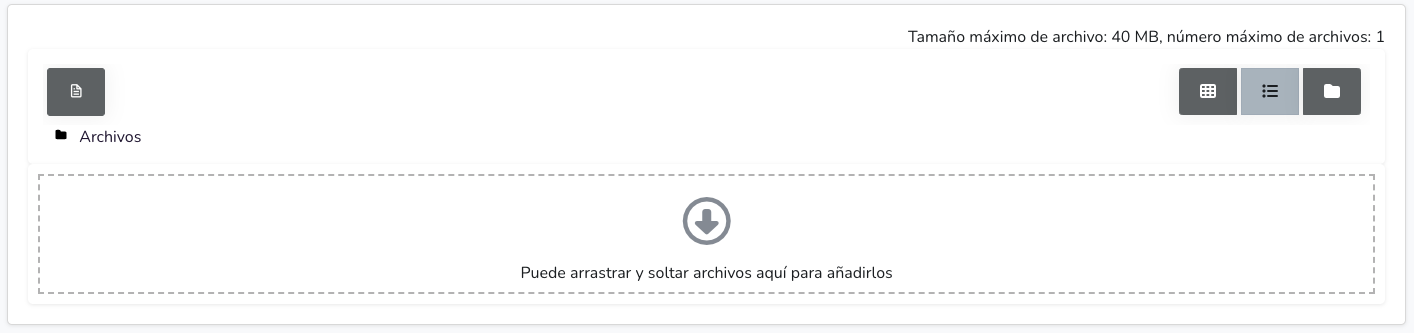
Course Summary Files:
-
Here you can upload supplementary files such as the course program, study guides, or introductory presentations. Additionally, this is where the course photo is uploaded.
-
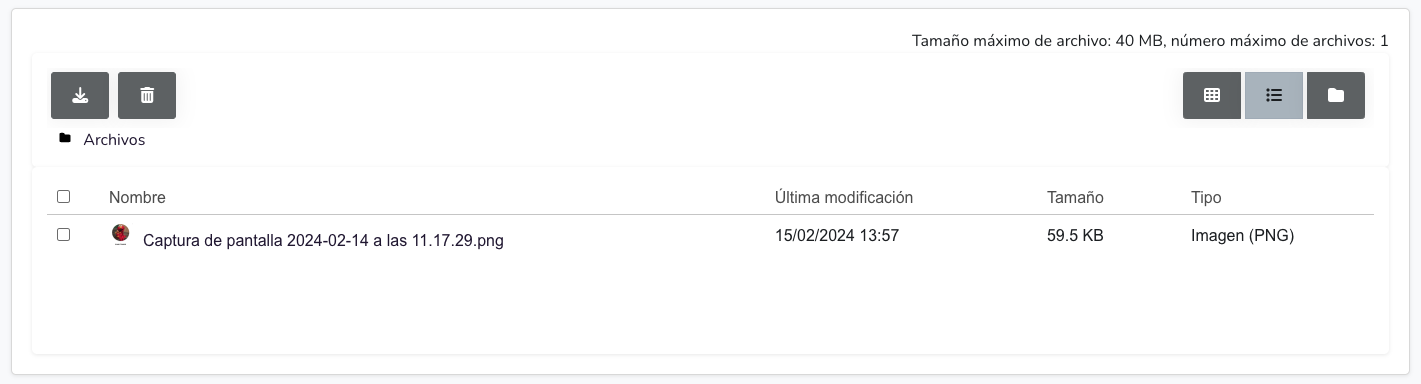
Course Photo: An image that visually represents the course and appears in the course list or on the course's main page. It is recommended to use a relevant and attractive image to capture students' attention.
-
Example: Upload a representative image of the course, such as an ancient map for a history course or a chemical formula for a chemistry course.
-
To upload an image, you can drag it from a folder to the box.
-
Course Format
Format
Allows you to define how the course content will be presented and organized. Here are the details of each option:
- This setting determines the overall structure of the course, affecting how sections and activities are presented to students. There are several formats available:
- Custom Sections:
- In this format, the course is divided into sections that can be customized according to the topics or units of the content. Instructors have the flexibility to name, organize, and configure each section in a way that best suits the course objectives.
- Example: A history course could be organized into sections such as "Middle Ages", "Renaissance", and "Industrial Revolution", each with their own specific resources and activities.
- Weekly Sections:
- The course is structured in sections that correspond to weeks, starting from the course start date. Each week can include its own activities and resources, following a learning schedule.
- Example: A 12-week language course could have a section for each week, with corresponding lessons and exercises.
- Single Activity:
- This format is used when the course is centered on a single main activity or resource. It is ideal for short courses, such as workshops, seminars, or assessments focused on a single task.
- Example: A certification course consisting of a single final exam.
- Social:
- In this format, the course is organized around a main forum, which encourages discussion and interaction among students. Additional activities and resources can be added through the "Social" activity block.
- Example: A debate or seminar course where participation in the forum is the main component of the course.
- Custom Sections:
Number of Sections:
- This option allows specifying how many custom sections the course will have. The instructor can set the number of sections that fit the course structure, dividing the content into thematic units or specific modules according to the teaching objectives. For example, a course could have sections for "Introduction", "Development", "Practices", and "Conclusions", thus organizing the content in a clear and structured way for students.
Hidden Sections:
- Defines how hidden sections will be displayed to students. This is useful to keep the focus on relevant material and not overwhelm students with information.
- Hidden sections are shown as unavailable:
- When this option is selected, hidden course sections are not accessible to students, but remain visible in the section list. They appear marked in some way (for example, in gray or with a "not available" message), indicating to students that there is content that will be revealed in the future.
- Example: This can be useful if you want to show students the complete course structure from the beginning, but gradually release the content as they progress.
- Hidden sections are completely invisible:
- When selecting this option, hidden sections are not shown at all on the course page. Students will not see any indication that these sections exist until the instructor makes them visible.
- Example: This option is useful if you prefer students to focus only on the currently available content and not get distracted by future sections or materials not yet revealed.
- Hidden sections are shown as unavailable:

Appearance
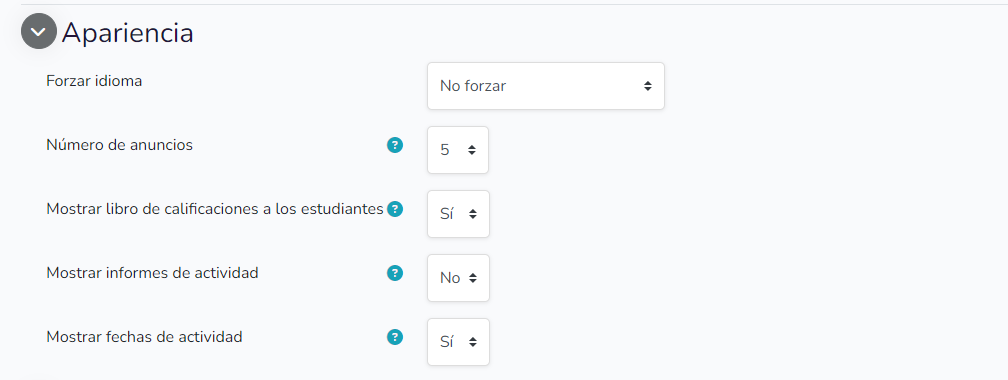
The Appearance section in the course configuration allows customizing how the course is presented to students. Below, the available options under this section are explained:
- Force Language:
- Here you can select a specific language for the course, which will replace the site's default language for students accessing this particular course.
- Example: In an English teaching course, the instructor could force the language to English, regardless of students' default interface language, to provide total immersion in the language.
- Number of Announcements:
- This option sets how many recent announcements will be displayed in the course announcements block. Announcements are used to communicate important information to all course participants.
- Example: An instructor can set to display the 5 most recent announcements, to ensure students see the most updated and relevant information when entering the course.
- Show Gradebook to Students:
- This option allows deciding whether students can view their own gradebook, which shows grades and comments on their assignments and activities.
- Example: In some cases, the instructor may choose not to show grades to maintain the surprise of the final evaluation, while in others, showing grades can motivate students to improve.
- Show Activity Reports:
- Allows students to view reports on their activity in the course, such as participation in forums, completed assignments, and progress in quizzes.
- Example: This functionality can be useful for students to monitor their own progress and participation in the course, identifying areas where they need to focus more.
- Show Activity Dates:
- This option controls whether the start and end dates of activities are displayed. Activity dates include assignment due dates, quiz openings, etc.
- Example: Showing activity dates can help students plan their time and ensure they meet deadlines, especially in courses that require strict time management.
Files and Upload
The Files and Upload section in the course configuration allows defining the maximum size for files that students can upload.
- Example: If the maximum file size is set to 200 MB, users will not be able to upload files that exceed this limit. This is useful to control storage usage on the platform and ensure uploaded files are manageable.

Completion Tracking
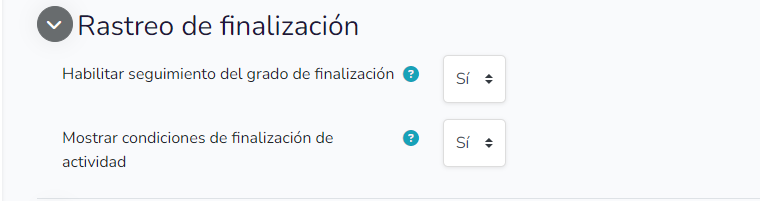
This section allows setting conditions for the completion of the activity or course. Below, the available options under this section are explained:
- Enable Completion Tracking:
- This option allows setting conditions under which an activity or the course is marked as completed.
- Example: If this option is enabled, the instructor can define that an activity is considered completed when the student has viewed the resource, submitted an assignment, or achieved a minimum grade on a quiz.
- Show Activity Completion Conditions:
- Allows students to see the specific conditions they must meet for an activity to be marked as completed.
- Example: This option is useful so students know exactly what actions they need to take to complete each activity, which can help them plan and manage their time and efforts in the course better.
Groups
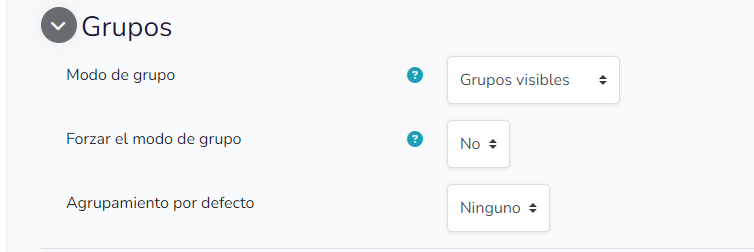
The Groups section in the course configuration allows managing how students are organized into groups within the course. Below, the available options under this section are explained:
- Group Mode:
- This option defines how groups are structured within the course.
- No Groups: All students participate in the course as a single unit, without subdivisions.
- Separate Groups: Each group can only see and work with their own members. Students cannot see the work of other groups.
- Visible Groups: Students work in their own groups, but can see the work of other groups.
- Example: An instructor can choose to use "Separate Groups" in a course where each group of students works on different projects and should not see each other's work.
- This option defines how groups are structured within the course.
- Force Group Mode:
- This option allows defining whether the selected group mode is applied mandatorily to all course activities.
- Yes: The chosen group mode is applied to all activities, regardless of their individual configuration.
- No: The instructor can configure the group mode for each activity individually.
- Example: If "Yes" is selected to force group mode, all course activities will follow the group mode set in the general configuration, ensuring greater consistency in how groups are managed throughout the course.
- This option allows defining whether the selected group mode is applied mandatorily to all course activities.
- Default Grouping:
- This option allows selecting a specific grouping that will be applied by default to all activities that use groups.
- Example: If the course has several groupings (for example, for different tasks or projects), the instructor can define which one will be used by default, facilitating organization and group management.
Tags
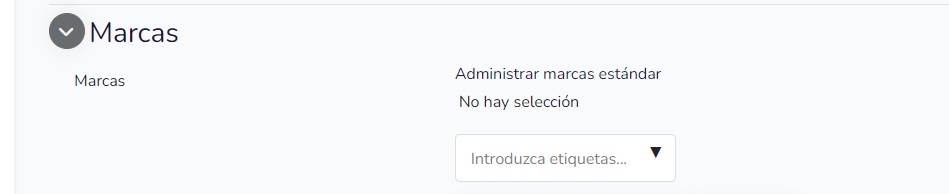
The Tags section in the course configuration allows introducing and managing tags that can be used to categorize and organize the course content. Below, the available options under this section are explained:
- Enter Tags:
- This option allows instructors to add tags or keywords that will be associated with different resources and activities within the course.
- Example: An instructor can add tags like "Assignment", "Exam", "Project" to facilitate searching and organizing course content. This allows students to filter and quickly find resources related to each tag.
-
When you have finished, click on Save Changes and Show. The course will appear already created.