Custom Mailing Usage Tutorial in Campus
🔹 How to send enrollment email to your course students
1. Add Custom Mailing to a Course
To start using Custom Mailing, you must add it as an activity within a course.
✅ Steps to add the activity
- Enter your course in Campus.
- Activate editing by clicking the "Edit mode" button (top right).

-
Add a new activity:
- Click on "Add an activity or resource".
- Search for "Custom Mailing" in the list and select it.

- Press "Add".
2. Configure Custom Mailing
Once the activity is added, you can customize how and when emails will be sent.
✅ Configuration Screen
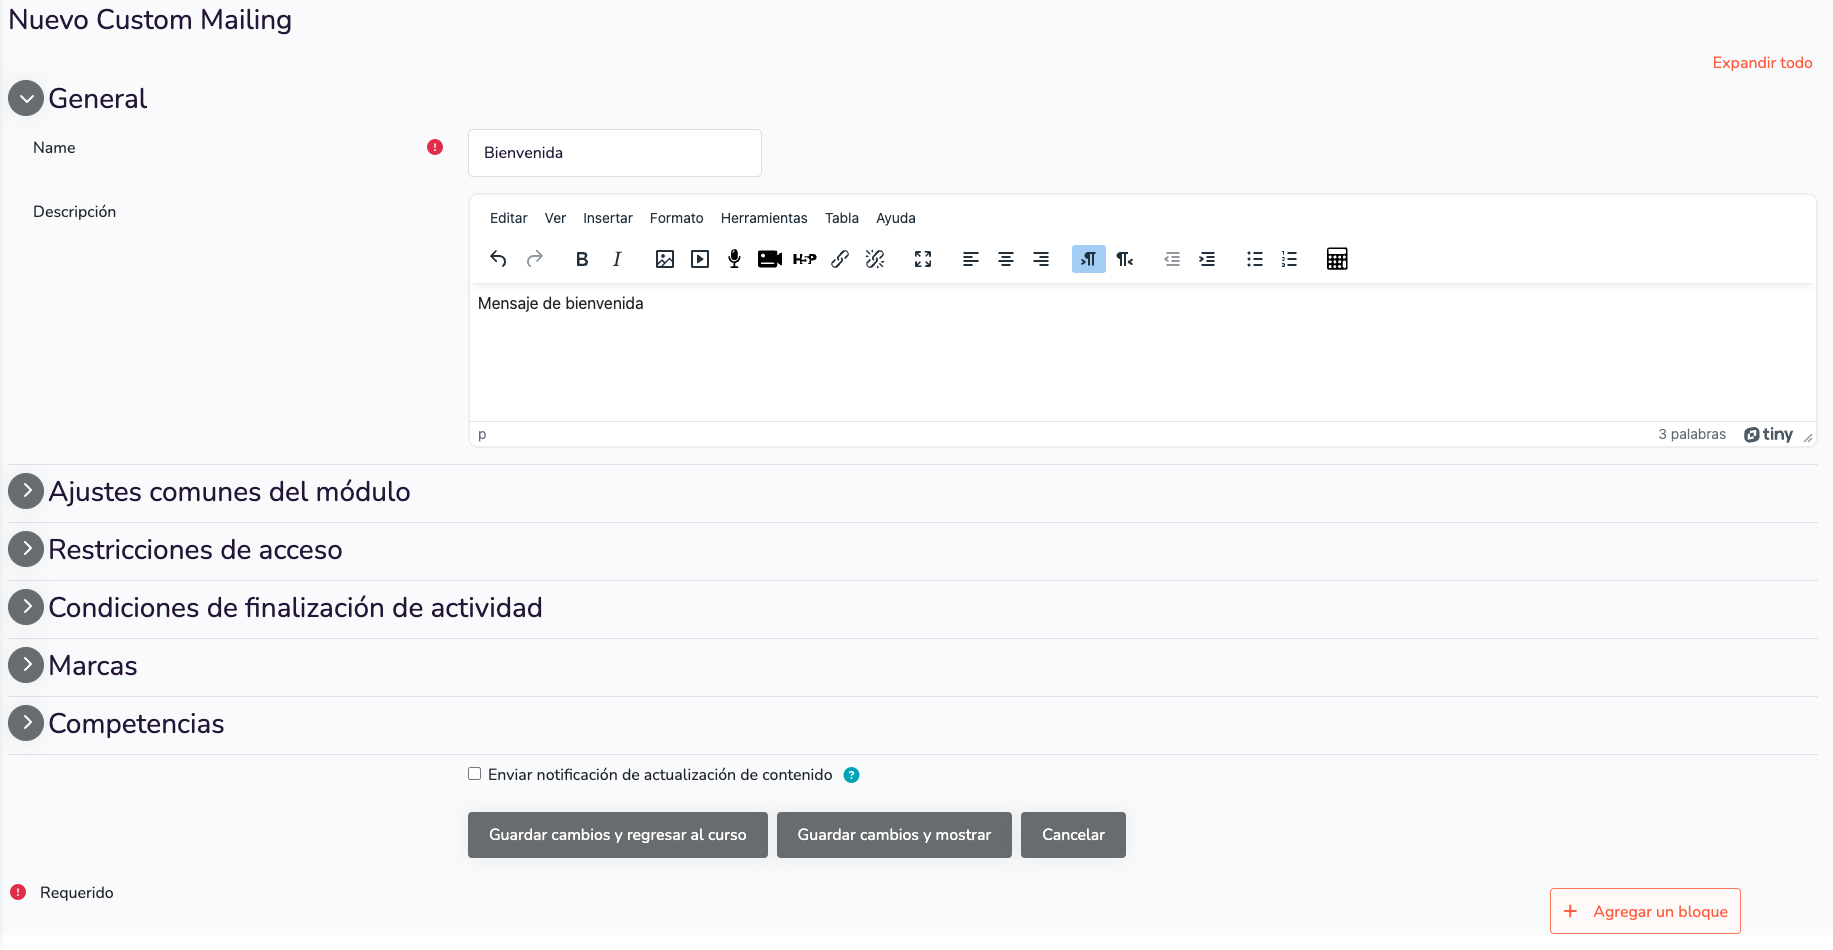
When creating a new Custom Mailing, you will see the following screen:
-
General
- Name: It is the title of the custom mailing, for example, "Welcome". (Required field)
- Description: An optional text to clarify the purpose of the email.
-
Save options
- Save changes and return to course → Saves and returns to the course listing.
- Save changes and show → Saves and keeps the edit view.
- Cancel → Discards the configuration without saving changes.
If the "Name" field is empty, Campus will not allow saving the configuration (red warning icon).
3. Custom Mailing Management Screen
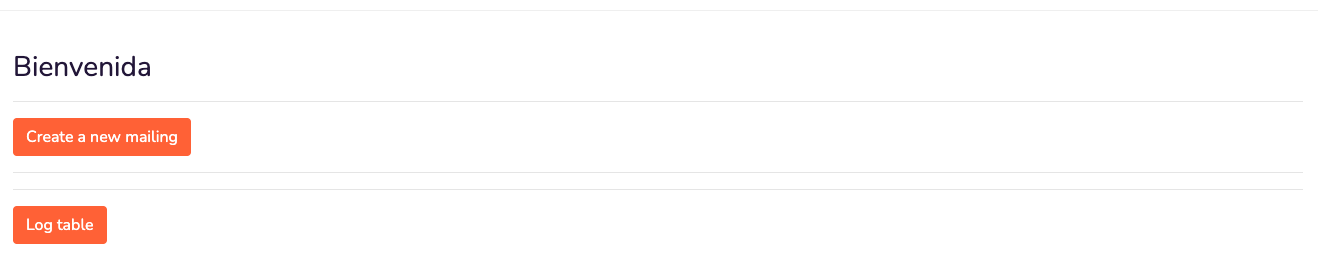
Once the mailing is created, you will see a screen like this:
✅ Available options
-
Mailing title ("Welcome")
- Shows the name of the created automated email.
-
"Create a new mailing" button
- Allows adding a new automated email within this same activity.
- If there are already other configured mailings, they will appear listed here.
-
"Log table" button
- Shows a history of sent emails.
- Allows seeing which students received the email and on what date.
📌 What to do from here?
- To add more automated emails, press "Create a new mailing".
- To review past sends, enter "Log table".
4. Create a New Mailing
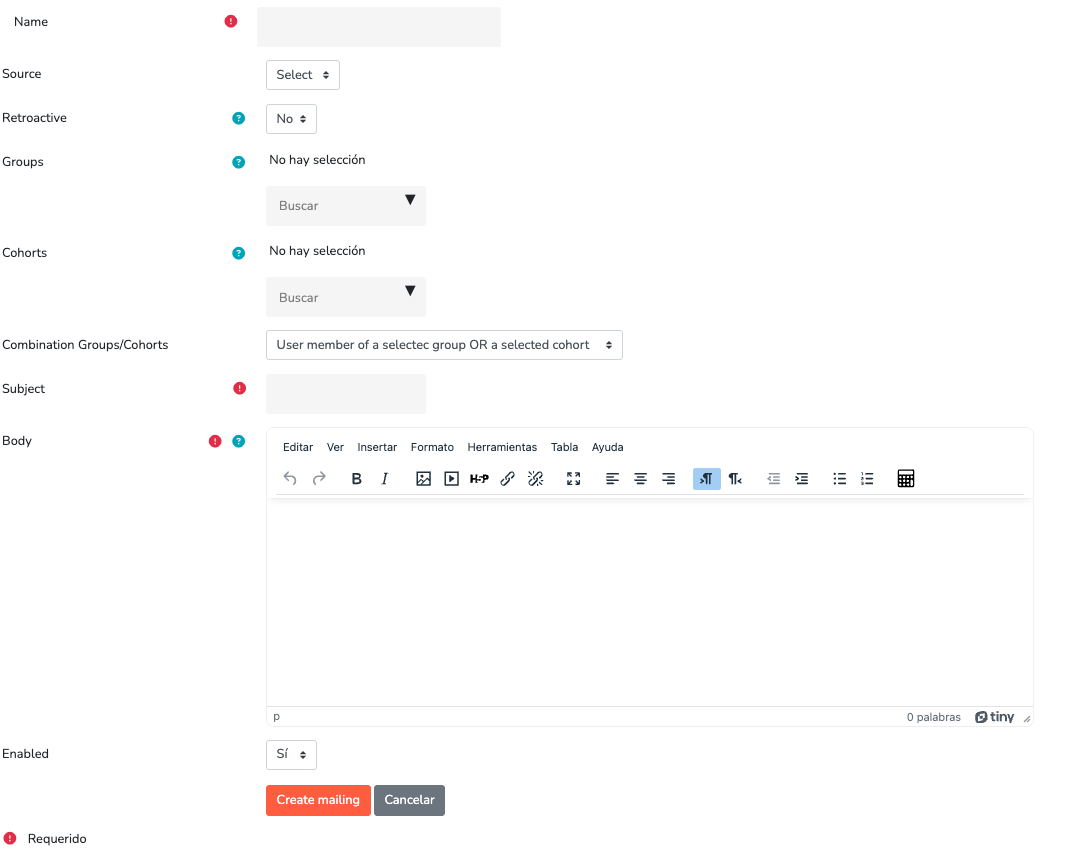
When you press the "Create a new mailing" button, the following configuration screen appears:
✅ Important Fields
- Name → It is the mailing identifier (Required field).
- Source → Defines the event that will trigger the email sending, we select "Course". Then we mark the option "At course enrol", so that the email is sent when a student enrolls in the course.
- Retroactive → If activated, it will send the email also to users who already met the condition in the past.
- Groups → Allows selecting specific course groups to receive the email.
- Cohorts → Allows choosing a user cohort that will receive the email.
- Combination Groups/Cohorts → Determines how groups and cohorts are combined.
- Subject → Title of the email that recipients will receive (Required field).
- Body → Here you write the email content.
- Enabled → Allows activating or deactivating the sending of this mailing.
✅ Finalize the configuration
- Press "Create mailing" to save and activate the email.
- If you want to cancel, click "Cancel".
If the "Name" or "Subject" fields are empty, you will not be able to save the configuration.
5. Verify Email Sending
To ensure emails are configured correctly:
- 🔹 Campus will send emails automatically according to the chosen conditions.
- 🔹 You can check the status of emails from the Custom Mailing activity in your course from "Log table".
6. Frequently Asked Questions
-❓ Can I send the same email multiple times?
✅ No. Each user receives an email only once per configured rule.
❓ Can I attach a file to the email?
❌ Not directly, but you can include links to documents in Google Drive or Campus.
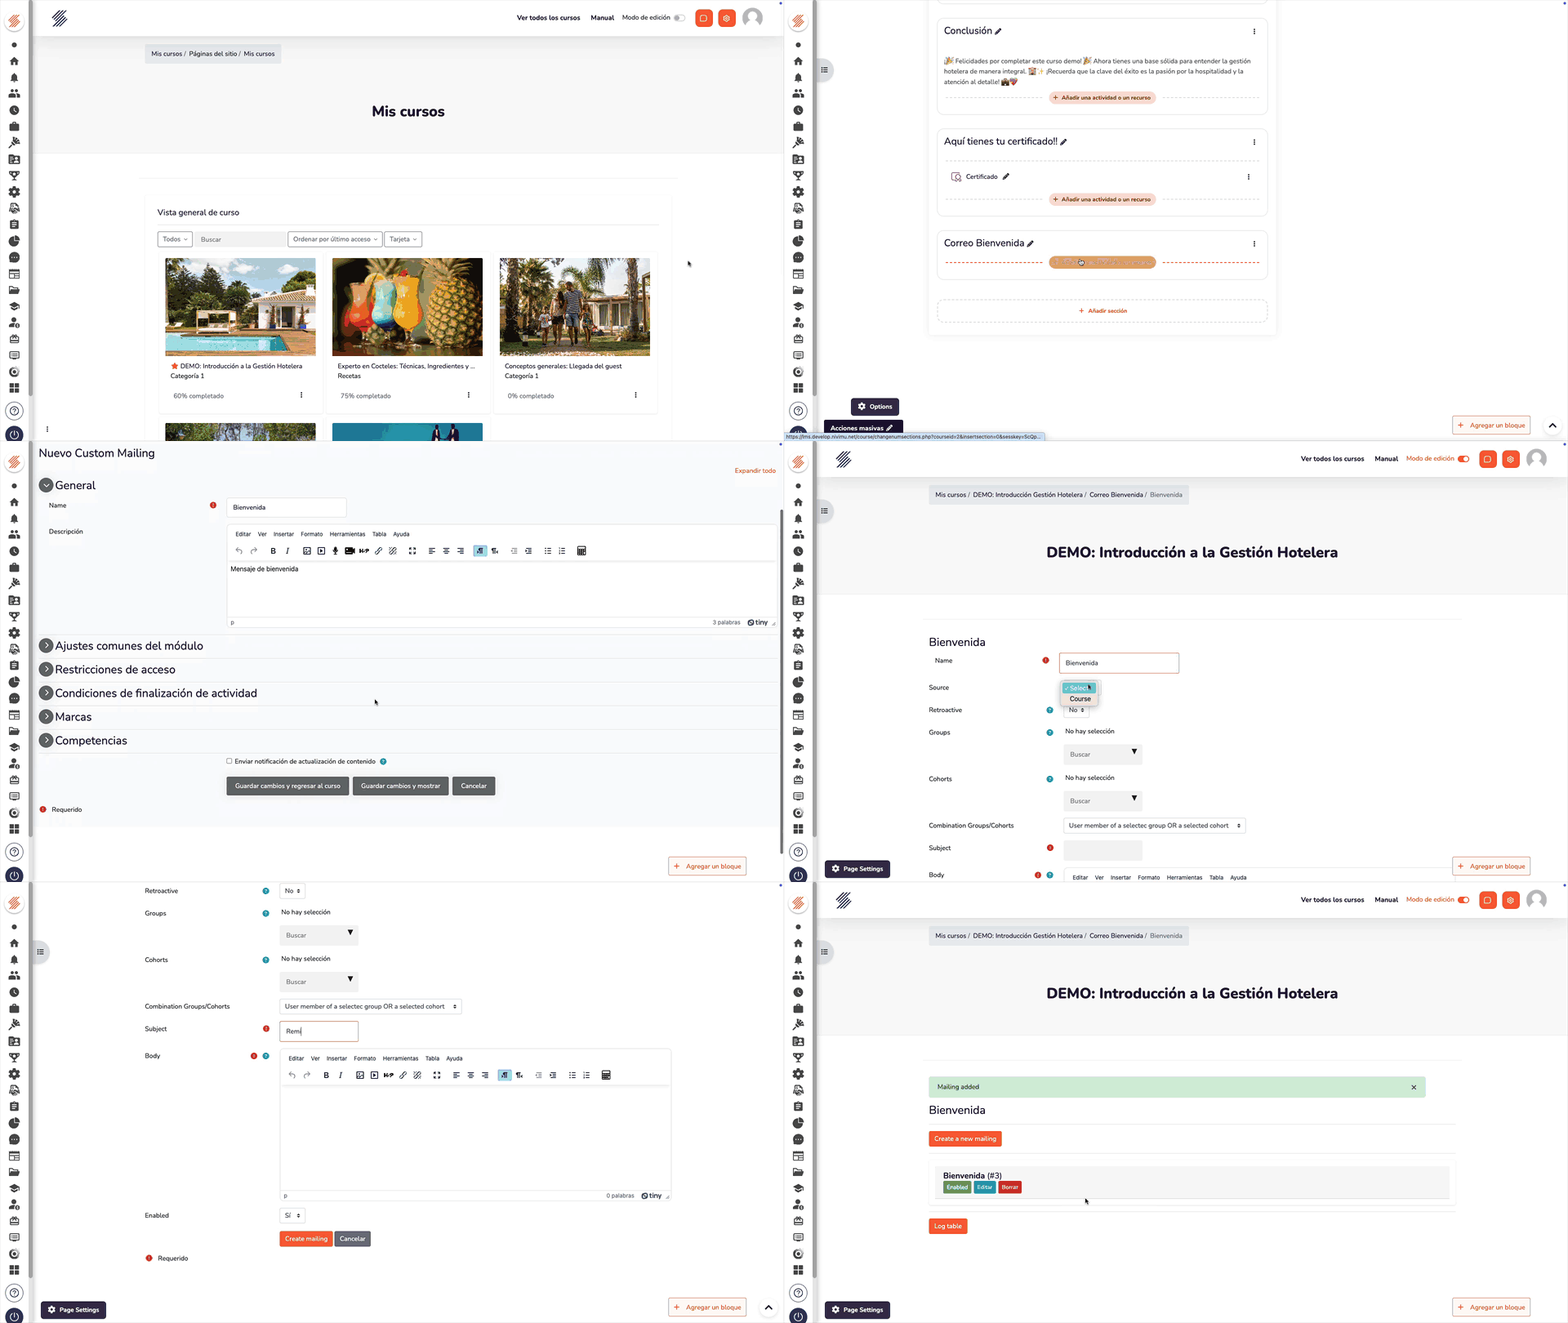
🔹 And that's it! Now your course will send emails automatically according to the rules you have configured. 🎉