Physical Clocking
For employees to be able to start clocking in their work areas, it is necessary to log in to the clocking devices with the control user. When the employee clocks on one of these devices, the system will capture the location and take a photograph instantly.
Clocking with ID Card
For employees to clock by entering their ID card:
- Access the portal of your application from the device that will be used for clocking.
- Enter the username and password assigned to the control user.
- Check the Keep session open box so that the session does not close.
- Click on Access. The first time you enter, you must accept the permissions to use the location and camera of the device.
- If the control user has only one center assigned, the numeric keypad will appear directly.
- If the control user has more than one center assigned, they must choose the center they want to set on that device.
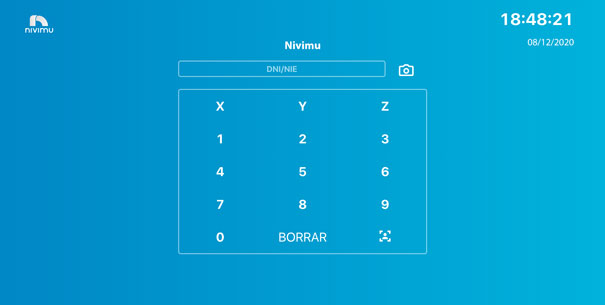
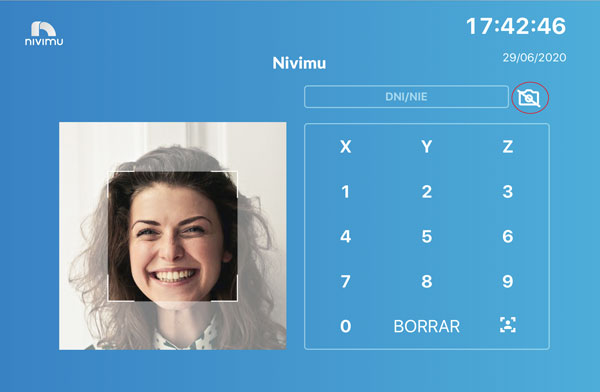
Next to the ID field appears a camera icon. If you click on the button you can see the framing that the camera has in that position and ensure that the images will come out properly.
Clocking Pause
The clocking pause is a feature that allows users to take paid breaks that are recorded in time control. To use this feature, you must contact our customer success department to enable it in the control user.
Once configured, when the user clocks an exit, it will ask if it is a break or a real exit.

Close Session
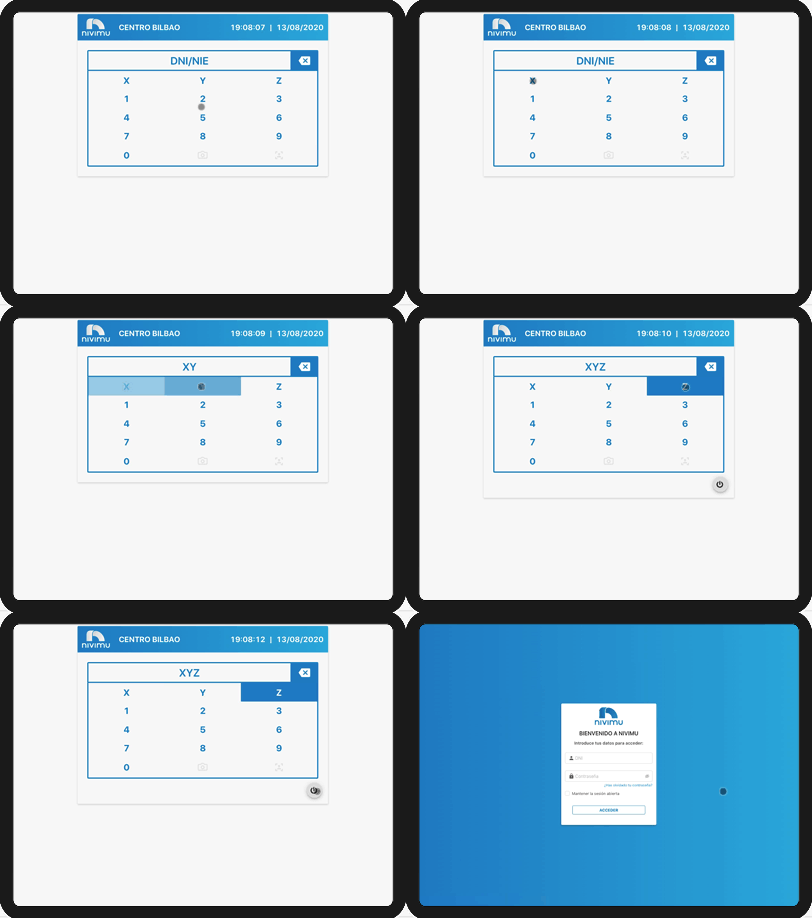
To prevent any employee from closing the session on the clocking device, the button that allows closing the control user session has been hidden. It is necessary to enter a code on the keyboard to activate said button and be able to close the session.
If you want to close the session, type X Y Z on the panel. Then, click on the red button that appears in the lower right corner.
🧭 Offline Clocking:
🛠️ General Operation
-
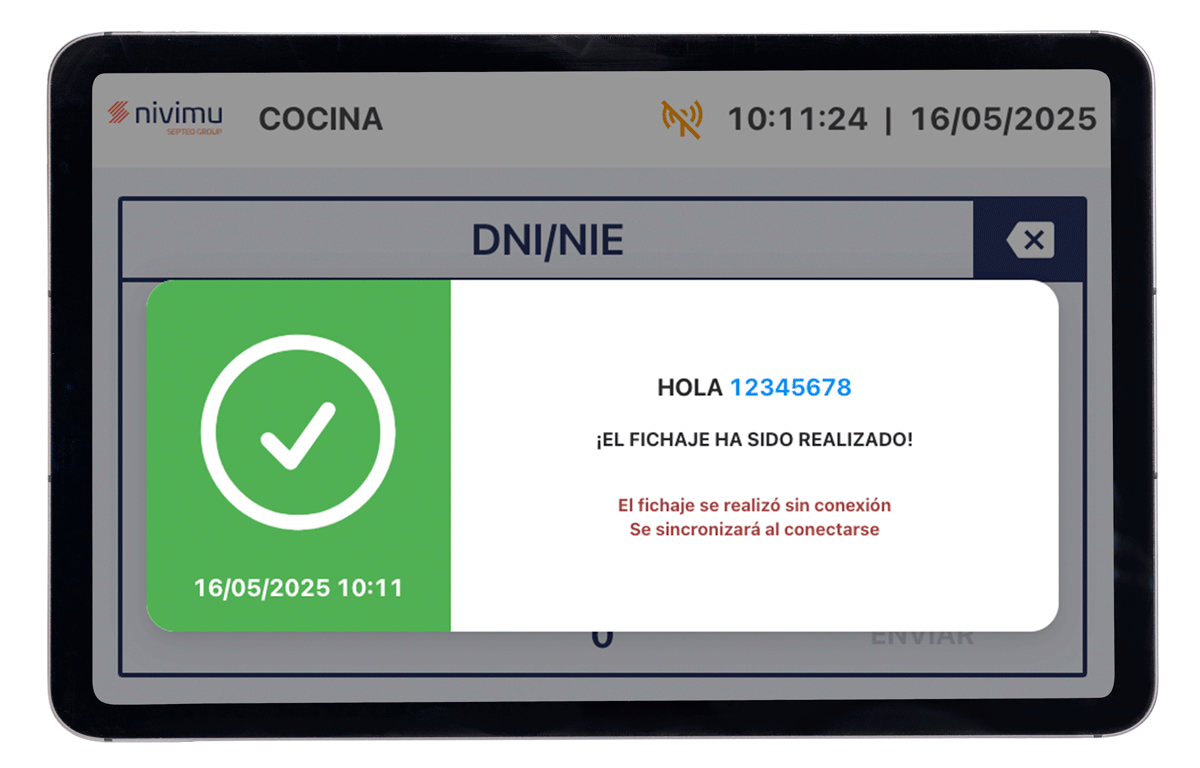
Offline Mode Activated Automatically When the clocking device loses internet connection, it automatically enters offline mode.
-
Clocking Registration Employees can continue clocking normally by entering their ID. The clockings are stored locally on the device.
-
Automatic Synchronization Once the device recovers the connection, all stored clockings are automatically sent to Nivimu in a few seconds.
⚠️ ID Validation
- If an employee enters an invalid ID:
- The clocking is not registered.
- An automatic notification is generated to the Admin Sup informing about the failed attempt and the entered ID.
📌 Important Considerations
- No manual action is required to activate or deactivate offline mode.
- Clockings are stored securely on the device until synchronization.
- It is the responsibility of the Admin Sup to review error notifications and take necessary actions.
🧪 Use Cases
| Scenario | Result |
|---|---|
| The device loses connection during the day | The clocking is saved locally |
| The device recovers connection | All pending clockings are synchronized |
| An employee enters an incorrect ID | The Admin Sup is notified, the clocking is not registered |
✅ Best Practices
- Periodically verify that devices have stable connection.
- Review clocking error notifications to avoid inconsistencies.
Configure Android Device.
Installation of the nivimu app on an Android device.
To install the Nivimu app, remember that you have the process in our Getting Started section.
Camera permissions on an Android device.
If we are using an Android device for physical clocking, we must give camera permissions for it to work. To do this:
- We close the nivimu app. To do this, click on the 3 lines at the bottom of the screen and press the X or swipe up the Nivimu app screen.
- Once closed, we long press the Nivimu app icon and a menu will appear.
- We press on "Site Settings".
- In "Site Settings" we press on the Camera button and activate it.
- We press the Back button.
- We open the app again and we will see the camera working.
Configure always-on screen on an Android device
If we are using an Android device for physical clocking, we must configure the device so that the screen never turns off. To do this, consult your device's operating manual. You can find it on the manufacturer's website.
Configure Apple Device.
Installation of the nivimu app on an Apple device.
To install the Nivimu app, remember that you have the process in our Getting Started section.
Camera permissions on an Apple device.
If we are using an Apple device for physical clocking, we must configure the camera permissions. To do this:
- We close the nivimu app. In this link we show you how to do it...
- Once closed, we go to "Settings".
- We scroll down to the Safari icon. and look for the Camera option.
- In "Camera access on all websites" we press on the Ask option.
- We exit settings, open the nivimu app and it will ask if we want to give access to the camera.
Configure always-on screen on an Apple device
If we are using an Apple device for physical clocking, we must configure the device so that the screen never turns off, because if it turns off, when it turns on again, the device will not remember the permissions that were previously given to the camera, and therefore the clocking will not work. To do this:
- We close the nivimu app. In this link we show you how to do it...
- We go to "Settings".
- We look for the "Display & Brightness" option.
- We select "Auto-Lock".
- A list will appear with different times (2 min, 5 min, 10 min, 15 min or never).
- We select the last option (Never).
- The screen will remain on indefinitely, until the power/sleep button is pressed.
- If the device is working correctly you will see a camera icon
 in the upper right of the device.
 - Once this is done, we open the app again and give camera permission.
If the iPad screen turns off, you will have to close the application and reopen it to give camera permissions again.