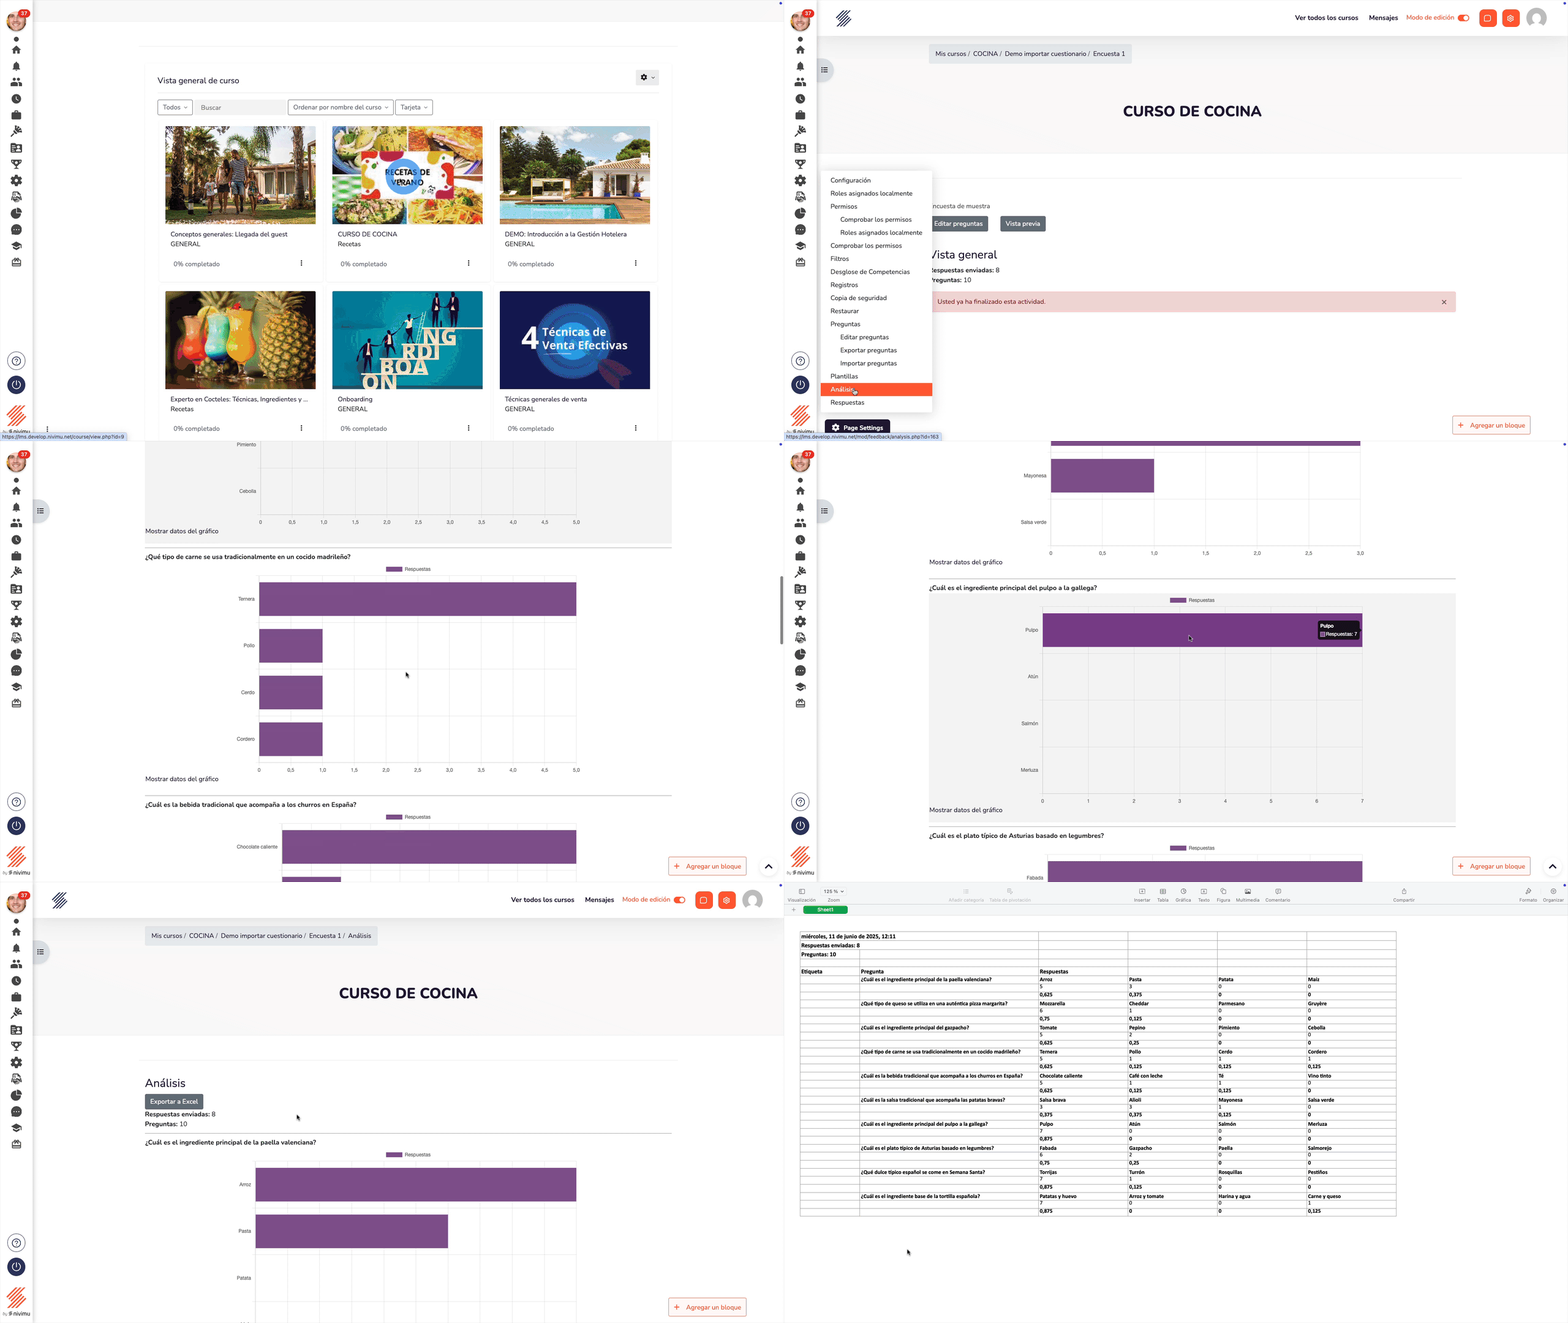
Campus Surveys
Tutorial for Using Surveys in Campus
🔹 How to add a survey to your course
Add a Survey to a Course
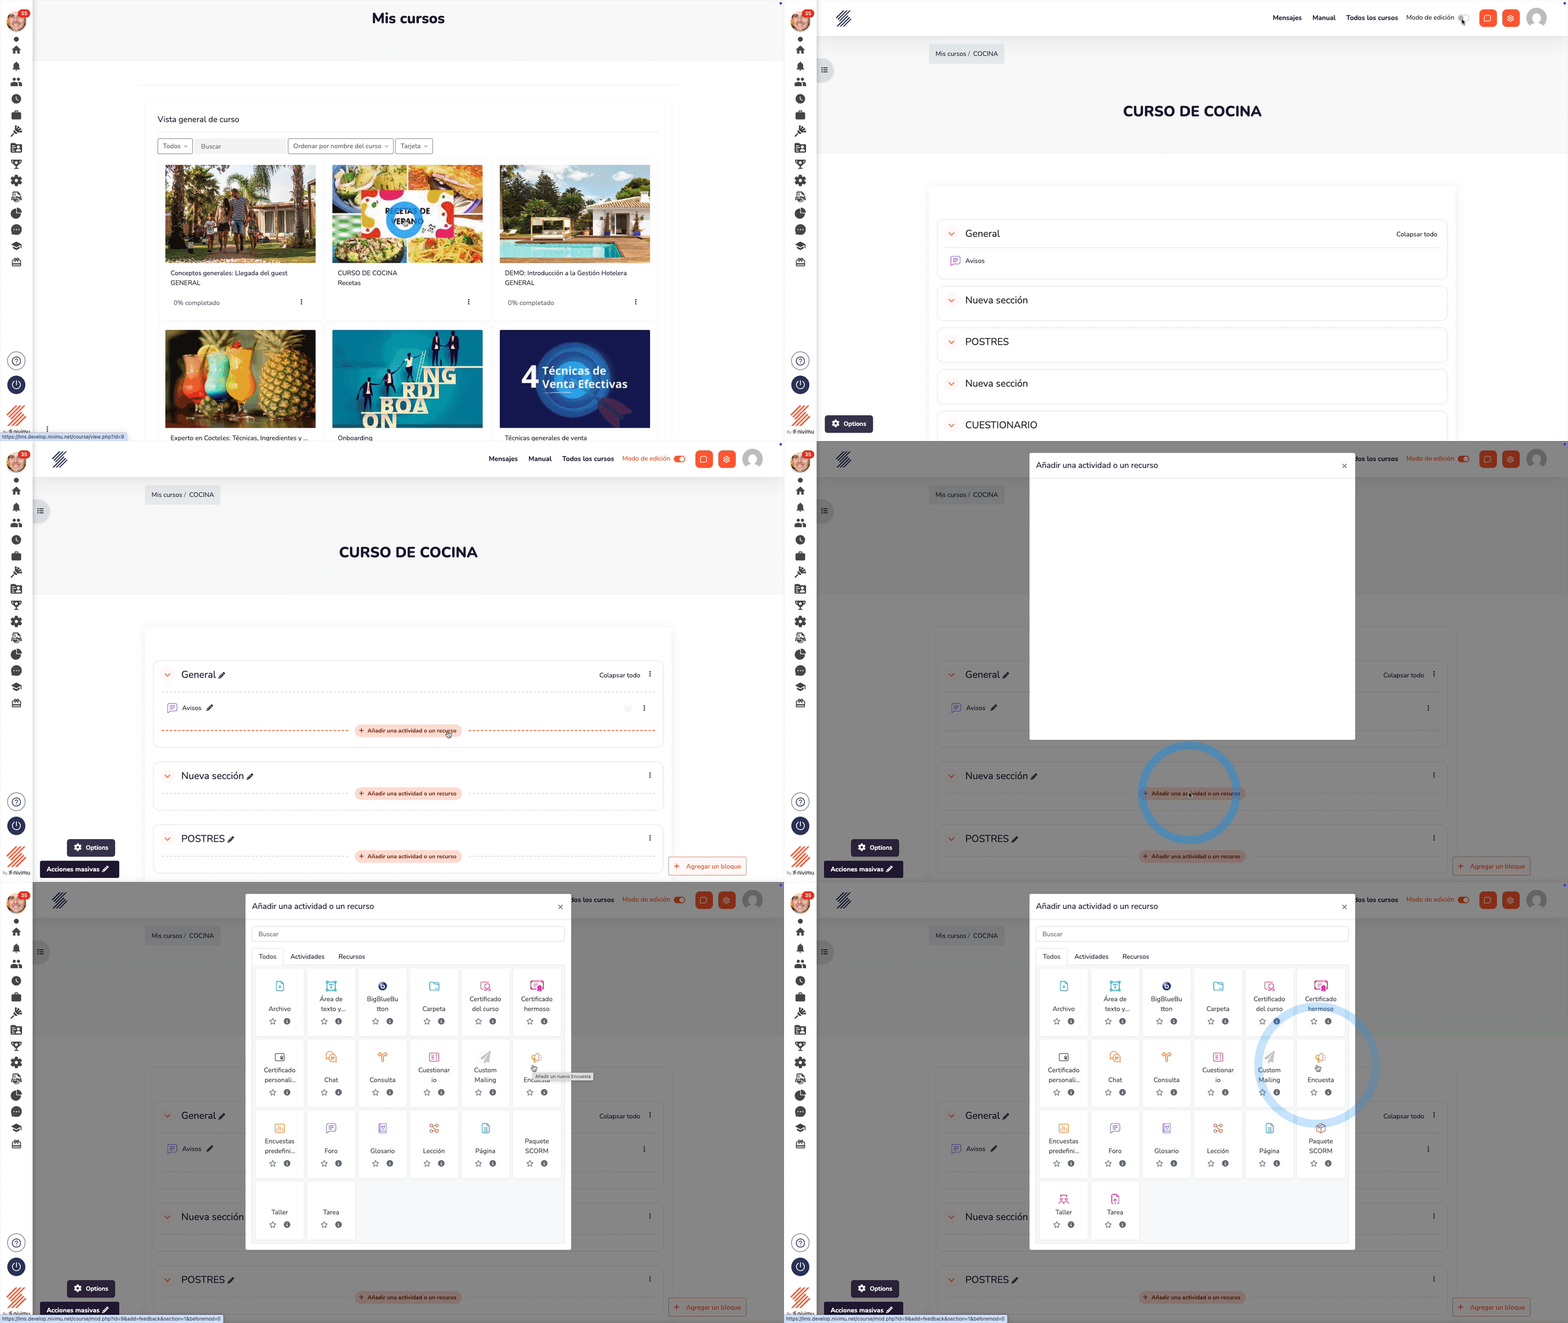
To start using Surveys, you must add it as an activity within a course.
✅ Steps to add the activity.
-
Enter your course in Campus.
-
Activate editing by clicking the "Edit mode" button (top right). Search for "Survey" in the list and select it.
Add a new activity:
- Click on "Add an activity or resource".
- Press "Add".
Configure Surveys
Once the activity is added, you can assign a name and description to the survey. Define the opening and closing date, if necessary. Adjust parameters such as response mode and whether results will be anonymous or visible to participants.
✅ Configuration Screen
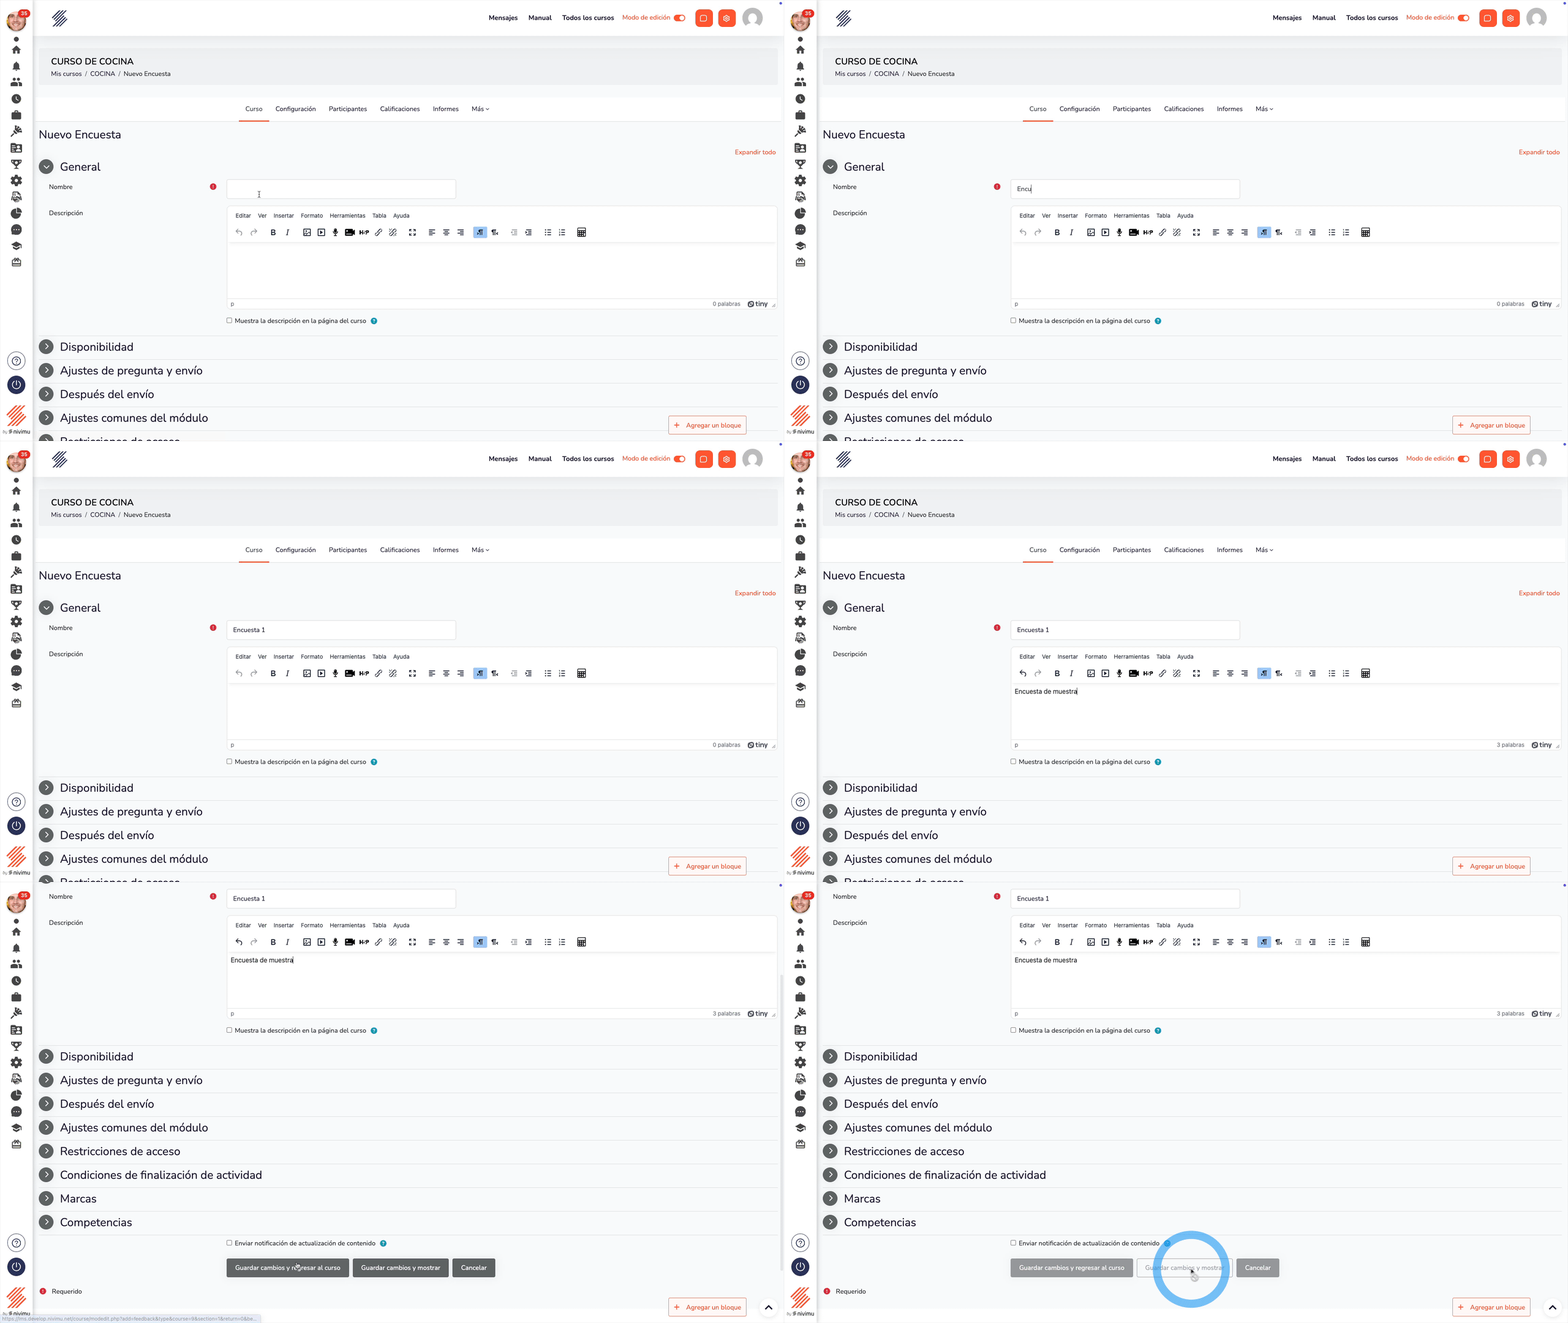
When creating a new Survey, you will see the following screen:
-
In the General section:
Fill Name: It is the title of the Survey, for example, "Survey 1". (Required field)
Description: Optional text to provide extra information about the survey.
-
Save options
Save changes and return to course → Saves and returns to the course listing.
Save changes and show → Saves and keeps the edit view.
Cancel → Discards the configuration without saving changes.
Survey Management Screen
Once the survey is created, you will see a screen like this:
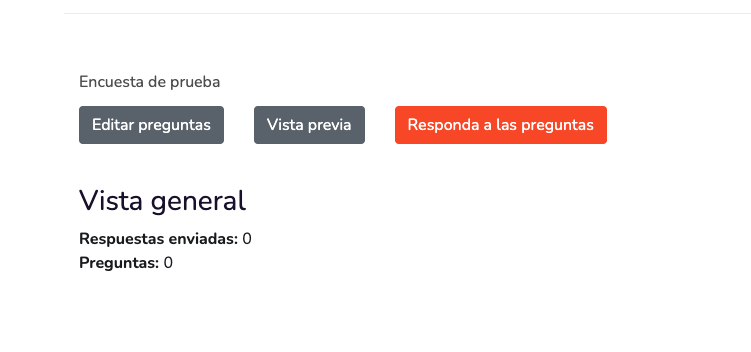
✅ Available options
- Survey Name ("Test Survey")
- Shows the "Description" field that we filled in previously.
- Edit questions
- Allows adding questions to the survey manually, through templates or importing from a question bank.
- Preview
- Shows a preview of the survey design.
- Answer the questions
- Gives access to the survey.
Create a question
When you press the "Edit questions" button, the following configuration screen appears:
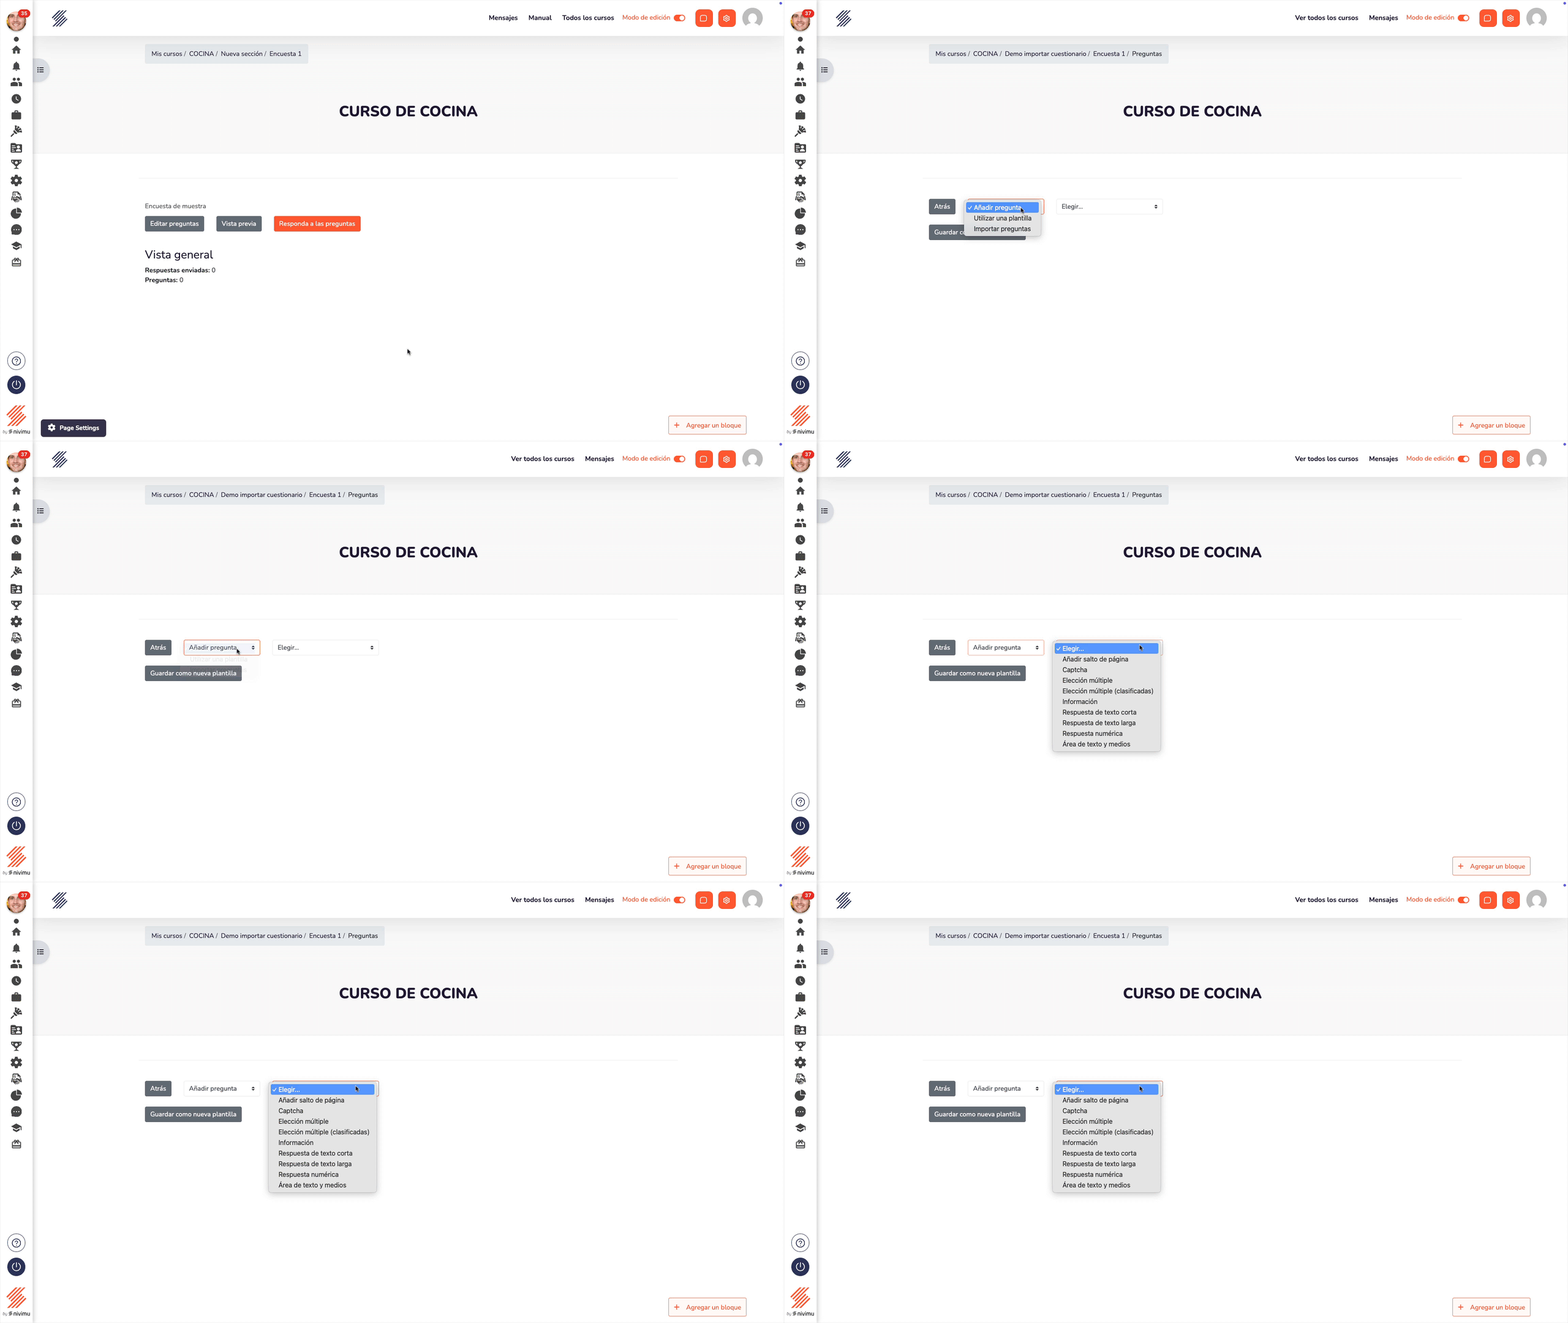
✅ Description of options
Add question:
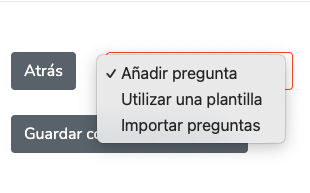
- Use a template: Allows using a predefined template to add questions to the Survey.
- Import questions: Allows adding questions from a question bank.
Choose
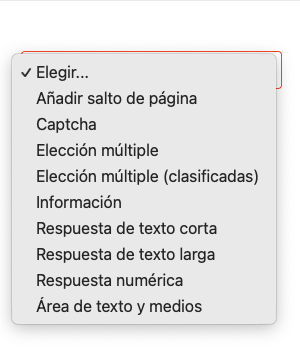
- Add page break: Allows dividing the survey into several pages, facilitating navigation and preventing participants from seeing all questions at once.
- Captcha: Adds a verification system to ensure that the survey is not being completed by a bot. Generally, the user is asked to enter a code or solve a small visual task.
- Multiple choice: Allows participants to select one or several response options. It can be configured to allow only one response or multiple responses.
- Multiple choice (rated): Similar to the previous option, but with the possibility of assigning values to each response option, which allows calculating averages or performing more detailed analyses.
- Information: It is not a question, but a text block that can be used to provide instructions, context, or any other relevant information within the survey.
- Short text response: Allows participants to enter a brief response, generally limited to a few words or one line of text.
- Long text response: Similar to the previous option, but without character limit, allowing more extensive and detailed responses.
- Numeric response: Asks the participant to enter a number as a response. It can be configured to accept only values within a specific range.
- Text and media area: Allows participants to write long responses and add multimedia elements such as images, videos, or links.
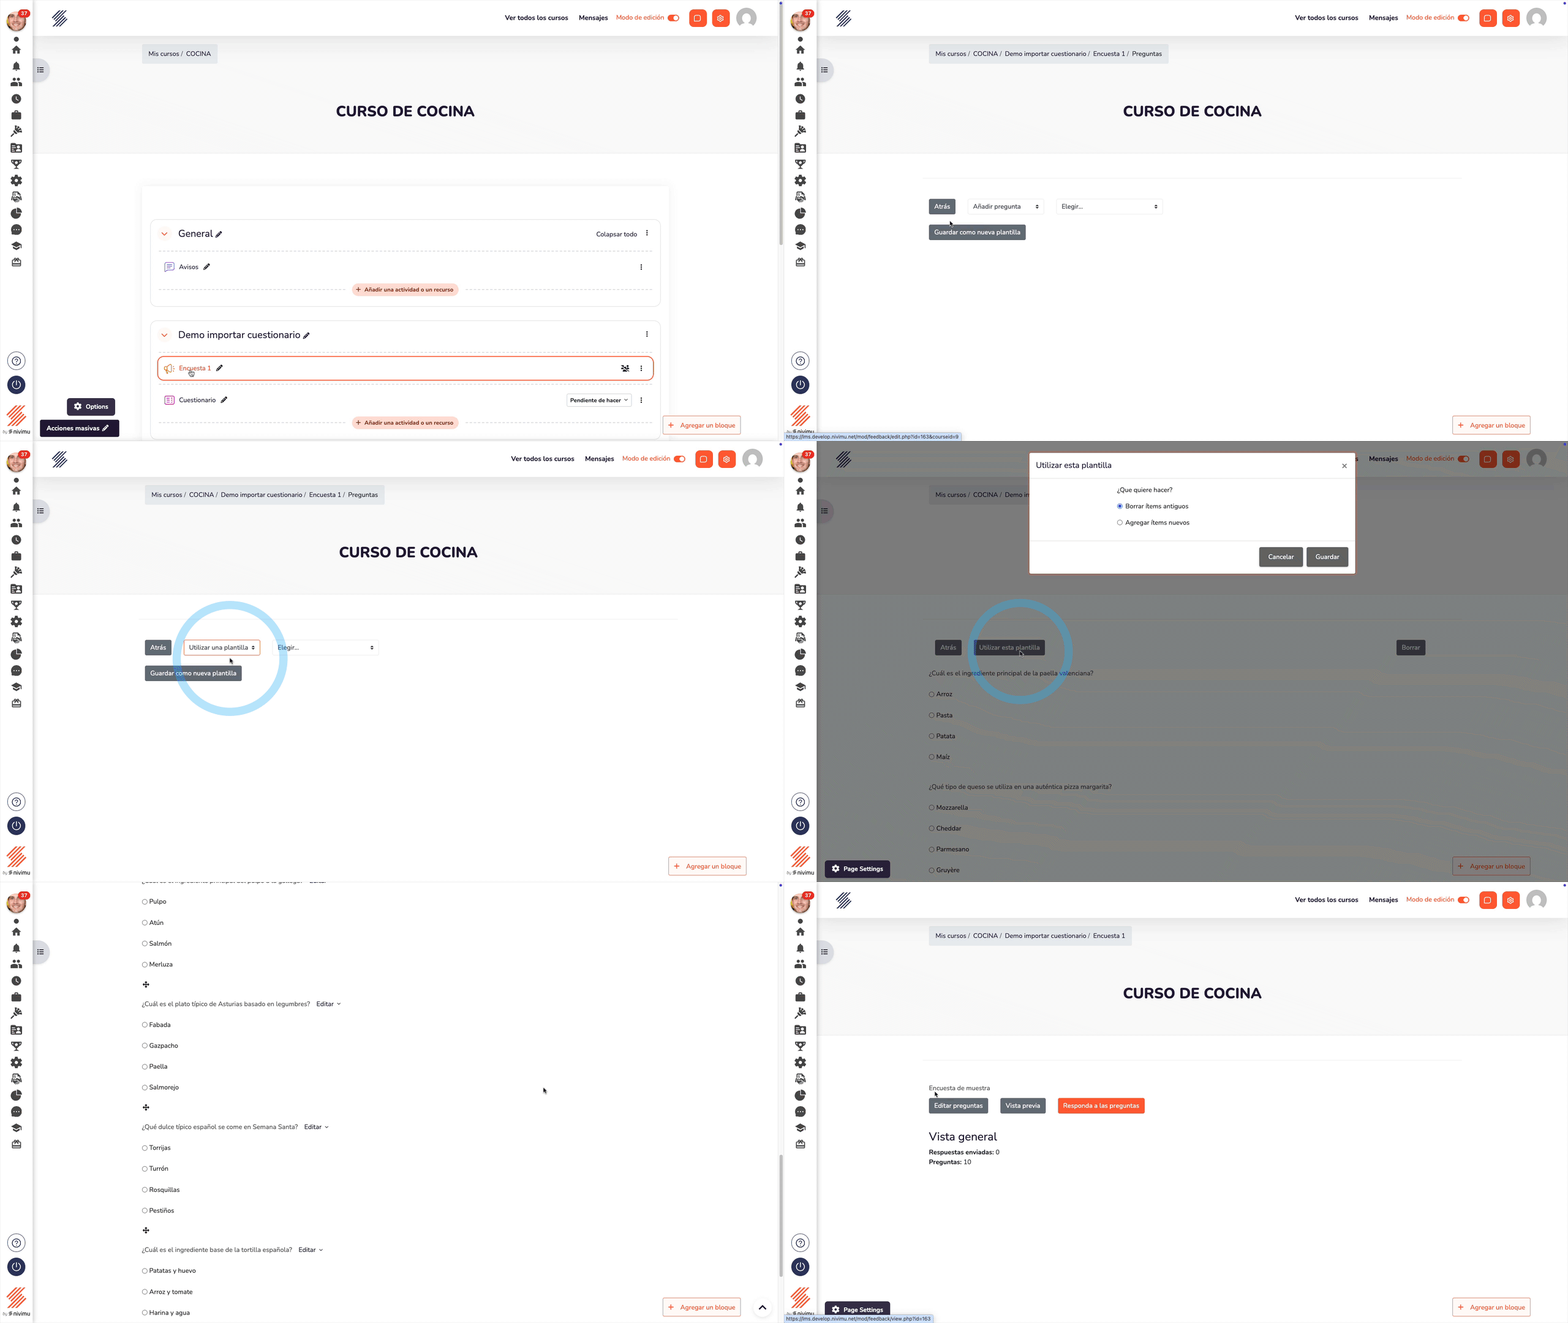
Example of how to add a question from a template:
- Select "Add question".
- Select "Use a template".
- Select the desired template.
- To confirm that the questions are added to the survey, select "Use this template".
- Select if you want to delete existing items or add new items and press "Save".
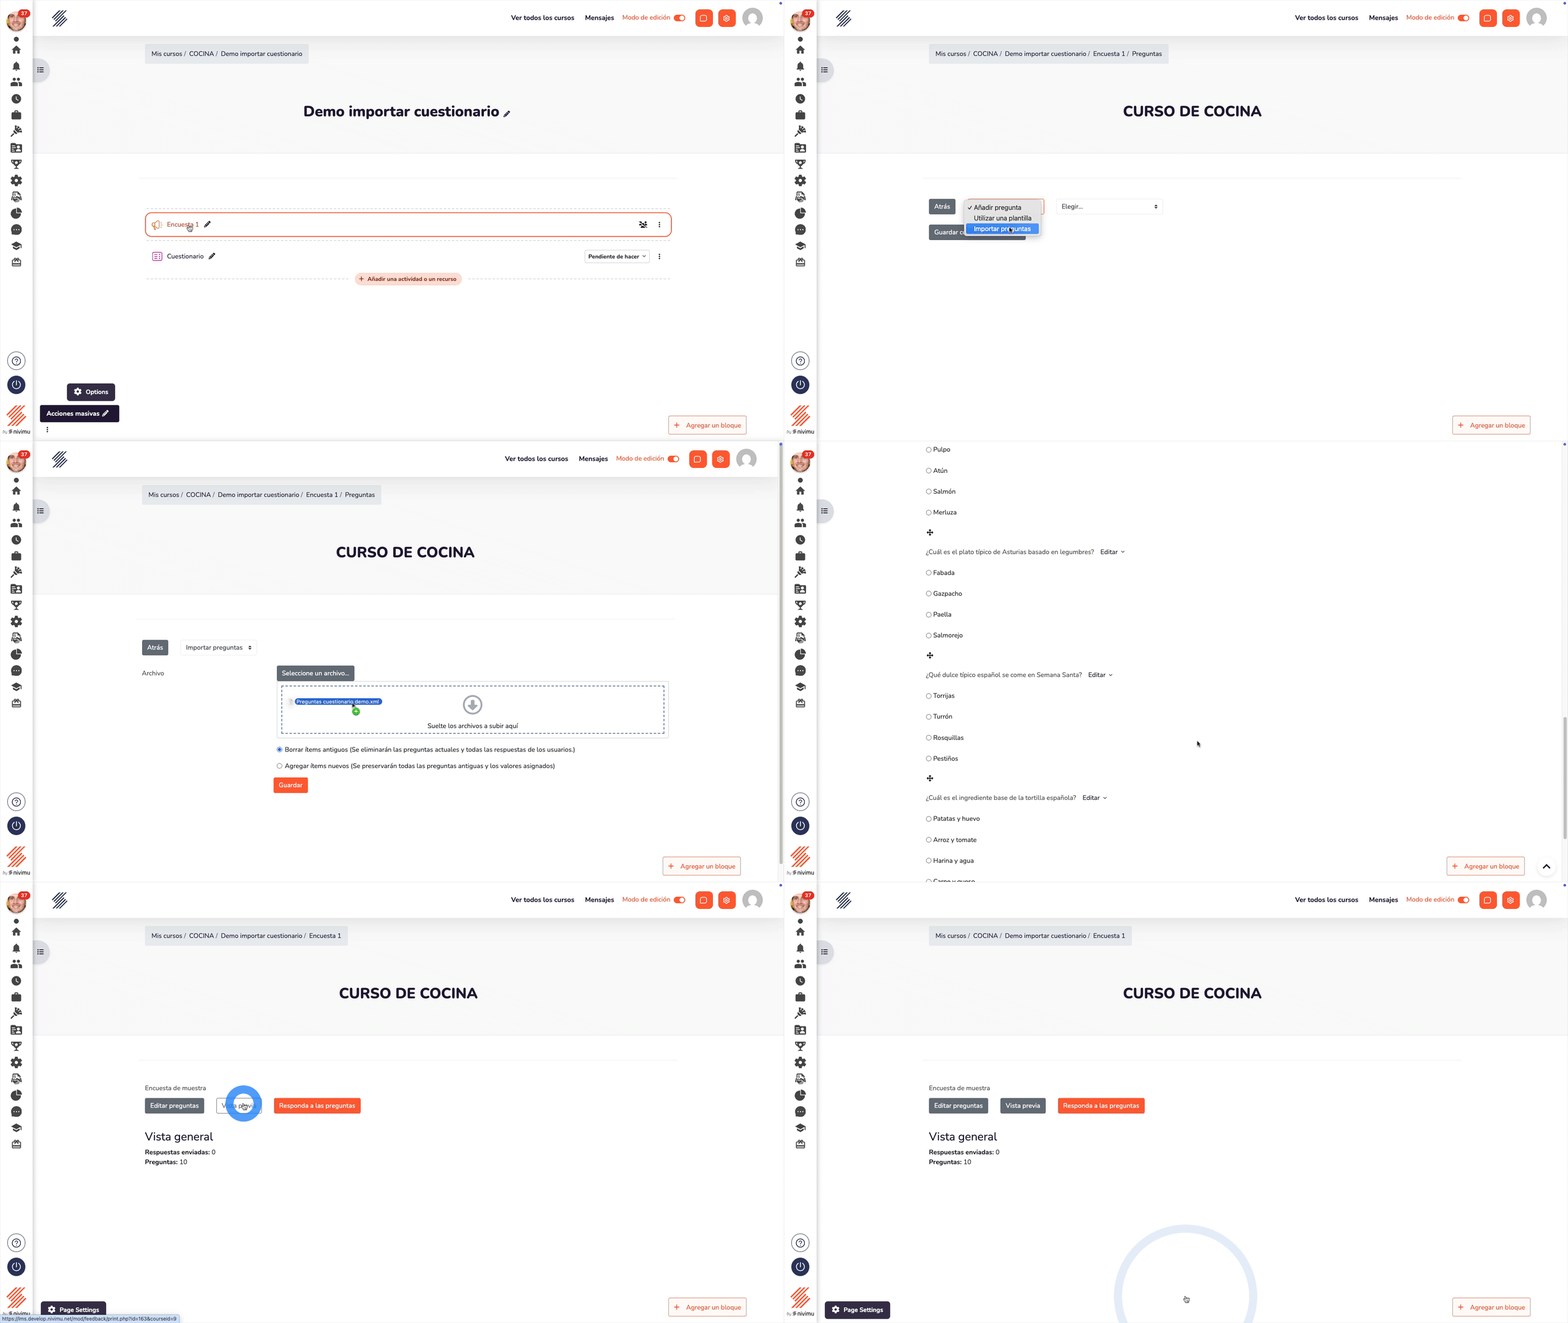
Example of how to import questions:
- Select "Add question".
- Select "Import questions".
- Select or drag the file with the questions.
- Select if you want to delete existing items or add new items and press "Save".
Example of how to add a question manually:
In this case we will add a Multiple Choice question.
- Select "Multiple Choice".
- Fill in the fields.
- Press "Save changes"

Survey results.
Once users start responding to the surveys, the results can be viewed in several ways:
With anonymous/non-anonymous difference:
-
Select the course and survey.
-
Go to the "Page Settings" button located in the lower left area of the page.

-
Select "Settings".
-
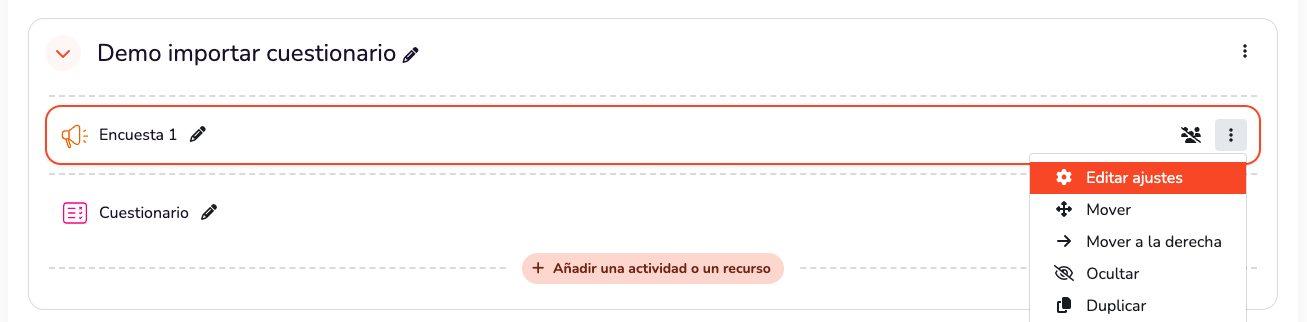
Or, from the "Edit settings" button located to the right of the survey block.
-
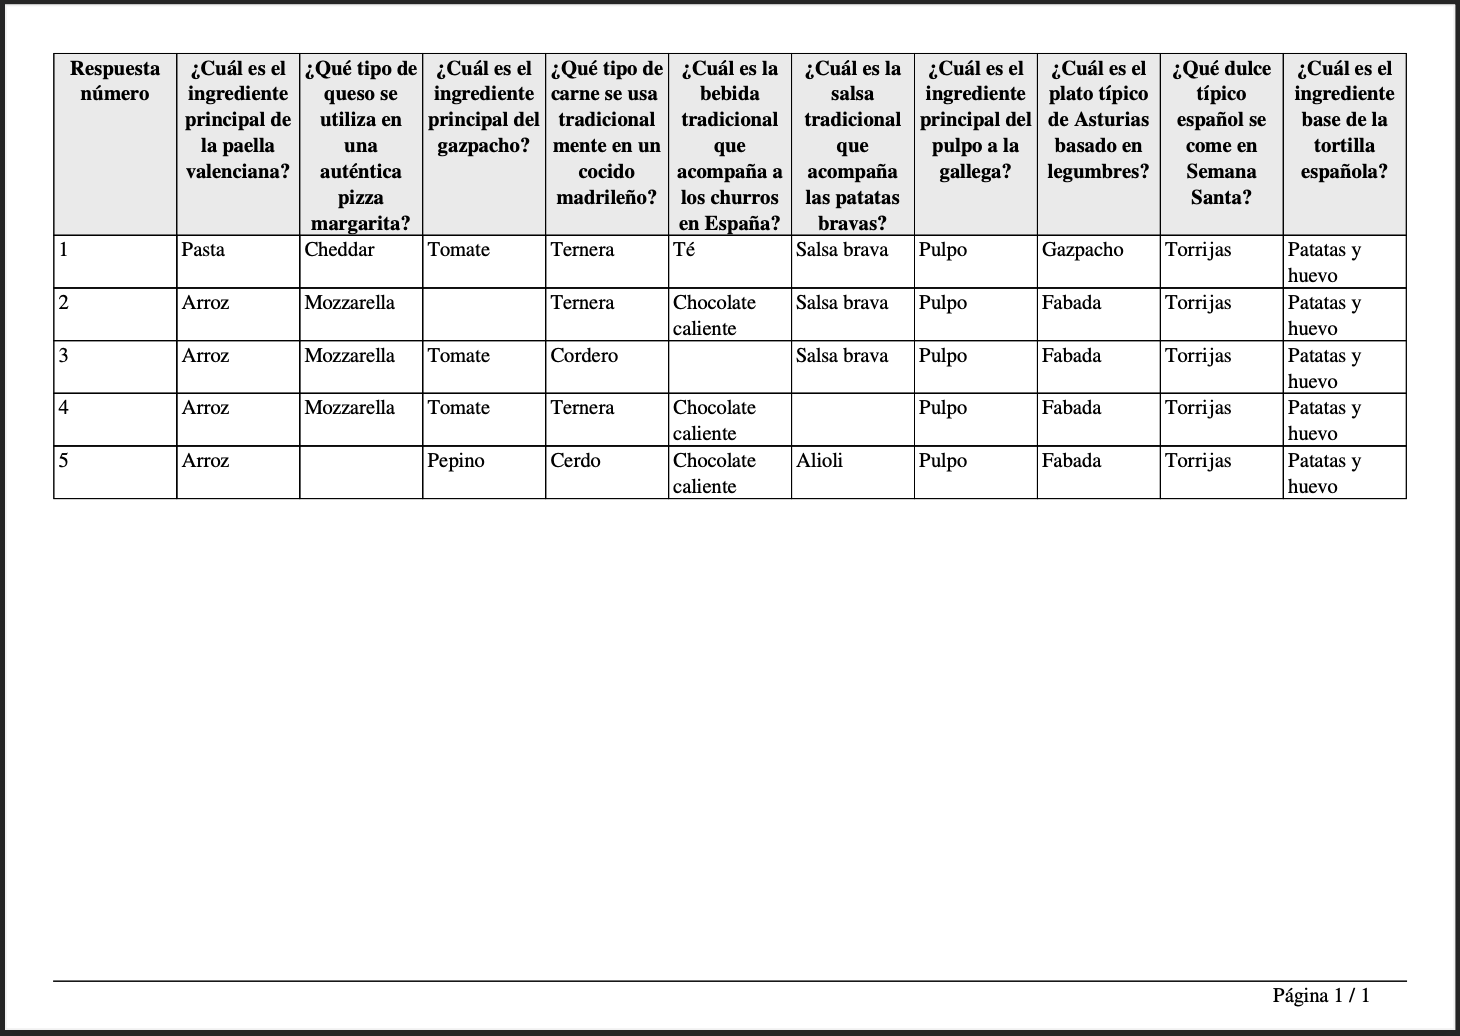
Select the desired format and press "download".
-
The file will be saved in the Downloads folder.

Some examples:
-
Comma-separated values non-anonymous:

-
Comma-separated values anonymous:

-
Excel file:

-
HTML table:

-
Portable Document Format (pdf):
Without anonymous/non-anonymous difference:
-
Select the course and survey.
-
Go to the "Page Settings" button located in the lower left area of the page.
-
Select "Analysis".
-
Select "Export to Excel".
-
The file is saved in the Downloads folder.