Documents
Introduction
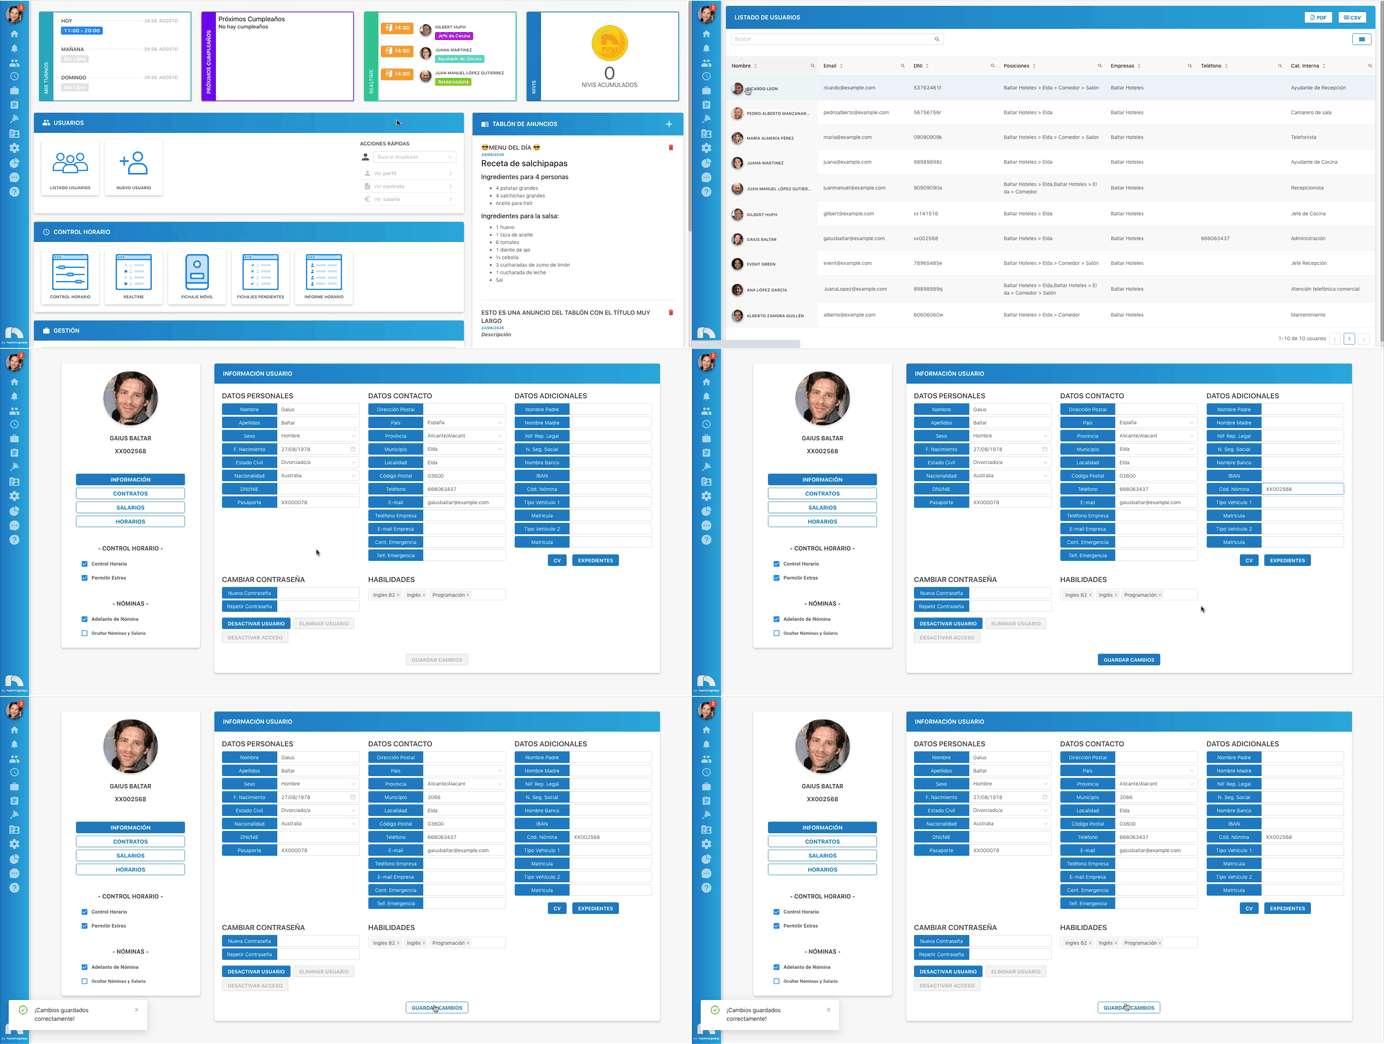
You can send different kinds of documents to all employees quickly and automatically. To auto-assign a document, the employee must have a payroll code set. To set it:
- Open the menu and go to User List.
- Find the employee and click them.
- In the profile, click Information.
- Under Additional Data, fill Payroll Code (Cód. Nómina). Do not reuse the same code for multiple employees.
- Click Save changes.
Document types
- Payslip
- Severance (Finiquitos)
- Settlement
- Advances
- Extra
- Certificates
- Bonuses
If you need another folder type, send the list to Nivimu to add it.
Upload a document
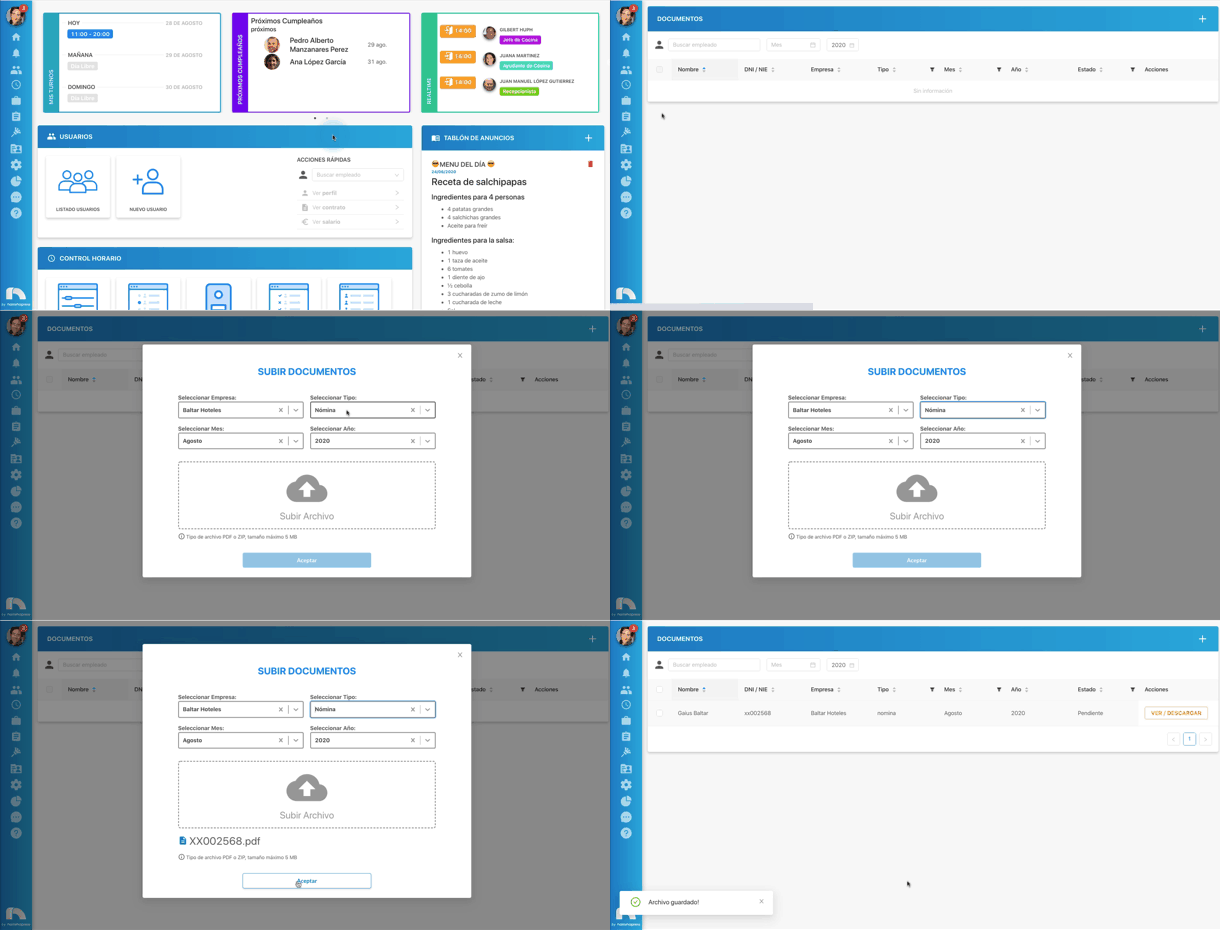
- Menu → Management → Documents.
- Click the + icon (top-right) and a new window opens.
- Select Company: choose the company for this payslip.
- Select Type: choose the document type.
- Select the month.
- Select the year.
- Click Upload File and pick the file. The filename must be the employee payroll code.
- Click Accept, then find the document to validate it so it appears to the employee.
Only PDF, CSV, or Excel files are allowed.
Upload multiple documents
- Name each file with the employee payroll code.
- Compress all files into a .zip.
- In Select Type, choose the document type.
- Upload the zip like a single document.
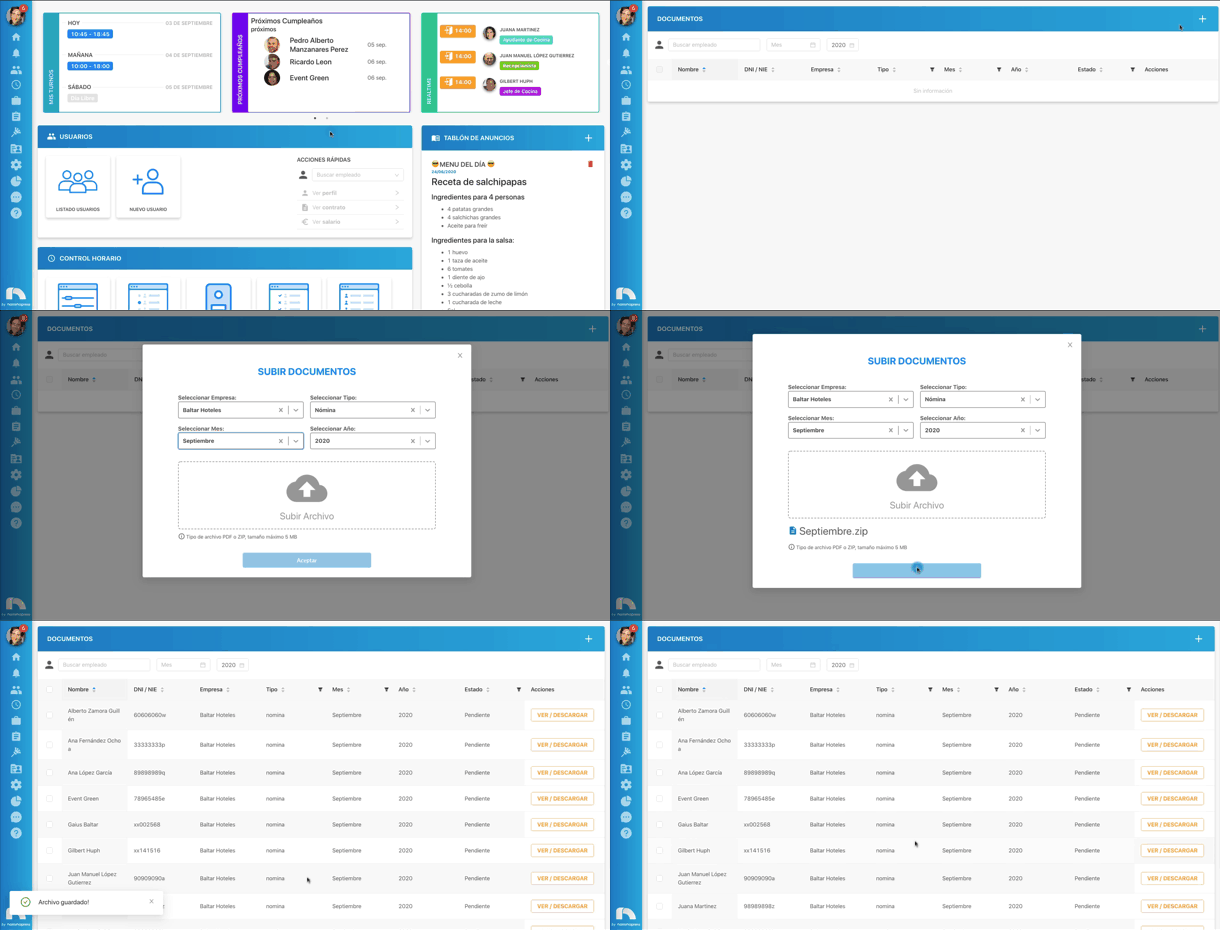
Only .zip files up to 20MB are allowed.
A file is linked correctly when Name and DNI/NIE appear in the table columns.
Accepted filenames
To link each document to the employee, the filename must match one of these patterns (others may work if requested):
- The filename stays constant month to month and matches Payroll Code in the employee profile. Example:
nomina_99781294A.pdf→ setnomina_99781294Ain Payroll Code. - The filename contains the DNI/NIE (login) within
nif_(DNI), e.g.,nif_(99781294A), with any prefix/suffix. - The filename starts with the DNI/NIE. Example:
99781294A/documento.csv. - The filename starts with DNI/NIE followed by an underscore. Example:
99781294A_documento.csv. - The filename includes
codigo_(PAYROLL_CODE). Example:Nomina_Noviembre_codigo_(000089).xls.
Validate a document
When uploaded, the View/Download button shows orange (not validated). To validate:
- Menu → Management → Documents.
- Locate the document by month/year or employee.
- Check the box left of the employee name.
- Click Validate selection (top-right).
- The page reloads and View/Download turns green.
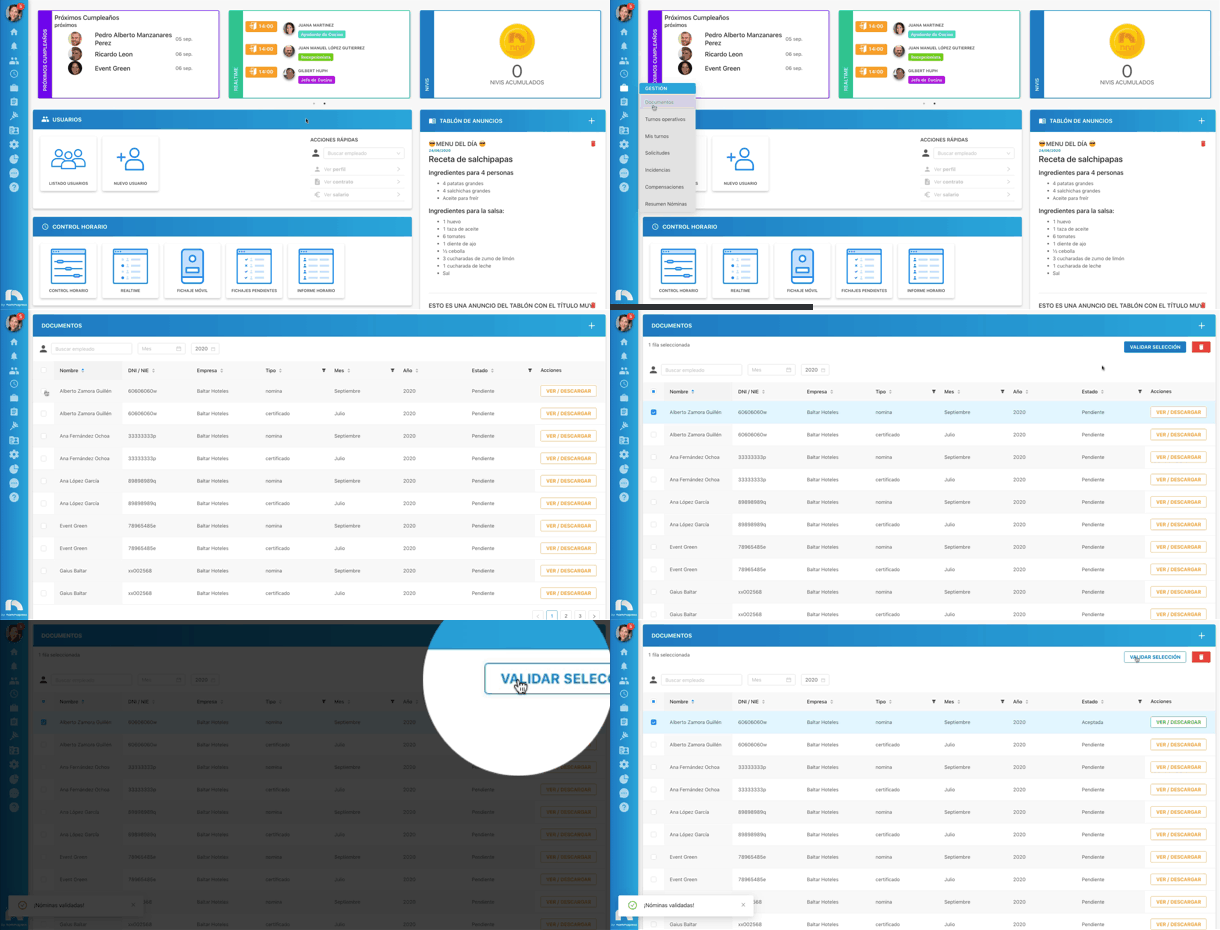
- The employee is notified the document is available.
To validate all at once, tick the box to the left of Name to select all employees.
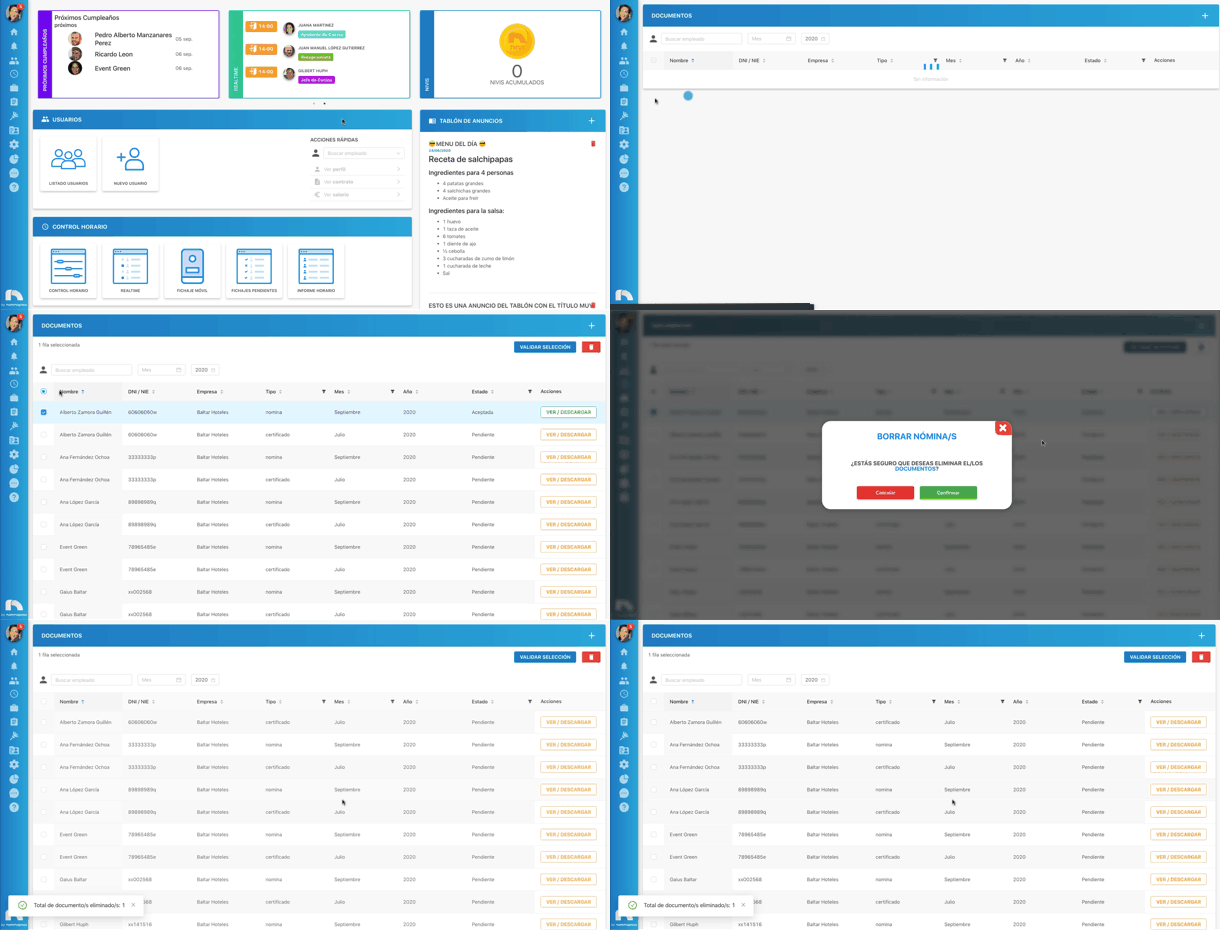
Delete a document
- Menu → Management → Documents.
- Find the document using the filters.
- Check the box left of the employee name.
- To delete all, tick the first box to the left of Name.
- Click the trash icon (top-right).
- Click Confirm.
Search a document
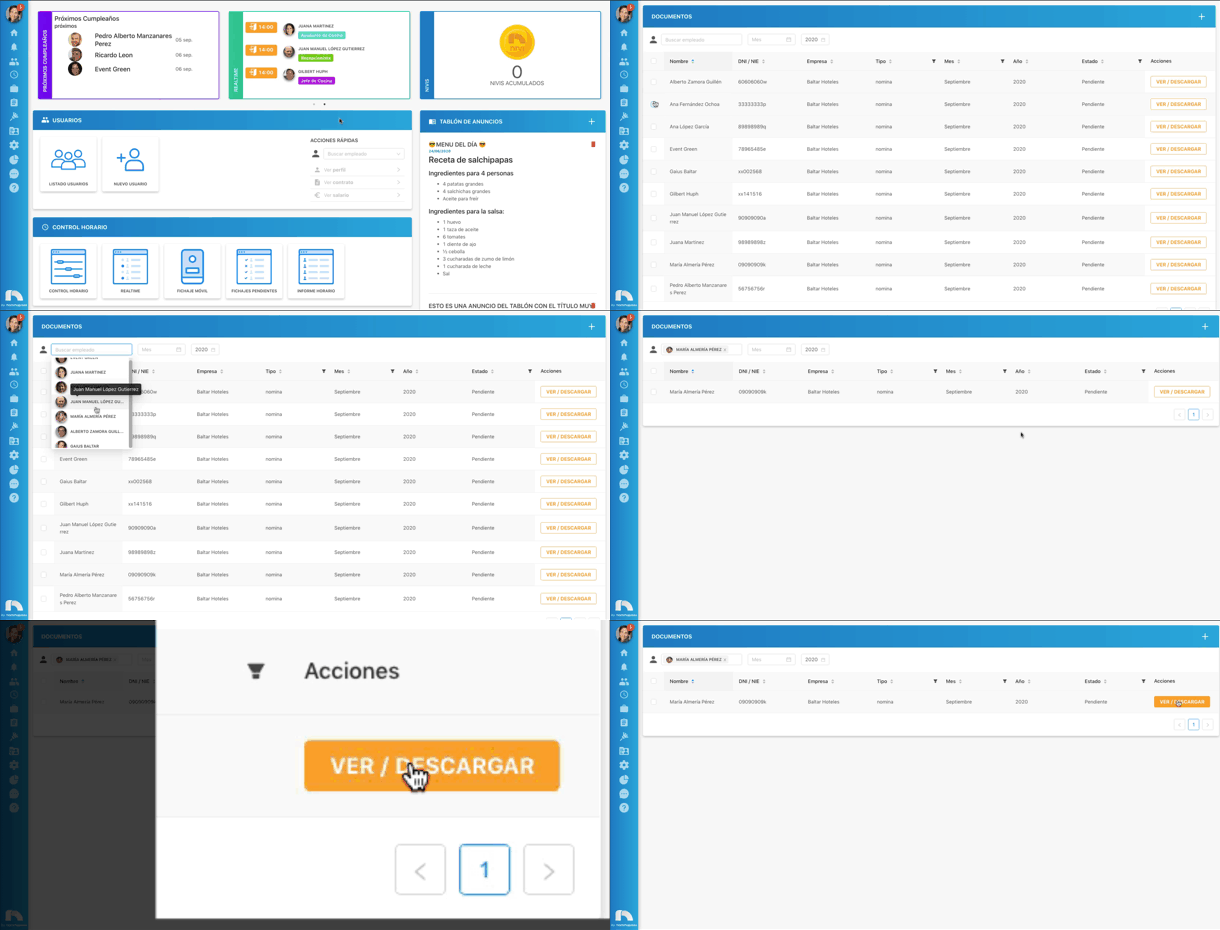
- Menu → Management → Documents.
- To search by employee, click Search employee and type the name.
- To view a specific month, click the month name and choose.
- To change the year, use the year dropdown.
- The table updates as you change filters.
Filter content
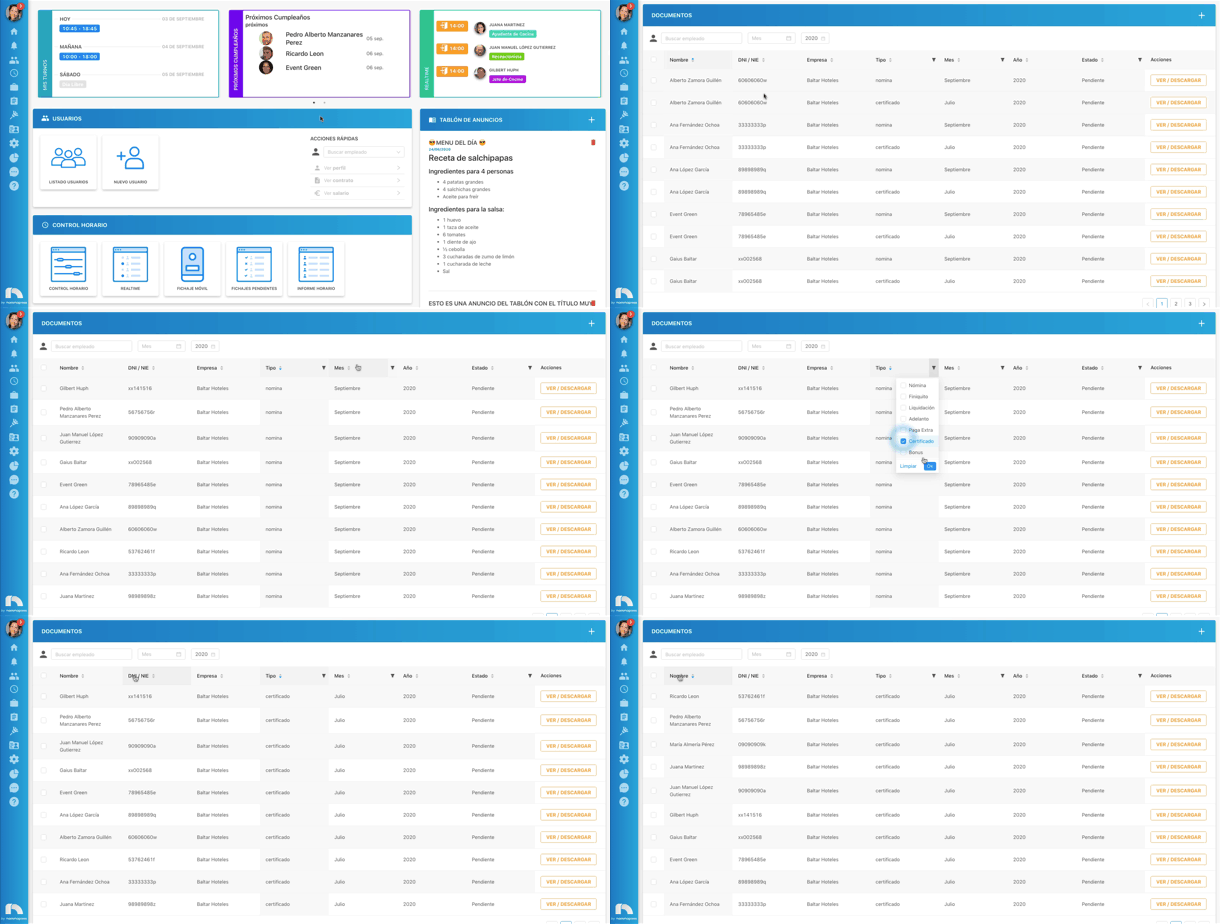
You can filter by user, month, year, and document type. Columns:
- Name
- DNI/NIE
- Company (filterable)
- Type (filterable)
- Month (filterable)
- Year
- Status
Statuses:
- Unassigned: file not linked to any employee.
- Pending: not validated, not sent.
- Accepted: validated and sent.
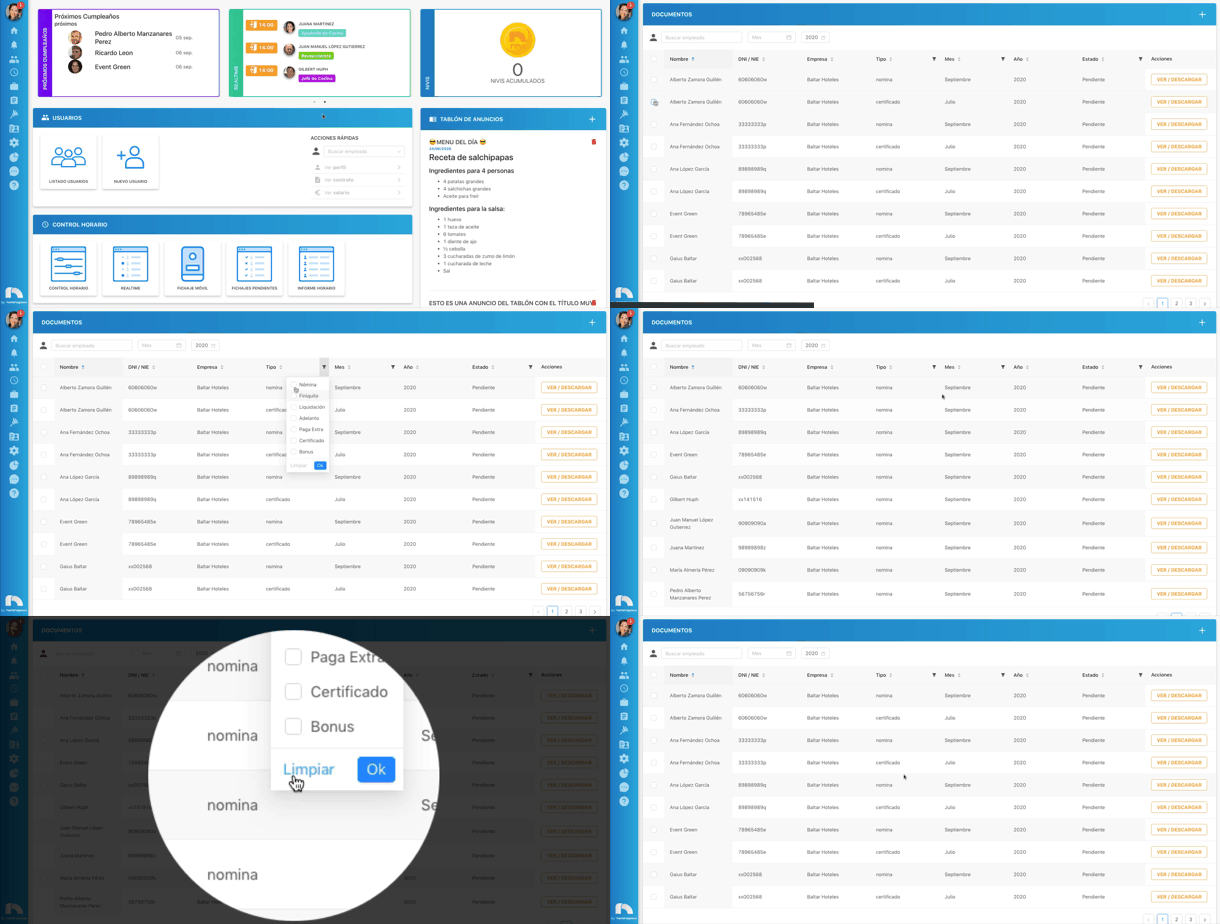
To clear filters, click Filter → Clear.
Document error
If an upload errors and isn't linked, the filename likely doesn't match accepted patterns. To fix:
- Find the errored document.
- On the right, a red Fix button appears.
- Click it and enter the employee DNI.
- Click Confirm; the validate button should appear.
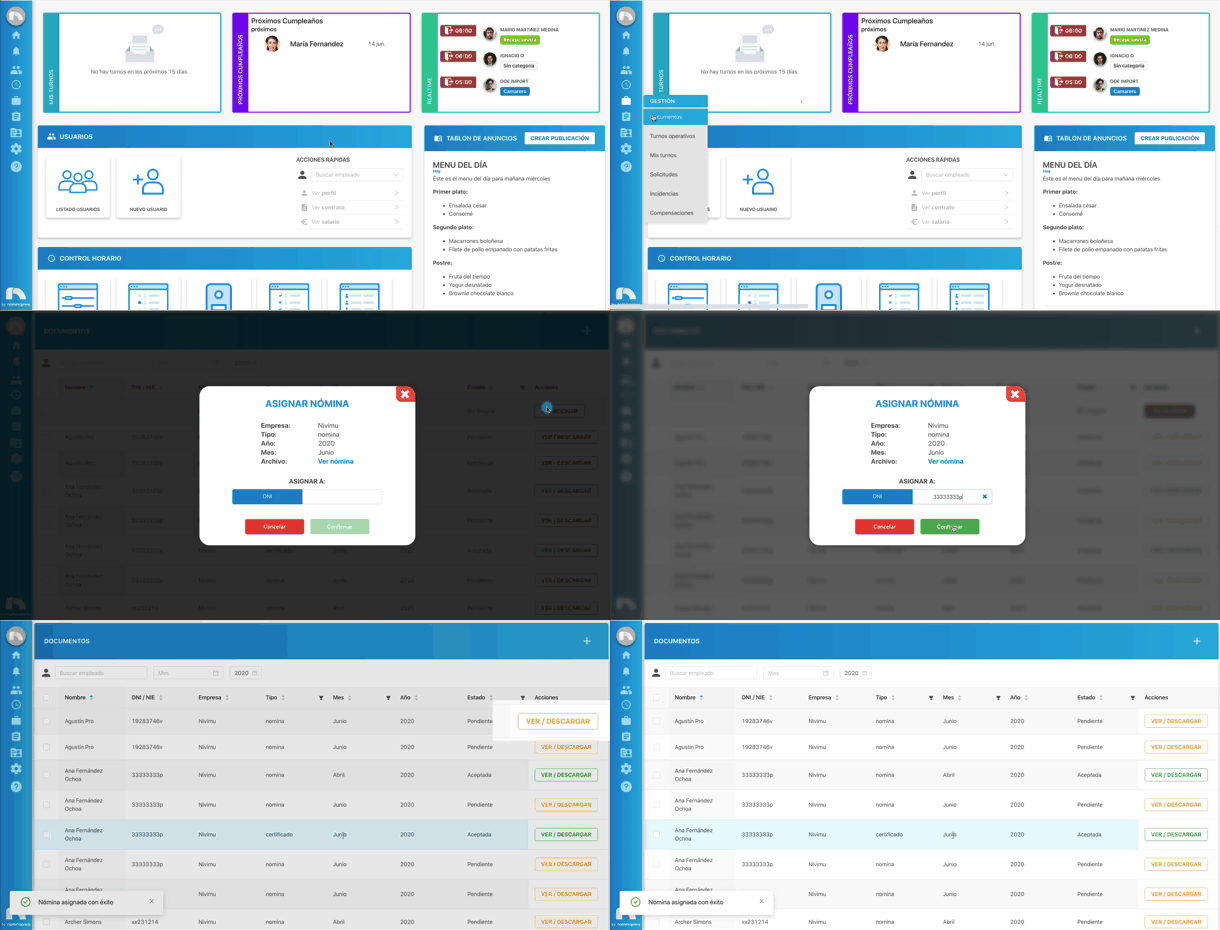
- Finally, validate following Validate a document.