Payroll Incidents Validation
In Payroll Incidents Validation you manage everything related to payroll incidents (requests, night hours, overtime, etc.). These incidents flow in from modules like Time Tracking and Requests.
How do payroll incidents get created? Examples
- Approved expense: when an expense is approved (by the employee or HR), it lands here for payroll payment.
- Approved overtime to be paid: if the employee has allow overtime enabled and exceeds their scheduled hours, an overtime request is created. Marking it to pay and accepting generates a payroll incident.
- Absence: if an absence request is approved with deduct from payroll, a payroll incident is created.
- Payroll advance: accepting an advance request.
- Manual regularization with non-zero price/hour:
- Overtime.
- Worked days off.
- Worked holidays.
- Night hours: if allow night hours is enabled, hours worked between 22:00 and 06:00 generate a night-hours incident automatically.
- Worked day off configured as paid (Settings → Zones → Site → Hours bank).
- Paid holiday worked.
- Manual: incidents can also be created manually.
Publish shifts correctly and ensure clock-ins exist so requests/incidents generate properly, and process requests promptly.
To manage payroll incidents:
- Menu → Management → Payroll Incidents Validation.
- Use filters to find a user, incident type, incident status, company, site, categories, or a date range.
- Save a filter as a favorite via the heart; name it (editable with the pencil). Delete with the trash. Set as default with the star.
Ensure incident types are configured in Settings before processing.
With filters applied, pending incidents appear in a list.
Available columns
- Actions: accept/reject or edit (pencil). Some incidents have an eye icon to view details.
- Accounting date: when the incident was generated; editable.
- User.
- Type: incident type name.
- Units: if configured to show by units.
- Unit amount: if configured to show by unit amount.
- Status.
- Payroll integration date: if integrated, shows integration date/time.
- Contract: which contract the incident refers to.
- Notes: notes added or from the incident type description.
Edit units/unit amount: click the pencil and adjust.
Accept/reject incident: click accept or X to reject. On accept you can edit the accounting date.
Accept/reject in bulk: select incidents, then click accept/reject at the top:
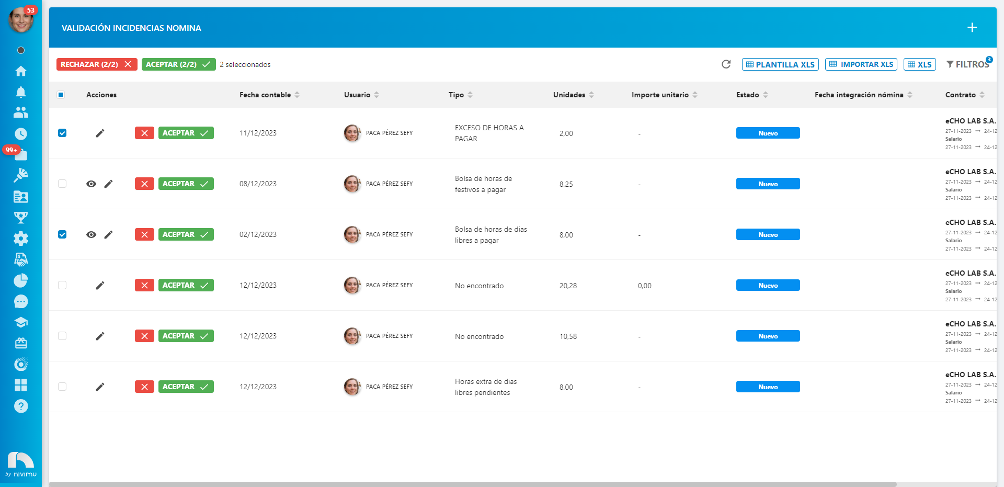
You can accept/reject all by clicking the box next to the Actions column:

- Payroll incidents roll over month to month if not processed.
- If the contract is not published, you cannot accept/reject the incident.
- Only active contracts can generate payroll incidents for validation.
Create an incident manually
First create an incident type in general settings.
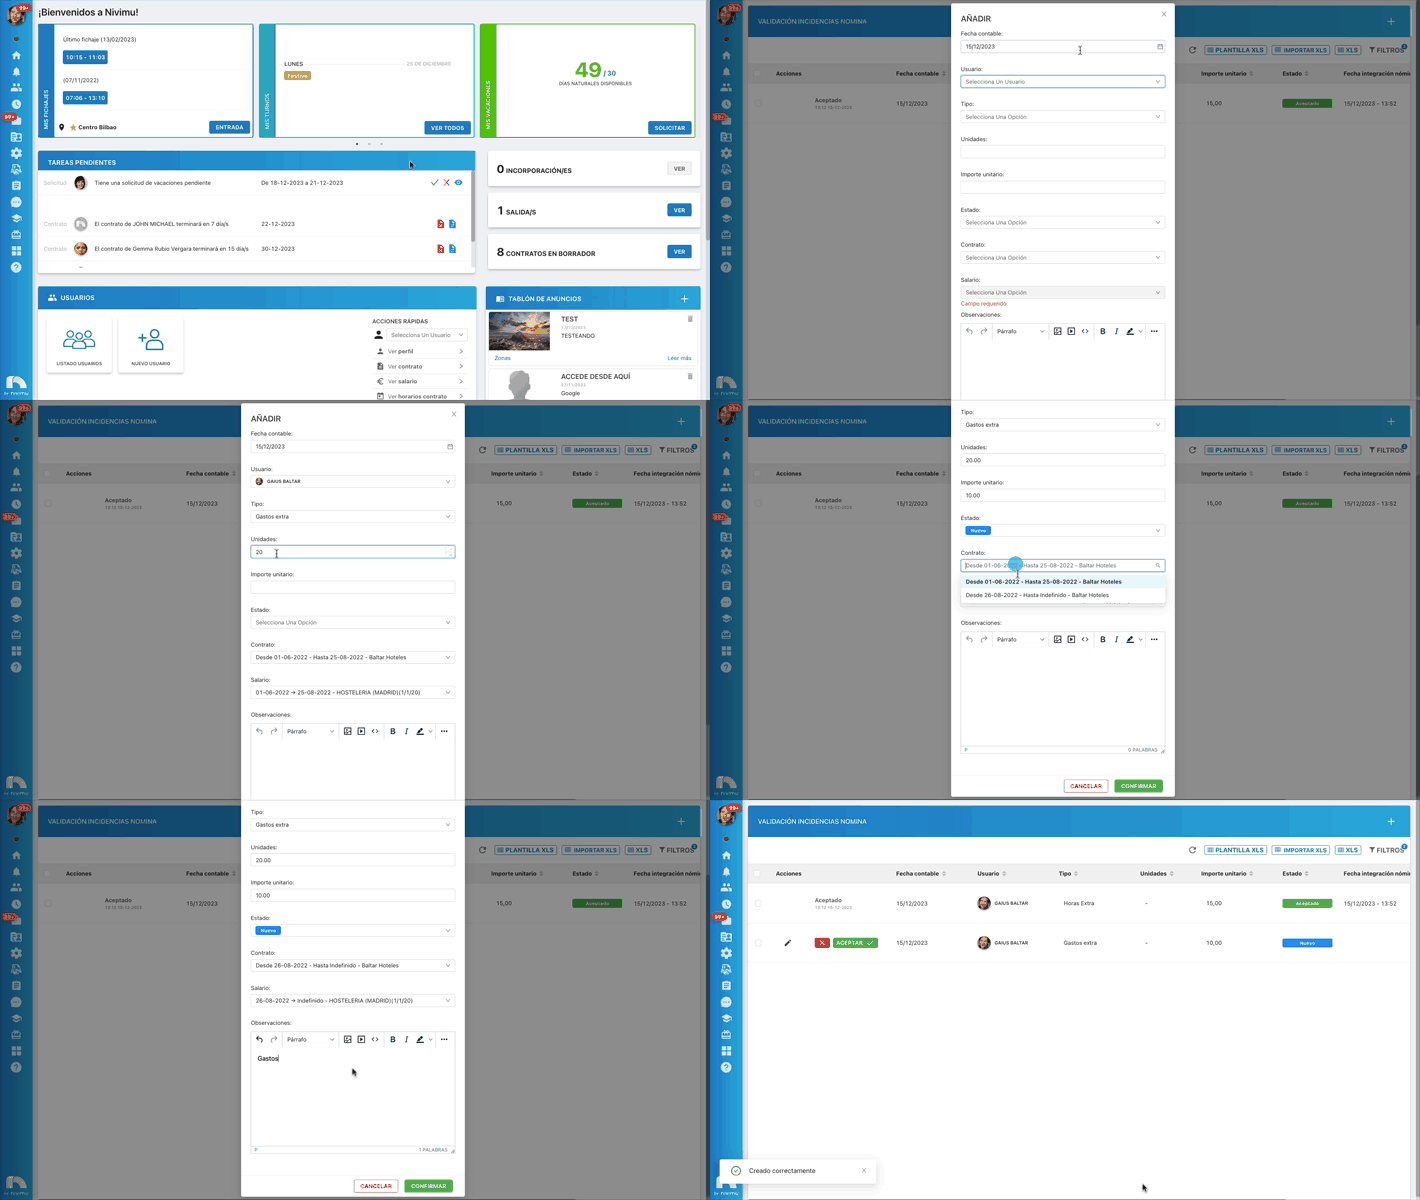
- Click + to create a payroll incident for an employee.
- You can edit the accounting date.
- Add the user.
- Choose the payroll incident type (created in Settings).
- Enter units if needed and unit amount if needed.
- Status: set a default status if desired.
- Select the contract to link (must be published to appear). If the employee has a published contract, it auto-fills when you select the user; change it if they have multiple active contracts.
- Salary: also auto-fills if the contract is published.
- Add a note (optional).
All fields are required except Notes. If you have no unit amount or units, enter 0.