Edit User Information
Each user's personal information can be modified at any time, but only the super administrator or those with granted permissions can do so.
At the top left of the screen, see your user's role and permissions.
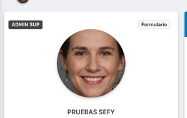
To switch from one user to another, do so at the top of the screen.

Edit Information
- Open the app menu and under Users, access User List.
- Find the user and click View Profile.
- Once you've accessed the profile, click Information. From this section, perform the following actions:
- Review and edit employee file information if needed (personal data, contact data, and additional data).
- Attach CV, identification document, and employee file.
- Change user password.
- Deactivate user: so they don't appear in listings as active user or in other tool parts but doesn't prevent employee access.
- Deactivate access: so employee cannot access the platform.
- Modify employee role from "user status" to: inactive, user, admin, or admin sup.
- Skills: typing in the box adds skills to the employee.
- Extra data: add extra data or fields generated from settings to this particular profile (see settings: general: users).
- Finally, click Save Changes.
If we modify the role to "admin", go to settings -> administrator permissions to indicate the company or companies this user will administer.
User Status
If you're Admin or Admin Sup, you can change user roles:
- Open the app menu and under Users, access User List.
- Find the user and click View Profile.
- Once you've accessed the profile, go to the USER STATUS section.
- If you're AdminSup, you can change to states: Inactive, Admin, AdminSup, or User.
- If you're Admin, you can change to states: Inactive, Admin, or User.
- Finally, click Save Changes.
- If you change the status to Admin or AdminSup, you'll need to assign Administrator permissions
Activate Time Control
If a user doesn't have Time Control activated, you can activate it from the left panel by checking the Time Control checkbox. Once checked, choose time control configuration: Auto, random, shifts, or contract schedule. You can also enable checkboxes for Allow Overtime, Allow Undertime, and finally Allow Mobile Clocking.
If you have DEEPUPSELL, you can activate the module and enter the PMS Seller Code. Below, enable the possibility for the employee to request Payroll advances and Hide payrolls and salaries.
You also have Quick actions like Go to documents of... or Go to requests of.... Finally, you can change the default language for this user.
Once roundings/courtesy time discounts are activated, if the "Allow extras" button is:
- Activated: Creates "extra" hours requests although in the accumulation, hours are discounted until approval.
- Deactivated: Although compensations are made, requests for those hours aren't created. These compensations are viewed in the hours bank detail in compensations.