Contract Schedule
When creating a contract you can (optionally) set its work schedule.
- Menu → Users → User List.
- Find the employee and open their profile.
- Click Schedules.
- Click + New Schedule.
- In Create Contract Period, choose which contract period this schedule belongs to.
Time-off/on-bank calculations pull theoretical hours from this contract schedule when creating shifts.
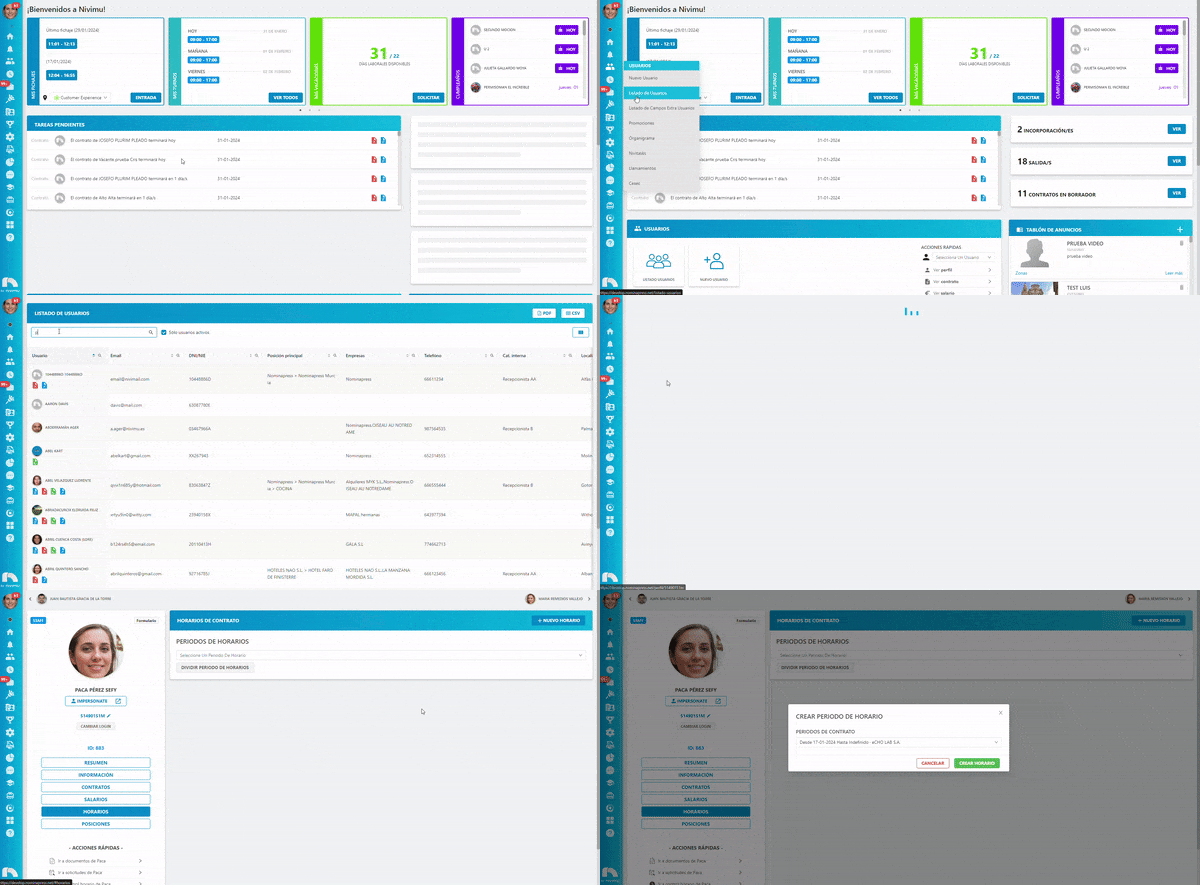
Info available when creating a contract schedule
Schedule periods
Review all contract schedules by contract and by period. Expand the dropdown to view them.
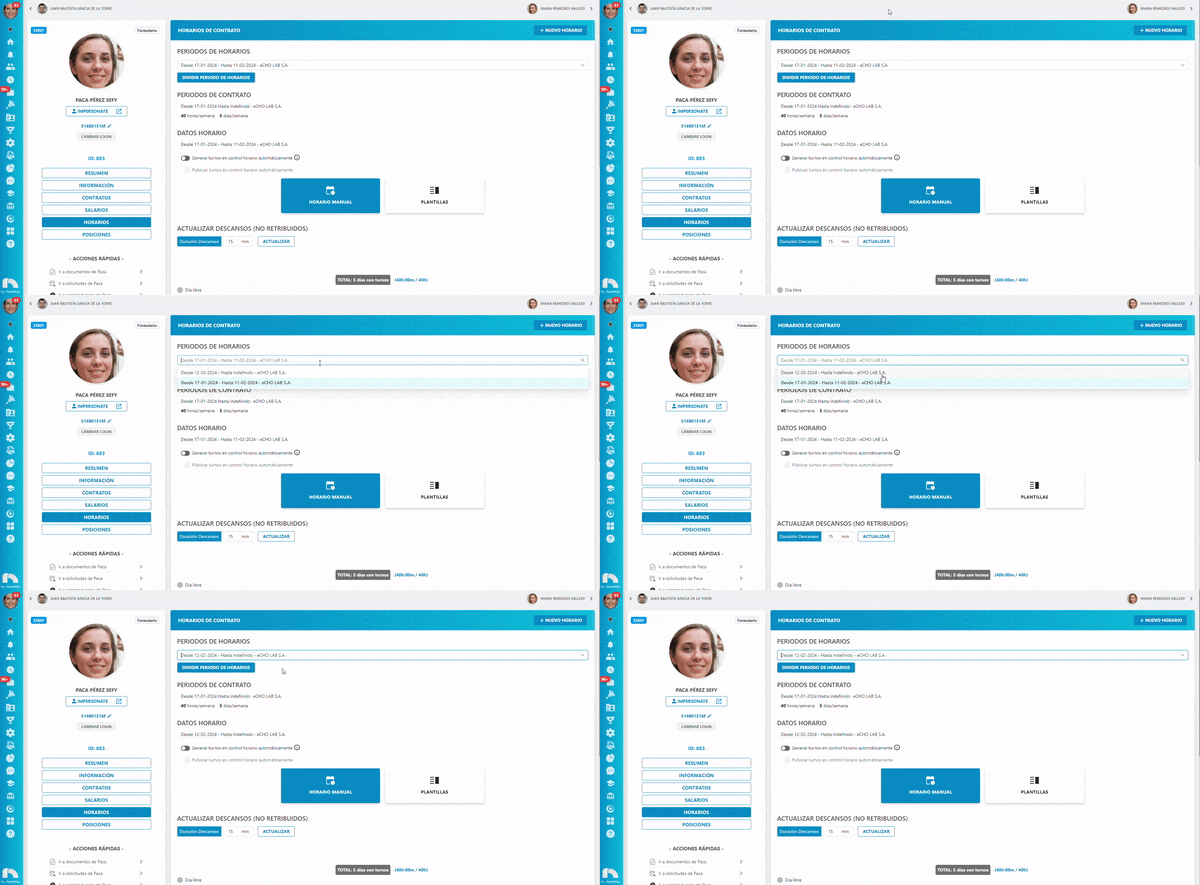
Split a schedule period
Create multiple schedule periods within a single contract:
- In Schedule Periods, click Split Schedule Period.
- Set the end date for the current period (new period starts the next day).
- Click Confirm (or Cancel to discard).
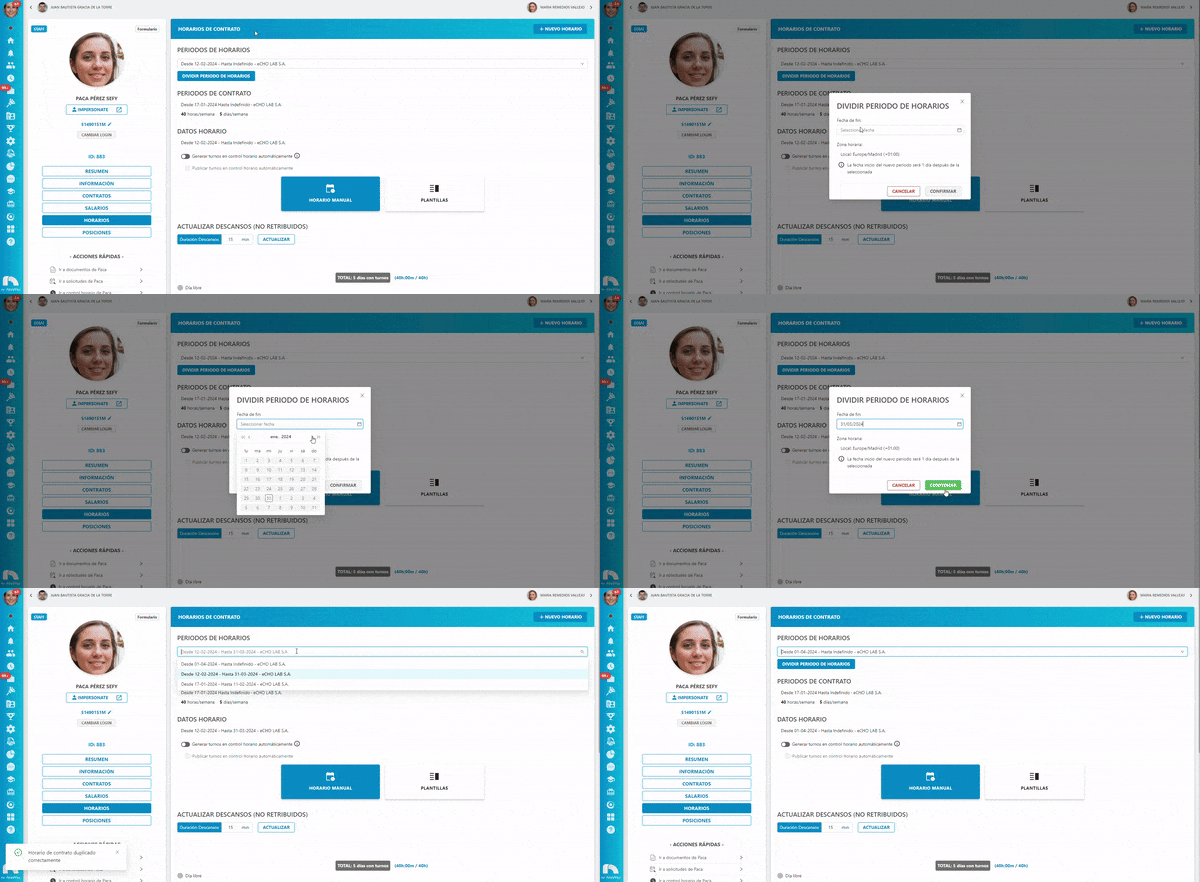
Contract periods
Shows contract start/end (or indefinite) plus hours/week and working days/week.
Schedule data
Date of the schedule period. From here you can:
Create a manual schedule
- Click the hour cell to start a shift, drag to end time.
- Repeat for the week.
- Click Update schedule to save.
This works like creating a shift template in Time Tracking; see that section for details.
Auto-generate shifts in Time Tracking
If a contract schedule is marked, shifts can auto-generate in Time Tracking. Publishing still happens in Time Tracking.
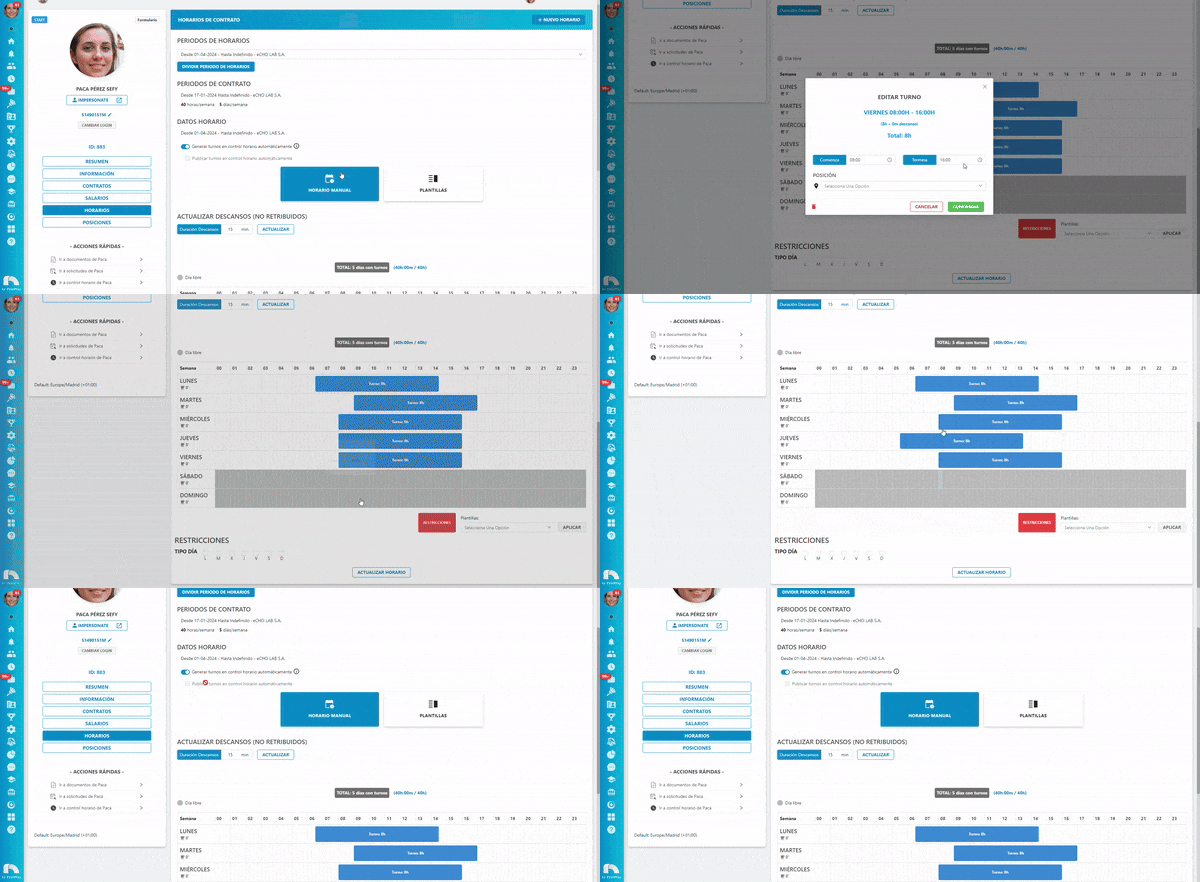
Delete a shift
- Build the weekly shifts as above.
- To remove a shift, click it and use the trash icon next to the time.
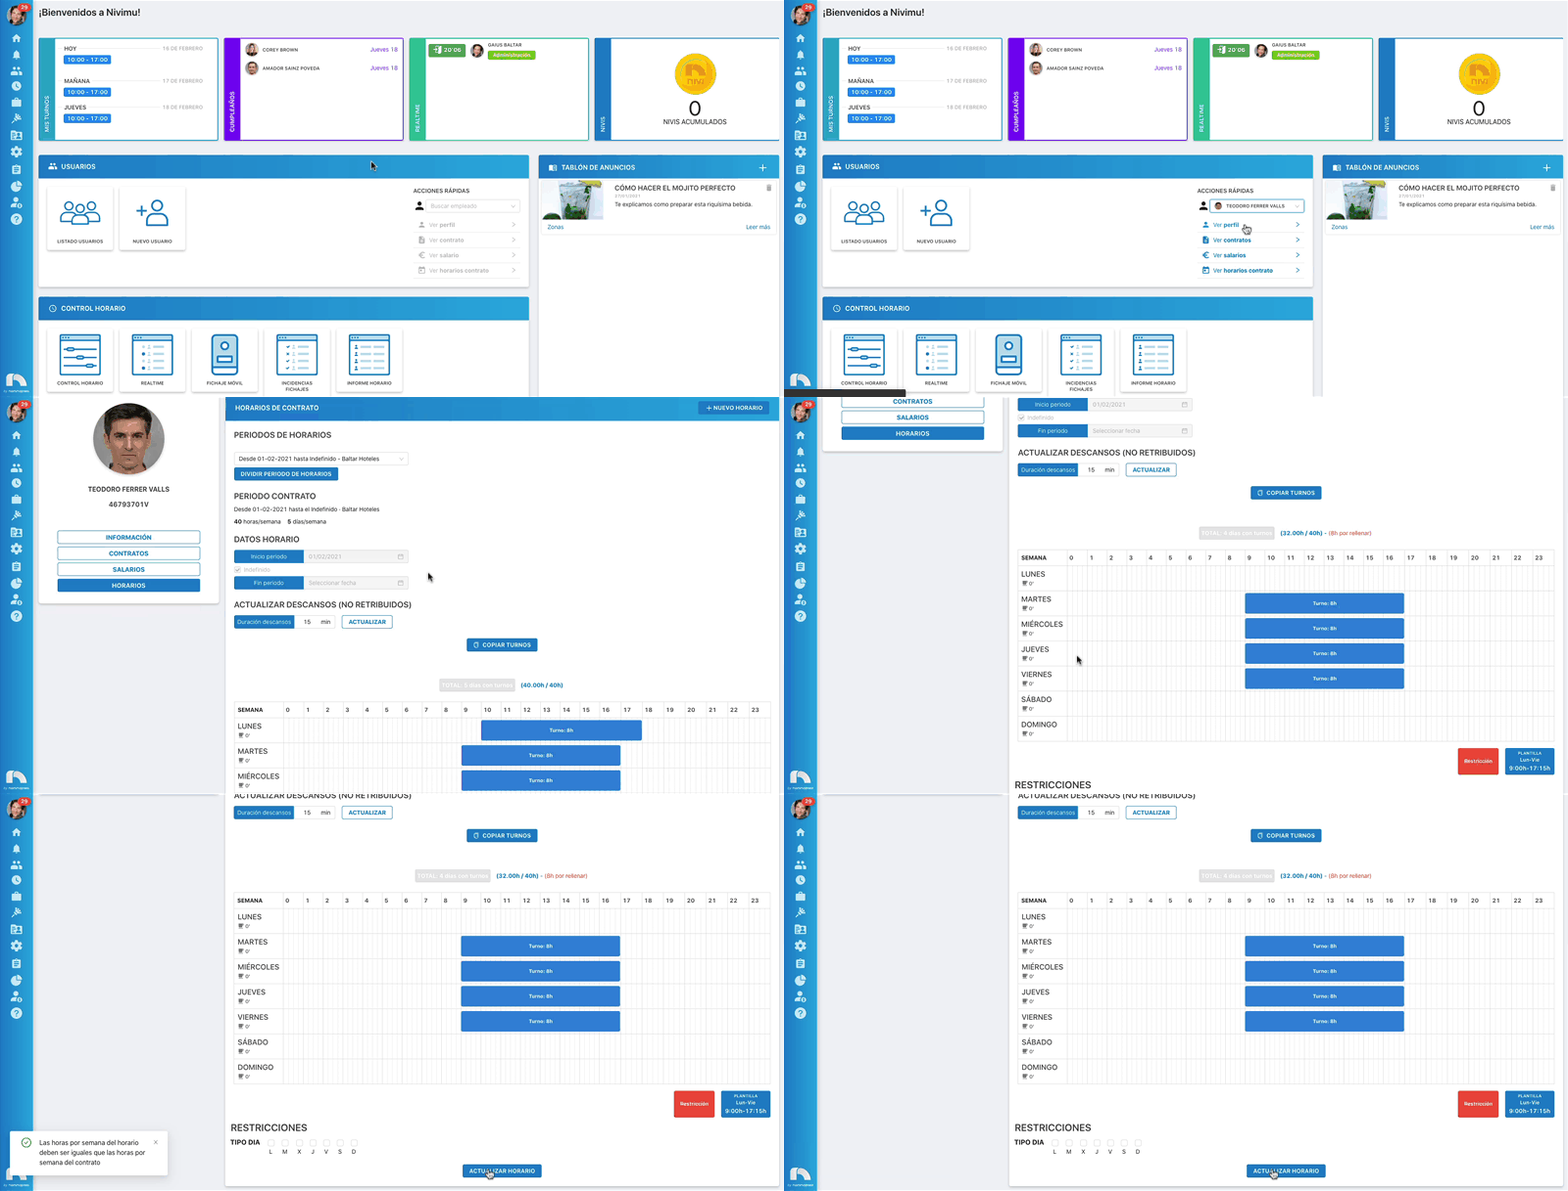
Update unpaid breaks
If you prefer employees with unpaid breaks not to clock out/in, set breaks inside the shift via manual contract schedule. Unpaid breaks do not count as worked time (see hour reports). For an 8h day + 30m unpaid break, create an 8h30 shift.
- Profile → Schedules, scroll to the schedule table.
- In Update breaks (unpaid), set the break and click Update.
- Click Update schedule to save.
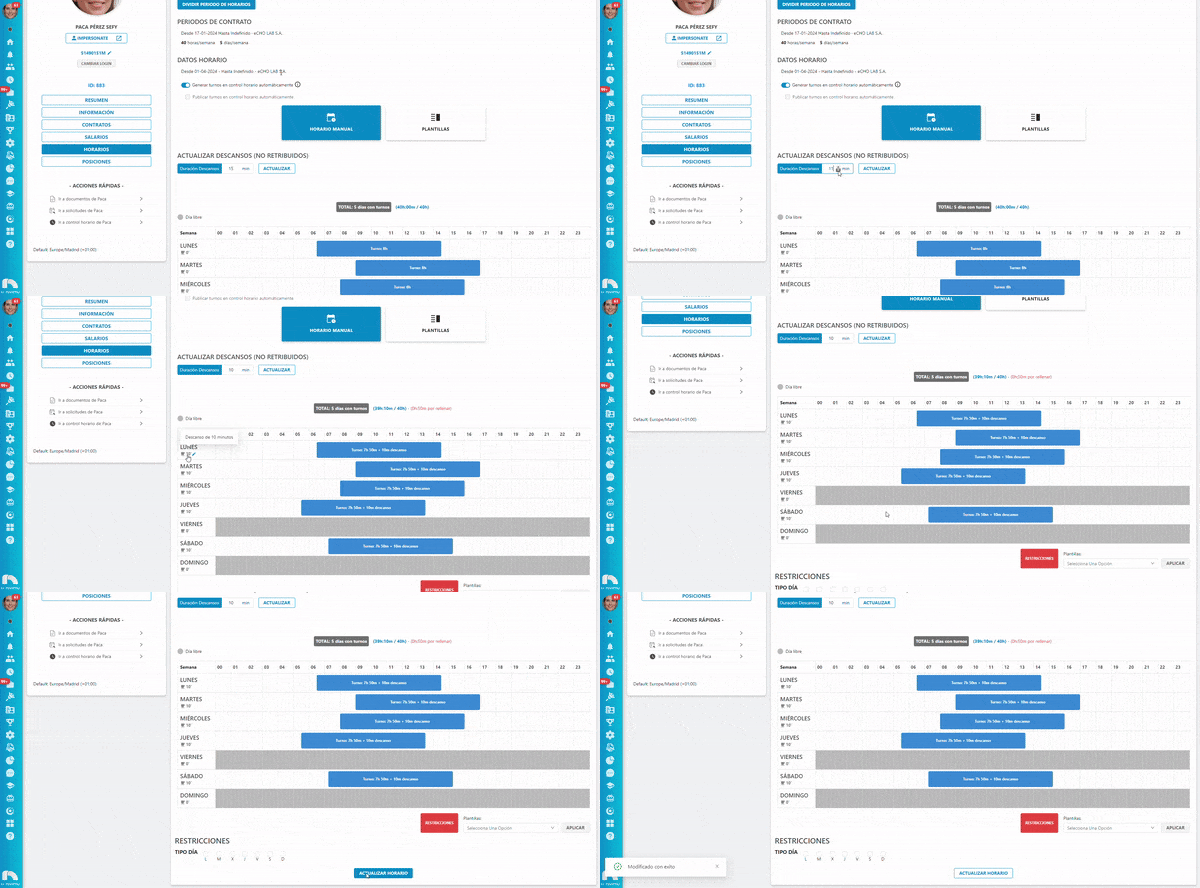
Customize breaks per day
- Menu → Users → User List → select employee → Schedules.
- In the first column (days), each day shows its break.
- Click a day's break time.
- Enter the new minutes.
- Click Update schedule to save.
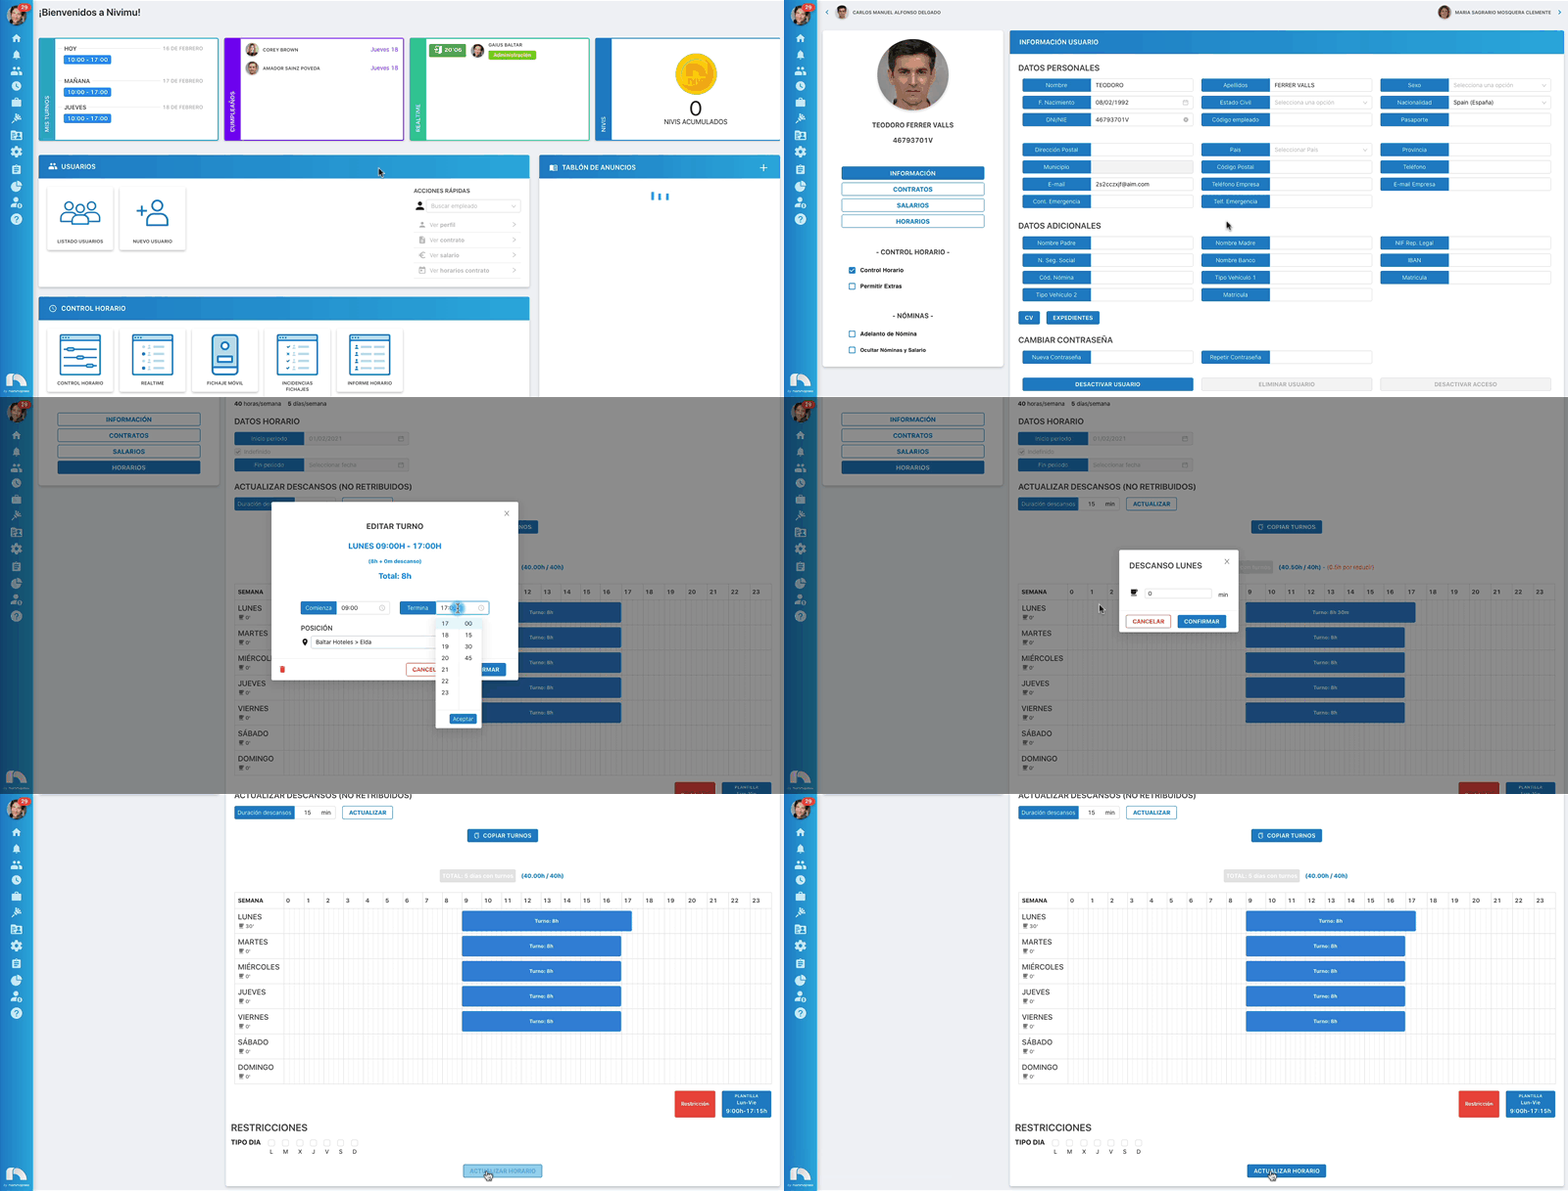
If the employee can work weekends and the schedule is informational, add unpaid breaks manually on free days so Control Hourly shifts honor them on weekends.
Restrictions
Mark time visually as restricted to avoid scheduling.
Restrict a full day
- In Restrictions, choose the day type to restrict.
- Click Update schedule.
If you create a full-day restriction then remove it, any prior shift is lost.
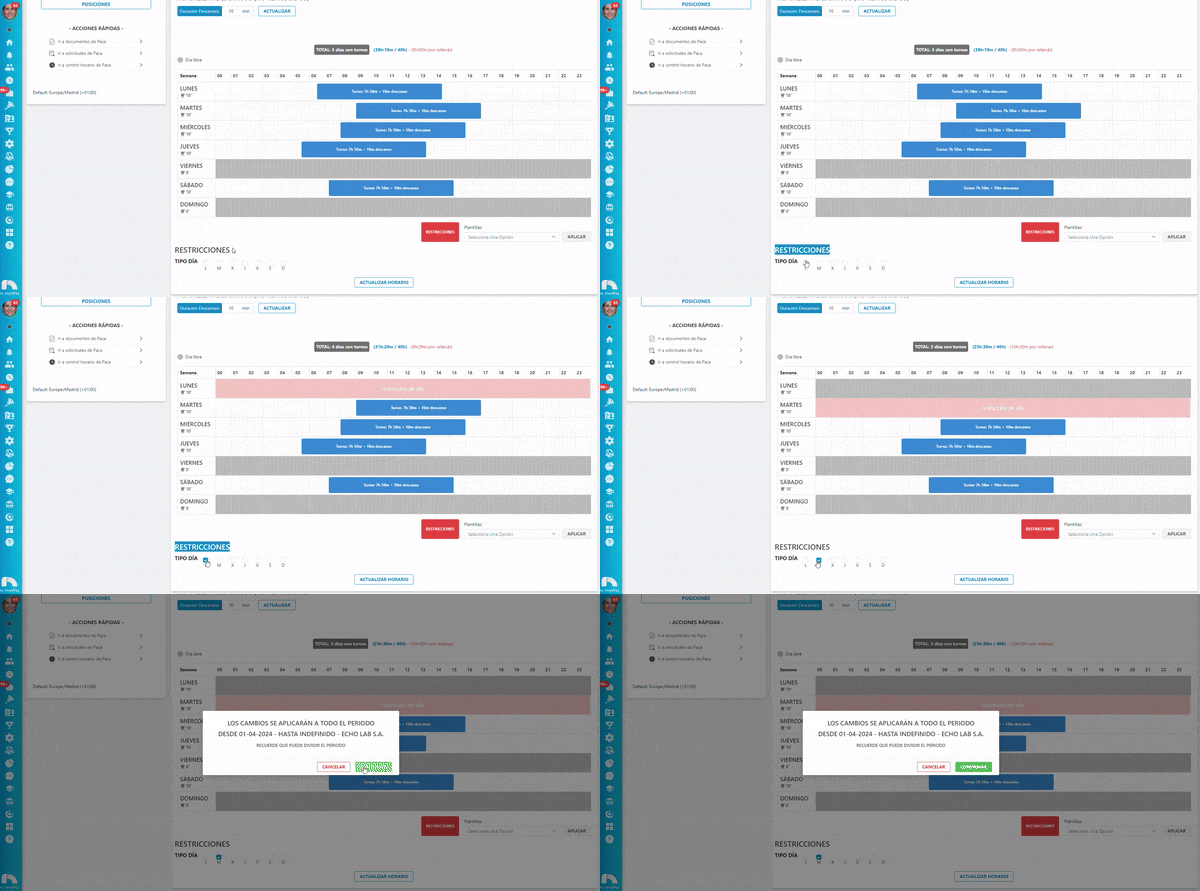
Restrict a time slot
- Drag the red restriction block to the desired time.
- Resize as needed.
- Click it to edit/confirm or delete if needed.
- Click Update schedule.

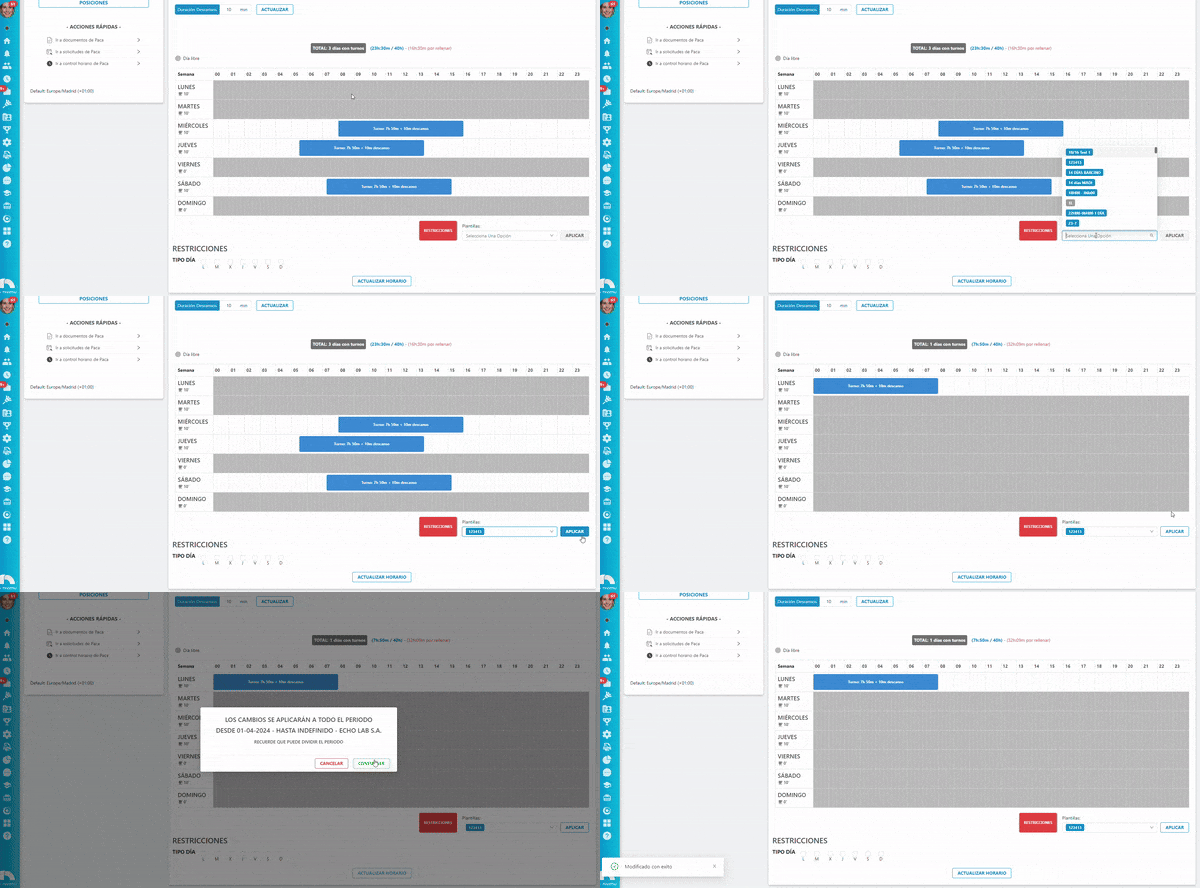
Apply a template to manual schedule
Use Time Tracking shift templates on manual schedules:
- Choose a template from the Templates dropdown.
- Click Apply and confirm.
- Click Update schedule.
Applying a template replaces the previous schedule.
Templates
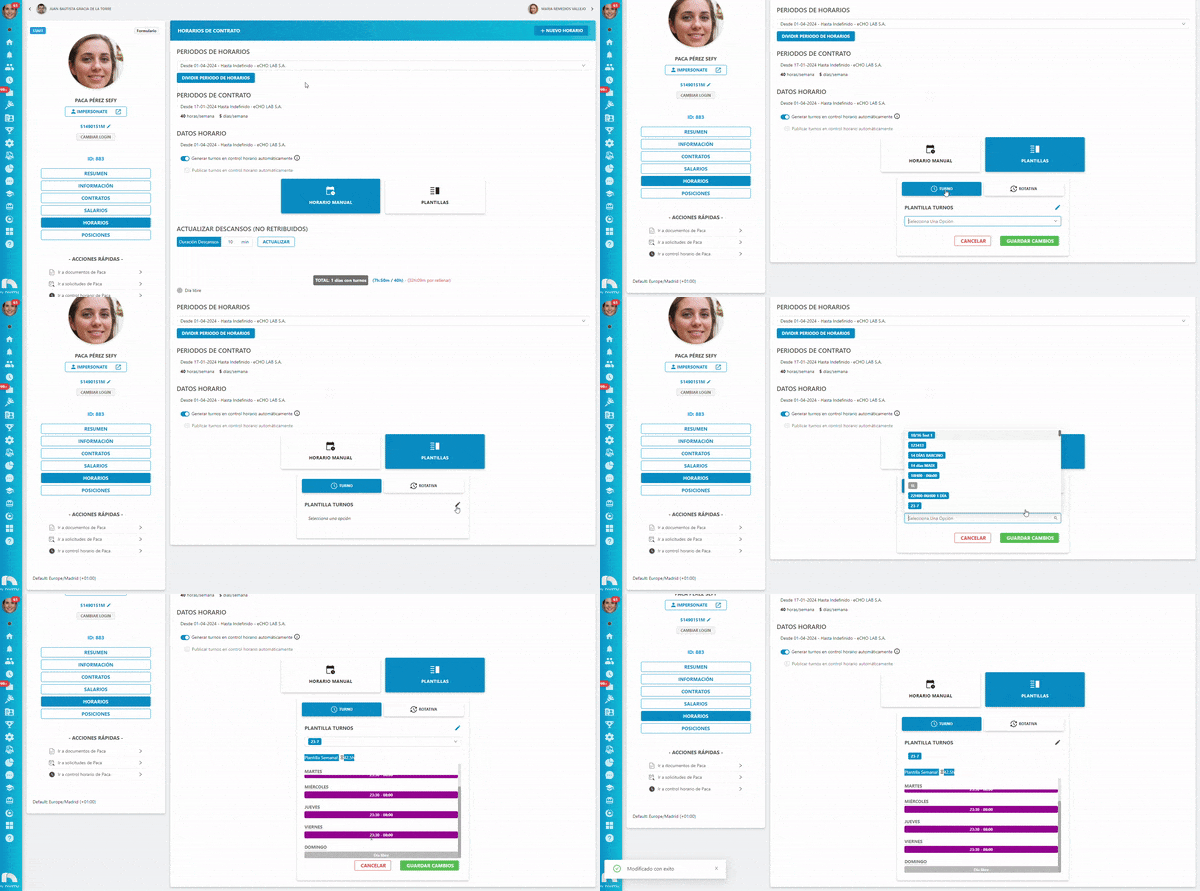
To add a template directly instead of manual edits:
- Click the Templates tab next to Manual schedule.
- Choose Shift or Rotating templates (see Time Tracking docs).
- Select a template and click Save.
- Edit via the pencil icon.
Review Time Tracking before building a contract schedule; once created it cannot be undone.